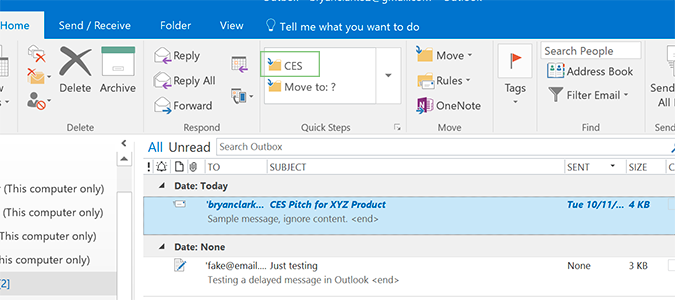
How to Automate Repetitive Actions in Outlook Using Quick Steps
Quick Steps are a godsend for email power users. Rather than sorting through an inbox of junk to find just a few gems you might need, Quick Steps makes it easy to set up filers, automate repetitive actions, and just generally keep a tidy inbox. While filters are the most commonly used Quick Step, the tool itself is powerful enough to just about anything you’d need it to.
Today, we’re going to keep it simple and show you how to sort email to a specific folder within Outlook using Quick Steps and a Windows hot key combination.
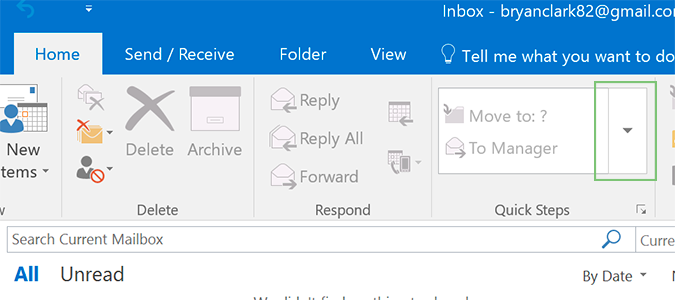
1. Open Outlook and click the Quick Steps button under the Home tab.
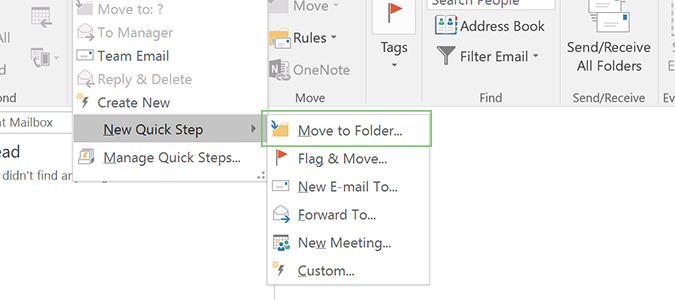
2. Click New Quick Step and then Move to Folder.
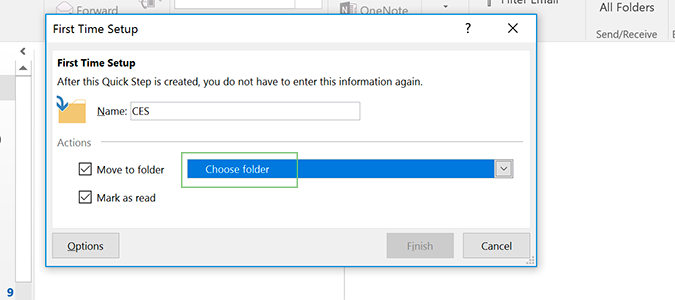
3. Name the action, and then choose the appropriate folder to move your mail to.
You can create a new one if necessary by choosing Other Folder > New. Uncheck the box ‘Mark as Read’ if you’d rather keep an accurate unread email count.
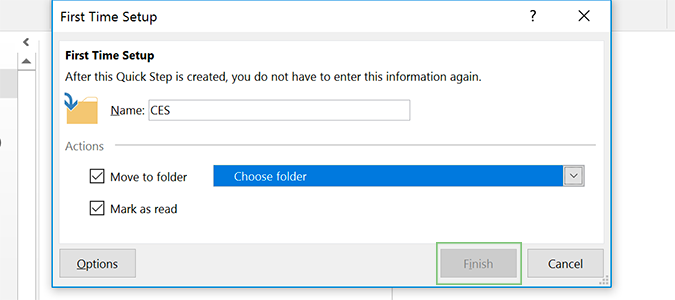
4. Click Finish.
Sign up to receive The Snapshot, a free special dispatch from Laptop Mag, in your inbox.
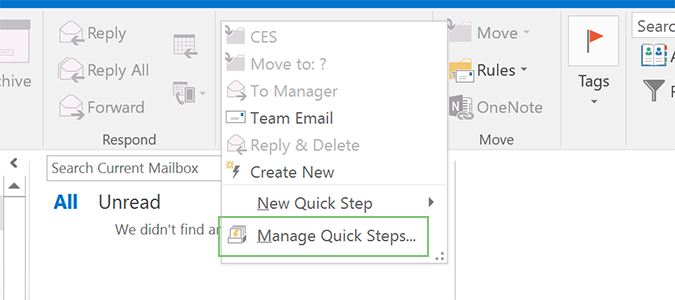
5. Click the Quick Steps button again and then Manage Quick Steps.
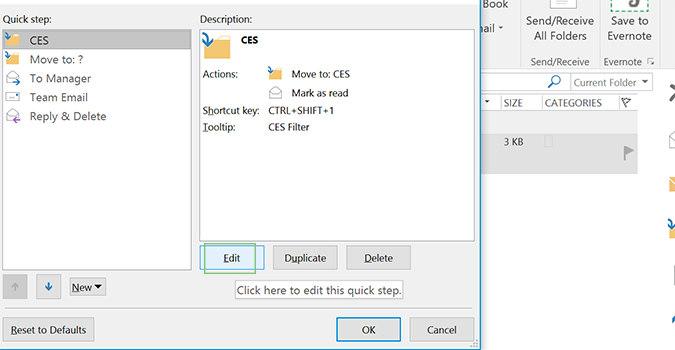
6. Select the appropriate folder, and click Edit.
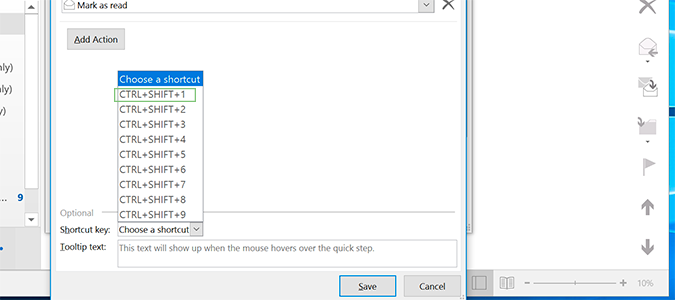
7. From the Shortcut key dropdown, select your preferred keyboard shortcut.
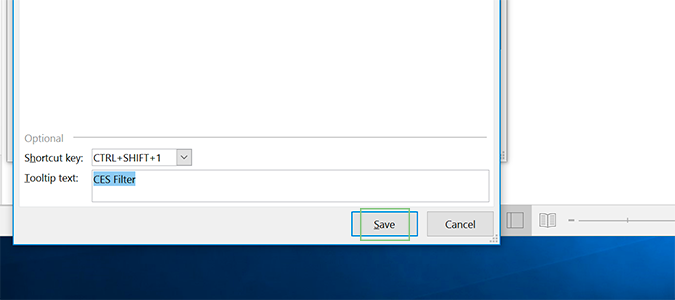
You can also add Tooltip text, which will display a message or description when you hover over the Quick Step.
9. Click Save and then OK.
10. To use the Quick Step, just select an email and use your keyboard shortcut, or click the appropriate icon from the Quick Step menu.
Microsoft Outlook Tips
- Block a Sender in Outlook 2016
- How to Instantly Mark Messages as Read in Outlook 2016 and Prior
- Edit New Message Alerts in Outlook
- How to Mail Merge in Office 2016
- Set an Out of Office Reply in Outlook
- How to Create Custom Groups in Outlook 2016
- Download Your Address Book in Outlook 2016 and Prior
- How to Archive Mail in Outlook 2016
- Create an Email Signature in Outlook 2016 and Prior
- Attach a Calendar Event to an Email
- Set Up a Universal Inbox
- Import Contacts to macOS Address Book
- Purge Deleted Messages
- Delete Addresses in Outlook Autocomplete
- Change the Attachment Size Limit in Outlook
- Import Contacts via CSV
- Back Up Outlook Data
- Change Fonts in Outlook
- Export Contacts to CSV
- Add an Image to Your Signature
- Set Up Out-of-Office Messages
- Create Email Templates
- Restrict Notifications to Important Emails Only
- Get Read Receipts
- Use Two Time Zones for Meetings
- Recall an Email
- Save Common Searches
- Filter Email
- Block Unwanted Mail
- Stop Sending Winmail.dat
- Schedule Outgoing Mail
- Create Canned Replies
Bryan covers everything you need to know about Windows, social media, and the internet at large for Laptop Mag. Thanks to his extensive knowledge of operating systems and some of the most popular software out there, Bryan has written hundreds of helpful guides, including tips related to Windows 11 drivers, upgrading to a newer version of the OS, editing in Microsoft Photos, or rearranging pages in Google Docs.
