How to Mail Merge in Office 2016
Sign up to receive The Snapshot, a free special dispatch from Laptop Mag, in your inbox.
You are now subscribed
Your newsletter sign-up was successful
Mail merge lets you easily turn one document into several personalized, unique versions of it. You can use mail merge in Office 2016 to create form letters or address labels, certificates with unique names, and more. Here's how.
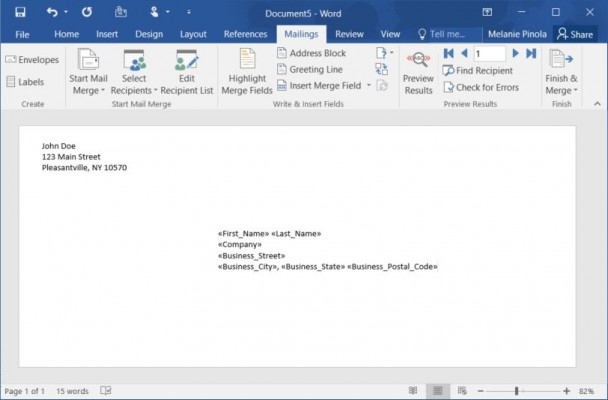
With mail merge, you create a document in Word that has the information that you want to be the same in each version (such as the return address on an envelope or the main content of your email). You add fields as placeholders in the document for the unique information that you want to be updated (such as the recipient's name or address). Instead of having to manually create new versions of the same document and replace those fields, Word does all the work, pulling in information from your Outlook contacts, an Excel spreadsheet or other data source to run the mail merge.
In this example, we'll be using mail merge to create a letter for multiple recipients.
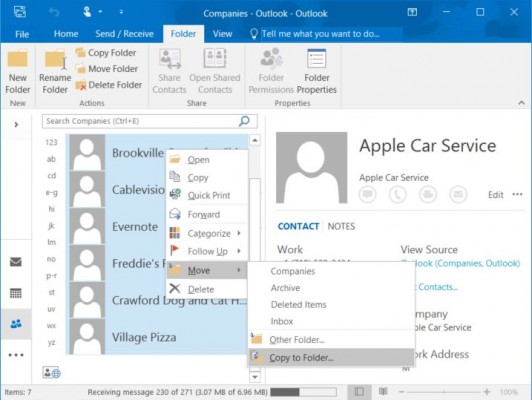
1. Make sure your contacts list is ready. It's best to have your spreadsheet or Outlook contacts prepared before you start creating the document so the mail merge goes smoothly. For example, whether you're using Outlook contacts or an Excel spreadsheet for your data source, make sure none of the data is missing for the fields you'll be pulling in. If you're using Outlook and have a large number of contacts but only want to use mail merge for specific contacts, you'll make the process easier by selecting those contacts and copying them to a new folder. (To do this, select the contacts, right-click, choose Move and then Copy to Folder…)
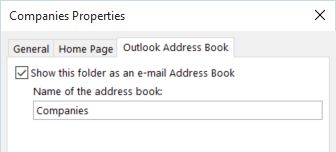
Make sure you change the contact folder's properties so it will be shown as an email address book (Right-click the new contacts folder, go to properties, and check "Show this folder as an email Address Book")
2. Create a new blank document in Word.
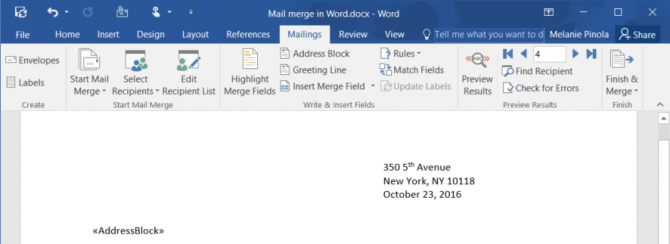
3. Navigate to the Mailings tab.
Sign up to receive The Snapshot, a free special dispatch from Laptop Mag, in your inbox.
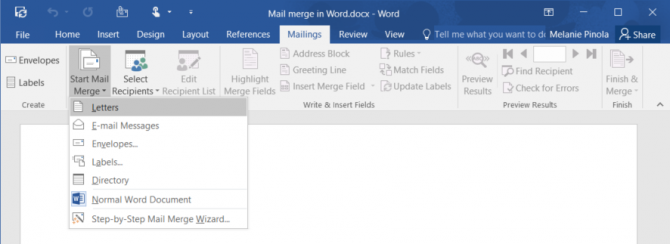
4. Click the Start Mail Merge button and select your document type. We'll start with the letter first.
5. Click the Select Recipients button and choose to create a new list, use an existing list, or choose from Outlook Contacts. The "Type a New List… " option creates a new data table in Word, but you're better off using an external source like a spreadsheet or the contacts list in Outlook so the data is readily available to other programs and other purposes.
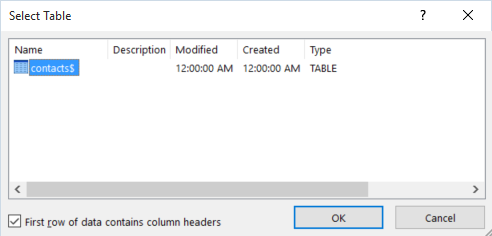
6a. If you choose "Use an Existing List…" you'll be asked to browse to the file on your computer and then confirm the data table.
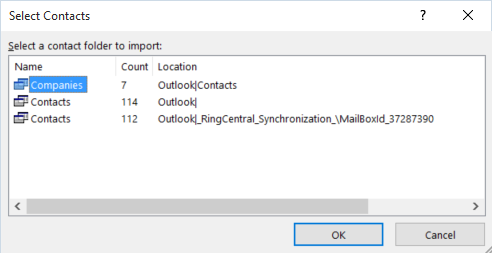
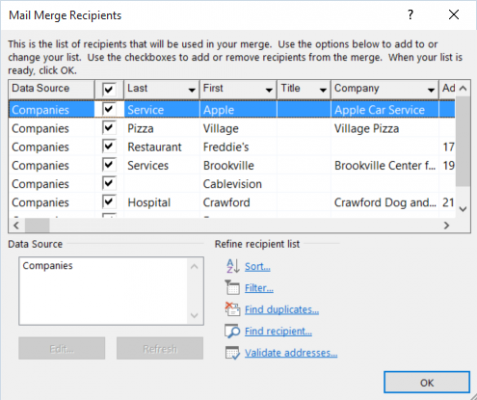
6b. If you choose "Choose from Outlook Contacts…" you'll be asked to choose the Outlook contact folder and then add or remove recipients from the merge. (This is why we advised in step one to create a new contacts folder for your mail merge: You won't have to scroll all of your contacts in this small box.)
7. Create the content for your document and insert the placeholders. When you get to the part where you get to information that needs to be personalized from your data source, insert a placeholder with either the Insert Merge Field button or one of the two shortcuts Word offers for common fields: Address Block and Greeting Line.
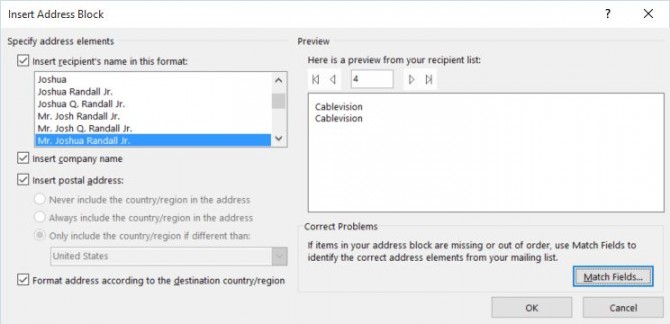
8. Use the Address Block shortcut. As the name suggests, the Address Block button creates a placeholder for a name and address--useful when creating letters or mailing labels or envelopes. With both the Address Block and Greeting Line shortcuts, you'll be able to specify what gets inserted and preview what it will look like.
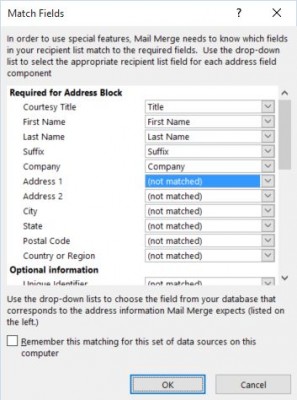
If the preview seems to be missing information, as in the address preview above, click the Match Fields button to tell words where the data is for the missing fields.
When the preview looks okay, click OK, and Word will insert the address placeholder.
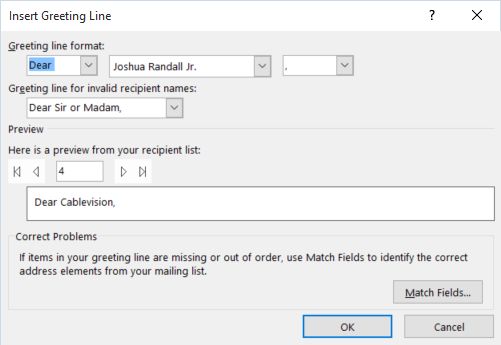
9. Use the Greeting Line shortcut. The Greeting Line button adds a salutation that you can format. The dropdowns will let you select to include the full name (by default), the full name with the title (e.g., Mr. Joshua Randall Jr.), title and last name, just a first name, a nickname, and other variations.
As with the Address Block shortcut, preview the results of the mail merge and use the Merge Fields… button to correct make sure your fields match if they don't in the preview.
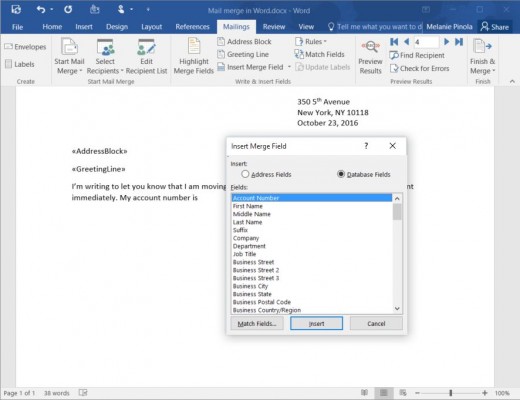
10. Insert other fields into your document. For other placeholders you might need, click on Insert merge field and select the field you want to insert at that point in the document. In this case, I have a unique account number in my database that I want to add to the letter, so I choose the Account Number field and click Insert.
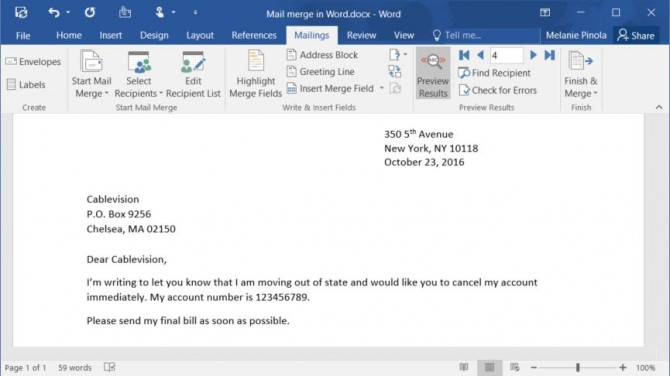
11. Preview the merge results after you've finished the document and inserted all your fields by clicking the Preview Results button.
You can format any of the placeholder text, such as adjust the line spacing, by selecting the text and formatting it as you would any other content. In the Mailings tab, use the forward and back buttons to check all of the mail merge results.
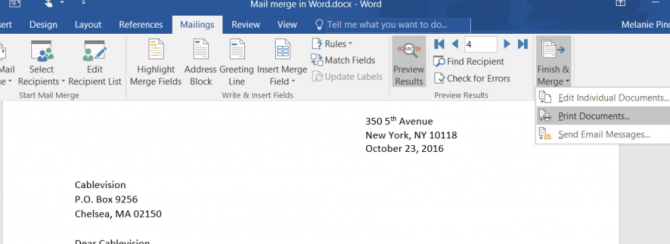
12. If all looks good, click on the Finish & Merge button and you can print individual documents, send them as email messages, or editing each individual document if you would like.
Repeat this for other types of documents you'd like to use mail merge for. In addition to letters (which can be any sort of document, including certificates and coupons), you can choose emails, envelopes, labels, or directories as the document type. Word also has a Step by Step Mail Merge Wizard (found under the Mailings tab > Start Mail Merge button), which basically walks you through the process above.
Microsoft Outlook Tips
- Block a Sender in Outlook 2016
- How to Instantly Mark Messages as Read in Outlook 2016 and Prior
- Edit New Message Alerts in Outlook
- Set an Out of Office Reply in Outlook
- How to Create Custom Groups in Outlook 2016
- Download Your Address Book in Outlook 2016 and Prior
- How to Archive Mail in Outlook 2016
- Create an Email Signature in Outlook 2016 and Prior
- Attach a Calendar Event to an Email
- Set Up a Universal Inbox
- Import Contacts to macOS Address Book
- Purge Deleted Messages
- Delete Addresses in Outlook Autocomplete
- Change the Attachment Size Limit in Outlook
- Import Contacts via CSV
- Back Up Outlook Data
- Change Fonts in Outlook
- Export Contacts to CSV
- Add an Image to Your Signature
- Set Up Out-of-Office Messages
- Create Email Templates
- Restrict Notifications to Important Emails Only
- Get Read Receipts
- Use Two Time Zones for Meetings
- Recall an Email
- Save Common Searches
- Filter Email
- Block Unwanted Mail
- Stop Sending Winmail.dat
- Automate Repetitive Actions
- Schedule Outgoing Mail
- Create Canned Replies
Melanie was a writer at Laptop Mag. She wrote dozens of helpful how-to guides, covering both the software and the hardware side of things. Her work included topics like SSDs, RAM, Apple, Excel, OneDrive, and detailed guides for Windows users. Outside of all her useful advice, Melanie also penned a few reviews for Laptop Mag, including Android emulators that help you run apps on your PC.
