Windows 11’s Snipping Tool gets a handy upgrade it should’ve had from day one
How did this take so long, Microsoft?

Microsoft’s never been the best at rolling out feature-complete software right out of the gate. But every now and then, the Redmond-based giant makes up for it by getting something exactly right, even if you still wonder what took so long.
On Thursday, the company announced that it's baking a color picker into the Snipping Tool on Windows 11, and it’s the perfect example of a minor but long-overdue addition.
Windows 11’s Snipping Tool finally gets a built-in color picker
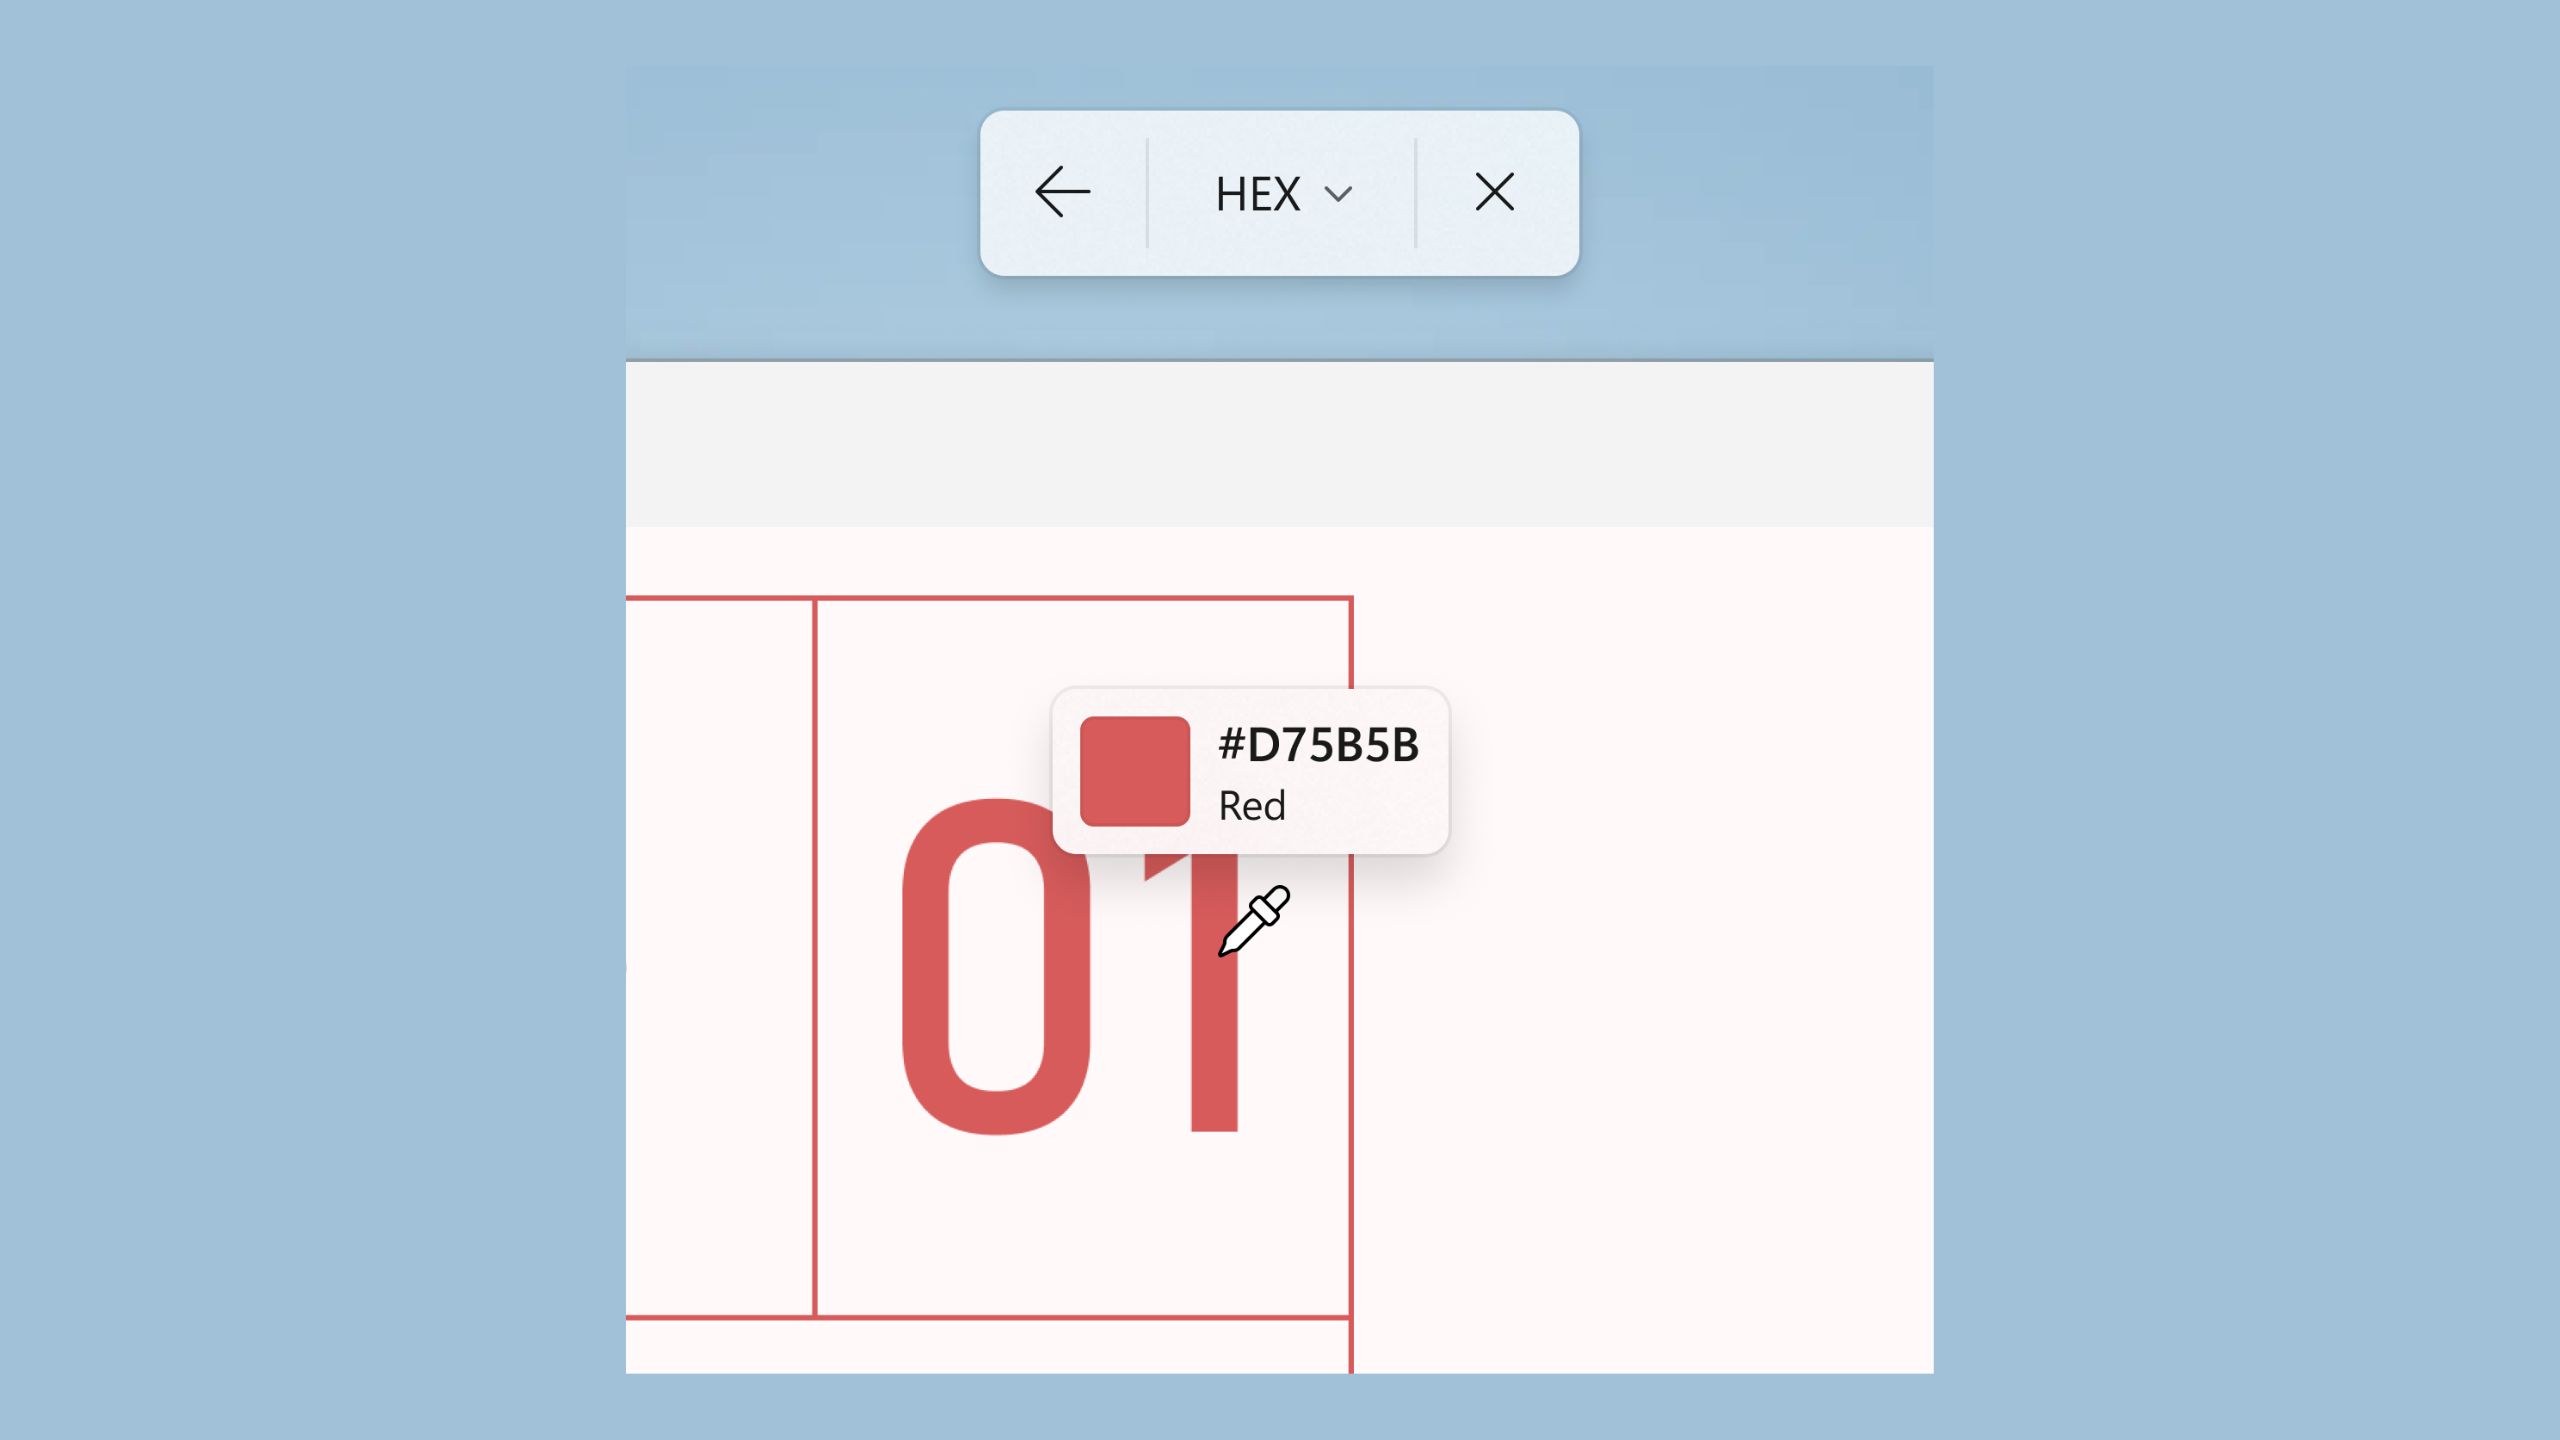
As announced on the Windows Insider Blog, Microsoft is adding a built-in color picker to the Snipping Tool, version 11.2504.38.0. The feature does exactly what you’d expect it to: letting you quickly figure out exact color values from anywhere on your screen.

The way it works is ridiculously simple. To use it, you’ll need to invoke the Snipping Tool like you usually do — either by clicking the “Start” button and searching for the Snipping Tool app, or by pressing the Windows logo key, Shift, and the S key simultaneously.
You’ll then find a new Color picker option, denoted by a pencil icon on the toolbar (according to Windows Latest). All you need to do is hover the dropper over any part of your screen, and the tool has a dropdown that instantly shows the color code in three formats: HEX, RGB, and HSL.
If you’re into design work, you likely know the difference between the three. But if not:
- HEX is a six-digit code (like #8F00FF) commonly used in web design to represent colors.
- RGB shows the amount of red, green, and blue in a color, formatted like rgb(143, 0, 255).
- HSL stands for Hue, Saturation, and Lightness. It’s especially useful if you want to fine-tune how vibrant or bright a color appears. For example, violet: h: 274°, s: 100%, l: 50%.
Features: 16-inch 2.5K (2560 x 1600) 90Hz 300-nit Mini-LED touchscreen, Intel Core Ultra 7 155H 16-core CPU, 16GB RAM, Intel Arc Graphics, 1TB SSD, Windows 11 Home
This saves you the manual effort of needing to use a third-party tool to convert the color code from one format to another. In case you need more precision, you can also press Ctrl and +/- to zoom in or out.
Sign up to receive The Snapshot, a free special dispatch from Laptop Mag, in your inbox.
The best part about the feature, though, is that you don’t need to take a screenshot just to find out the color code. So if you’re someone who needs to figure out colors often, you won’t have to worry about your PC overflowing with unnecessary screenshots.
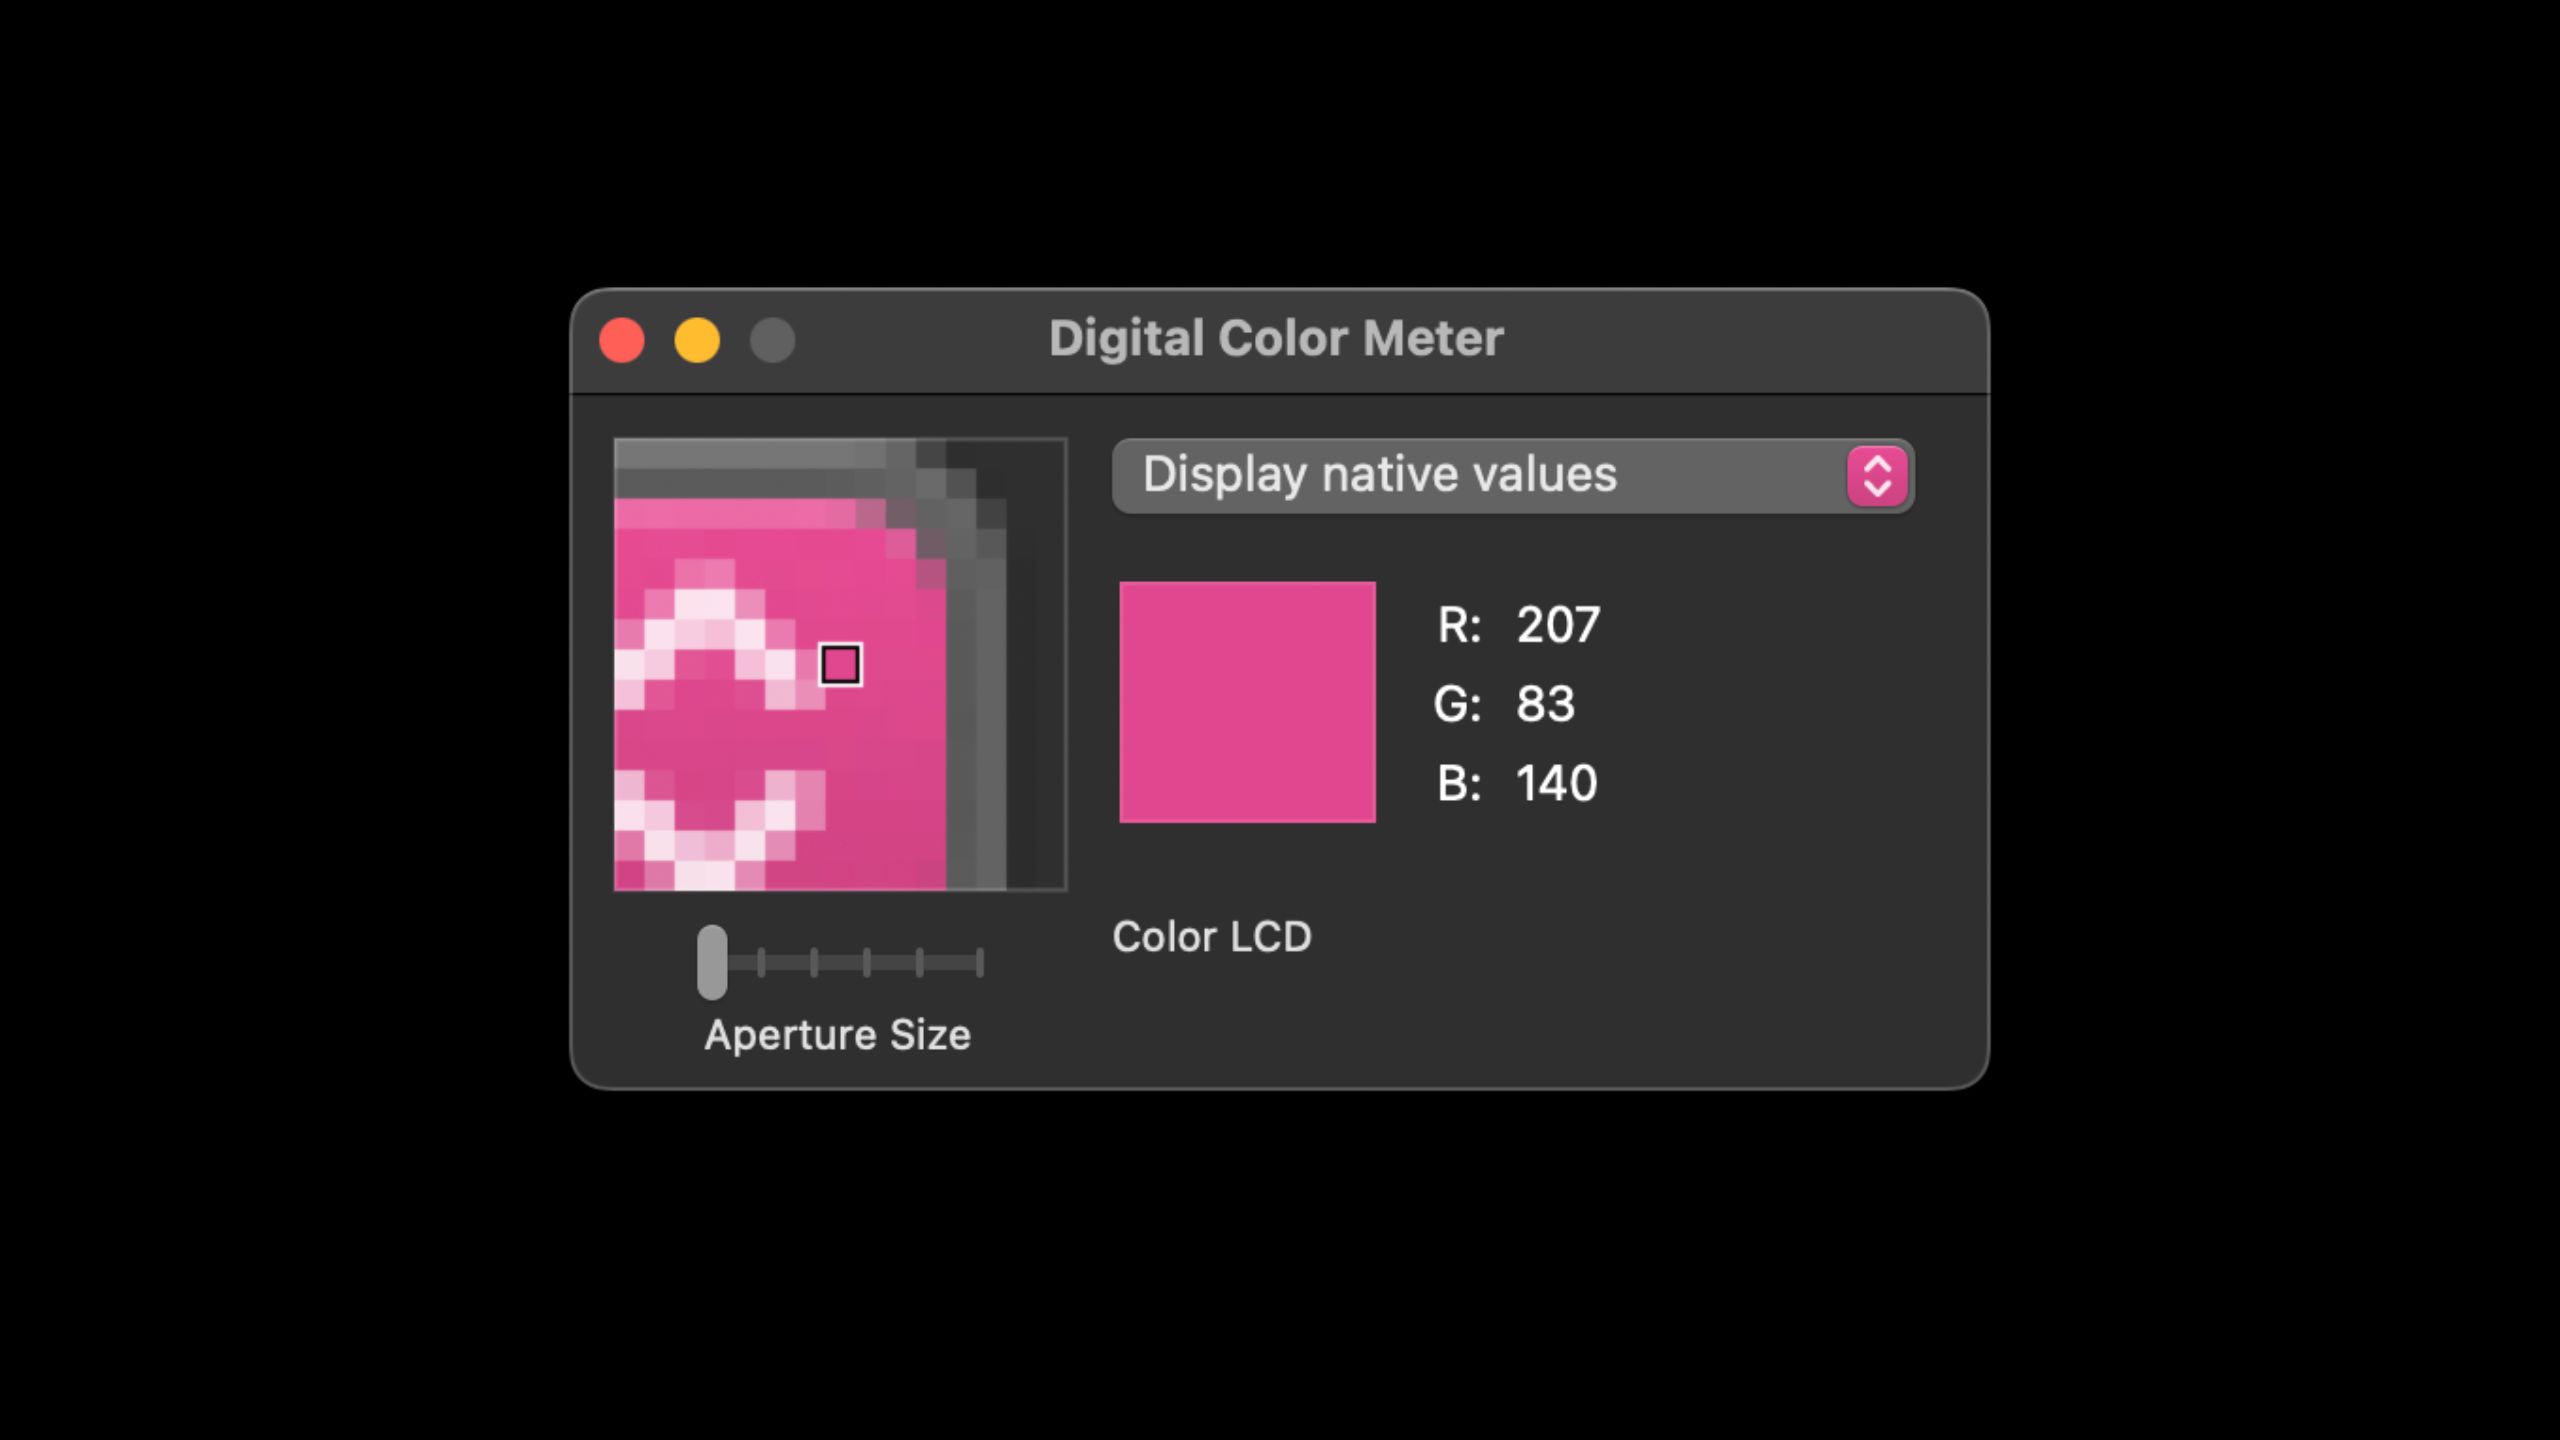
Before switching to Mac, there were multiple times I needed to figure out the color code from an image or somewhere on my screen, often for my school projects. What I always had to do back then was take a screenshot and then use a third-party tool like RedKetchup or Color Picker online. Since Macs have a similar built-in utility called Digital Color Meter, I haven’t felt the need to use those online sites anymore.

So, I’m thrilled that Microsoft’s finally integrating this basic functionality right within the Snipping Tool.
Perfect screenshots are now just a Ctrl key away too
The Snipping Tool is also getting a new AI-powered feature for Copilot+ PCs, called Perfect screenshot. This feature can intelligently resize a screenshot you’re attempting to take based on the content in your selection.
This means you won't need to manually edit a screenshot after capturing it. It also saves you the hassle of trying to get everything just right in a screenshot before hitting the capture button.
All you’ll need to do is open the Snipping Tool, select the Perfect screenshot feature, and choose the region of your screen you’d like to capture.

The best part about this feature is that you don’t necessarily need to pick the option from the toolbar. Instead, you can simply hold the Ctrl key on your keyboard once you’ve invoked the Snipping Tool and selected the screenshot region.
Both of these new Snipping Tool features are currently in testing for Windows Insiders in the Canary and Dev channels on Windows 11. They’re rolling out gradually, so even if you’re part of the program, you might not see them right away. For everyone else, they’ll likely show up once Microsoft pushes them to the release branch. So you’ll need to wait a little longer.
More from Laptop Mag
- Microsoft is quietly testing one of macOS’s best features on Windows 11, and trying to hide it
- This app outsmarted Windows 11's most "dangerous" feature — here's how
- How to install Windows 11 without a Microsoft account

Mahnoor Faisal is a freelance tech journalist who began her professional writing journey in 2021. While she got her start as an iOS writer, she’s expanded her beat over the years and now focuses on both the mobile and laptop side of the tech world. Her work has appeared across outlets like MakeUseOf, XDA Developers, MUO, SlashGear, Android Police, The Mac Observer, and, of course, Laptop Mag.
Mahnoor’s an Apple enthusiast at heart but loves reporting on all things tech. When she’s not writing or cramming for another college exam, you’ll find her either mindlessly scrolling through TikTok for hours like every other Gen Z-er or hanging out with her friends.

