How to Disable the Windows 10 Startup Delay
Sign up to receive The Snapshot, a free special dispatch from Laptop Mag, in your inbox.
You are now subscribed
Your newsletter sign-up was successful
If you have a fast SSD you’re used to rocket-like startup speeds. What you may not know is that you can make this process even faster by disabling the startup delay that Windows includes to keep from overtaxing your hardware. Don’t worry, it’s a legacy addition, and it’s not necessary with most modern SSD’s. If it causes issues, you can always undo it later.
1. Open regedit. You can get there by typing regedit in the Cortana search bar and pressing enter.
2. Click Yes on the pop-up asking if it’s okay to make changes to your device.
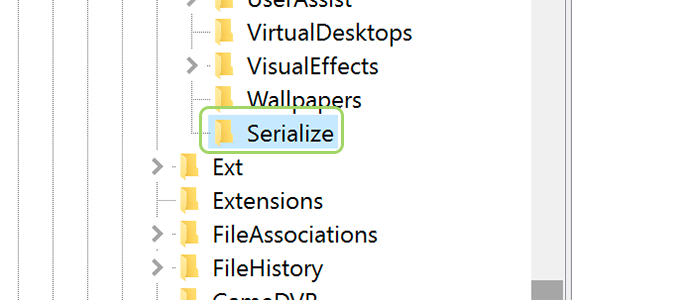
3. Find the HKEY_Current_User folder and navigate to Software\Microsoft\Windows\CurrentVersion\Explorer\Serialize.
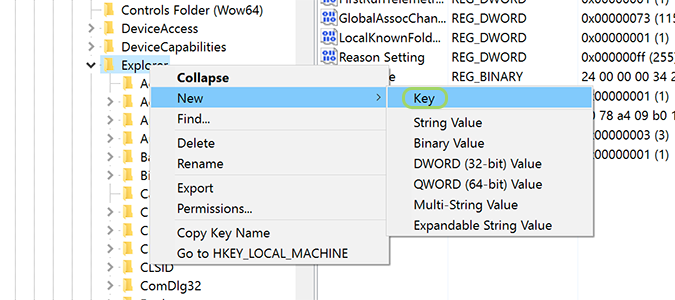
4. If the Serialize folder doesn’t exist, go up one level, and right-click the folder for Explorer, and create a new key entry named Serialize. If the folder is already there, you can skip this step.
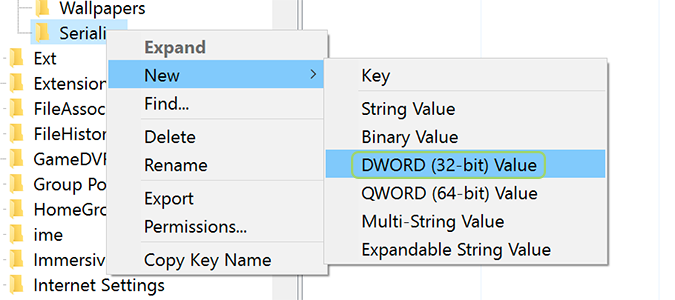
5. Right click the Serialize folder and select New > DWORD (32-bit) Value.
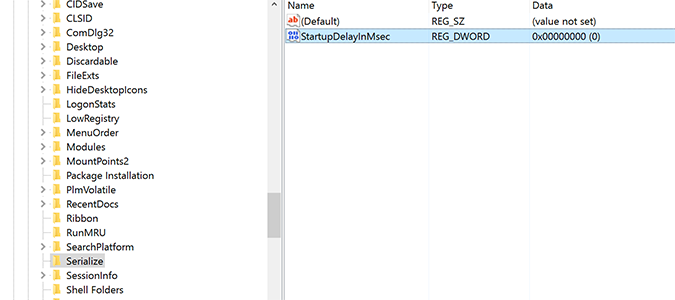
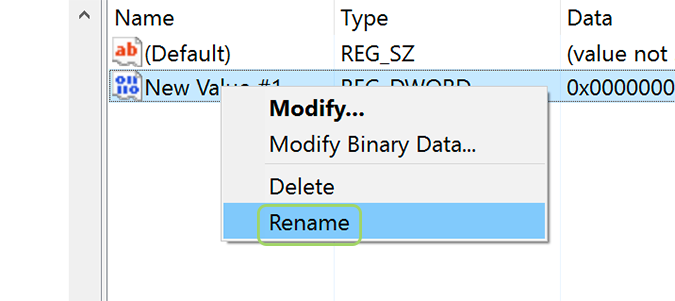
6. Right click the new value and select Rename. Name it StartupDelayInMSec.
Sign up to receive The Snapshot, a free special dispatch from Laptop Mag, in your inbox.
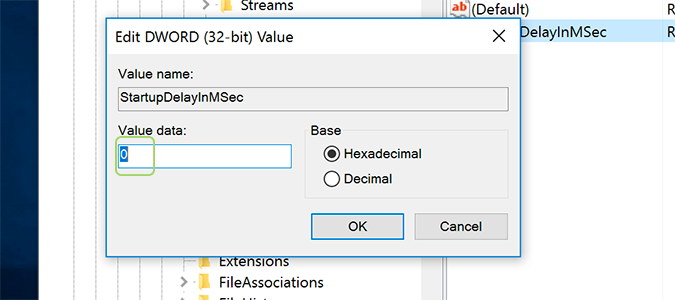
7. Double click the DWORD and set the value to 0.
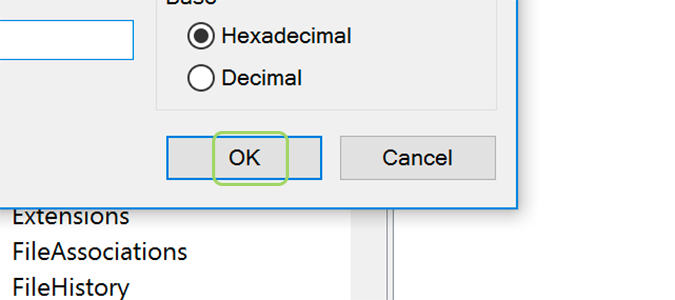
8. Press OK.
Windows 10 Performance and Productivity
- Best Windows 10 Keyboard Shortcuts
- MIrror Your Screen to a TV or Monitor
- Speed Windows 10 Boot Time
- Get Superfast Mouse, Touchpad Speeds
- Calibrate Your Monitor
- Activate 'God Mode'
- Defragment Your Hard Drive
- Measure the Time it Takes for Apps to Load at Boot
- Use Maximum CPU Power
- Enable Swipe to Delete in Email
- Copy and Paste at the Command Prompt
- Record Video of an App
- Use Offline Maps
- Get the Full Layout in Windows 10’s Touch Keyboard
- Create a .Reg File for Easy Registry Hacks
- Record PC Gameplay on the Xbox App
- Perform a Clean Install of Windows 10
- Uninstall Windows 10 and Roll Back to 7 or 8
- Enable the Linux Bash Shell
- Generate a Detailed Battery Report
- Turn a PC into a Wireless Display
- Open Folders in the Taskbar
- Open Sites in the Taskbar
- Import Gmail Contacts
- Get Android Notifications
- Use Multiple Desktops
- Use Eye Control
- Use the Timeline Feature to Resume a Task
- Send Web Pages from Phone to PC
- All Windows 10 Tips
- Increase your Battery Life
Bryan covers everything you need to know about Windows, social media, and the internet at large for Laptop Mag. Thanks to his extensive knowledge of operating systems and some of the most popular software out there, Bryan has written hundreds of helpful guides, including tips related to Windows 11 drivers, upgrading to a newer version of the OS, editing in Microsoft Photos, or rearranging pages in Google Docs.
