How to Uninstall Windows 10 and Return to Windows 7 or 8
Sign up to receive The Snapshot, a free special dispatch from Laptop Mag, in your inbox.
You are now subscribed
Your newsletter sign-up was successful
If you've recently upgraded to Windows 10 but are now regretting it, we have good news for you. You can uninstall Windows 10 and roll back to Windows 7 or 8. This trick has a few requirements, but if you meet them returning to your previous version of Windows is relatively quick and painless.
When you uninstall Windows 10, your files shouldn't be affected, but you might have to reinstall some apps and any settings changes you made after the upgrade to Windows 10 will be lost. It's a good idea to back up your computer before proceeding.
Windows 10 offers this option to downgrade to Windows 7 or Windows 8 only if:
- You did an in-place upgrade to Windows 10. That is, you didn't do a clean install but rather upgraded Windows while letting the upgrade wizard keep your files and programs.
- It's been less than a month since you upgraded.
- You didn't delete the Windows.old folder. That folder is created during the upgrade and some people delete it to save space on their hard drives, but it's needed for the rollback operation.
If you don't meet all three requirements above, you'll have to reinstall Windows 8.1 or Windows 7 instead of using this option. Otherwise, here's how to go back to your previous version of Windows.
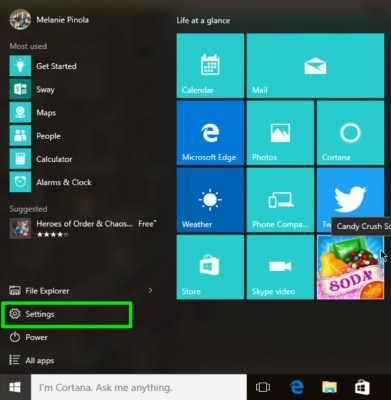
1. Open Settings. You can do this from the Start Menu.
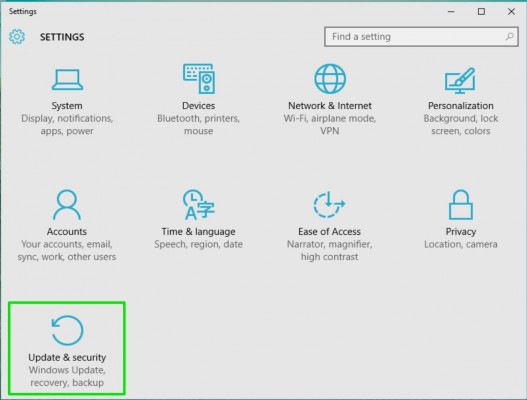
2. Click Update & security.
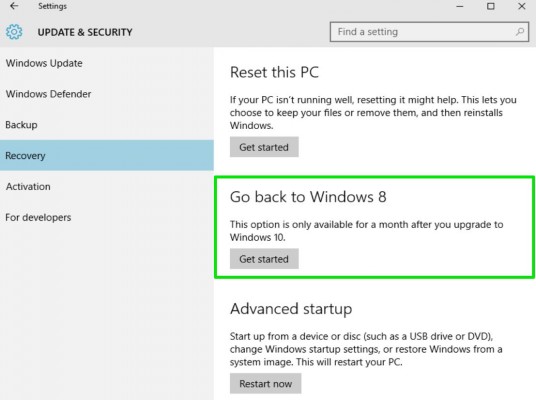
3. Go to Recovery and then click the Get started button under Go back to Windows 8 (or Windows 7)
Sign up to receive The Snapshot, a free special dispatch from Laptop Mag, in your inbox.
4. Check your reason for rolling back and click Next.
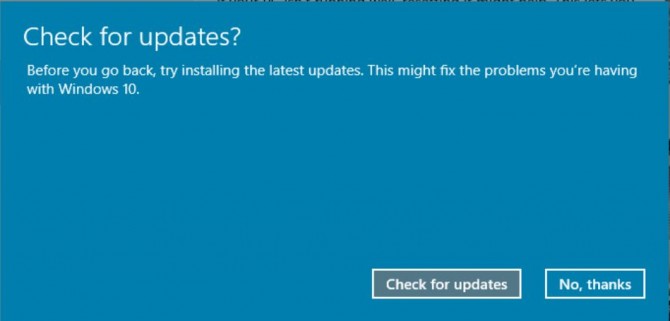
5. Click "No, thanks" to skip checking for updates.
6. Keep clicking Next to go through Microsoft's warnings screens about rolling back. They're annoying, but worth knowing:
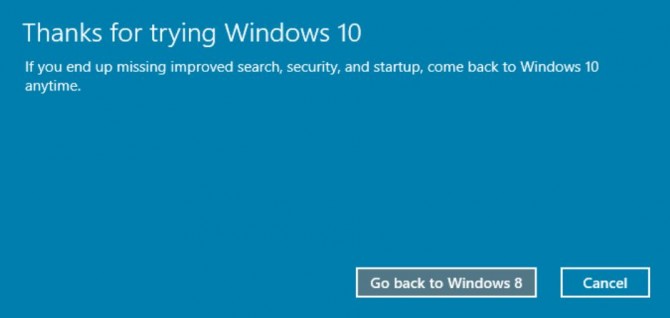
7. Click "Go back to Windows 8" to roll back.
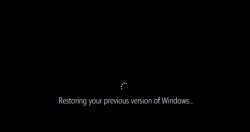
Windows will restart and restore your previous version of Windows. After about 10 minutes, you'll see your previous login screen.
Melanie was a writer at Laptop Mag. She wrote dozens of helpful how-to guides, covering both the software and the hardware side of things. Her work included topics like SSDs, RAM, Apple, Excel, OneDrive, and detailed guides for Windows users. Outside of all her useful advice, Melanie also penned a few reviews for Laptop Mag, including Android emulators that help you run apps on your PC.
