
1. Best laptop 2025: MacBook Air M4 ↴
2. Best budget laptop: Acer Swift Go 14 ↴
3. Best student laptop: Asus Zenbook 14 OLED ↴
4. Best ultraportable: Asus Zenbook S 14 ↴
5. Best high performance: MacBook Pro 16 M4 Pro ↴
6. Best gaming laptop: MSI Raider 18 HX AI ↴
7. Best 2-in-1 laptop: Asus Vivobook 16 Flip ↴
8. Best Chromebook: Samsung Galaxy Chromebook Plus ↴
9. Best battery life: Dell XPS 13 9345 ↴
10. Best for work: Asus ExpertBook P5 ↴
11. Recently reviewed ↴
12. How we test laptops ↴
13. FAQs ↴
14. How to find the right laptop ↴
15. Why trust Laptop Mag ↴
Laptop Mag started in 1991 as the Laptop Buyers' Guide and Handbook to review and recommend the best laptops. Thirty-four years later, helping readers find the best laptop remains our top priority. As managing editor of Laptop, I'm involved in every one of the 100+ laptop reviews we publish each year.
I spend thousands of hours annually researching and reviewing laptops. Whatever type of laptop you need, I have a recommendation ready.
The summer is a relatively quiet period for new laptop launches, making it a great time to buy a new laptop, as almost everything announced at CES and Computex has been released, and we have a clear picture of how the latest chips from Intel, AMD, Qualcomm, and Apple perform.
If you are in search of one of the best student laptops, best gaming laptops, or best MacBooks, I've got you covered. Need something more specialized? We have dedicated guides for the best workstation laptops, best laptops for video editing, best 4K laptops, and more.
If you're not sure where to start, check out our guide on how to choose the right laptop. After that, tap the "Back to the top" link to explore our latest expert picks with confidence. Looking for a great deal? Prime Day is nearly here, and we'll keep you updated on all the best Prime Day laptop deals through Amazon's July sales event.
This page is constantly updated to reflect Laptop Mag’s latest reviews and selections for the best laptops of 2025.
Click to view recent updates to this page.
Update log
- June 9, 2025: Updated introduction, replaced best gaming laptop, updated recently reviewed laptops, and new FAQ updates.

Sean Riley has covered a wide variety of tech during his 15 years as a journalist and product reviewer, including five years reviewing over 75 laptops, phones, and tablets at Laptop Mag. As the managing editor, he also has a role in every review and buying guide published on Laptop Mag, so you can trust his guidance in finding the best laptop for you.
The best laptop for most people:


Apple’s smallest laptop still weighs just 2.7 pounds while packing the more powerful M4 chip in 2025, bringing another leap in performance and better battery life. Did I mention it also got a $100 price cut? This is the best laptop for most people in 2025.
The MacBook Air's 13.6-inch display remains one of the brightest in a consumer laptop in 2025, and True Tone ensures color accuracy. The only knocks against the Air's display are its 60Hz refresh rate and the fact that it isn't as vibrant as OLED competitors. These aren't problems, but they are things you would notice if looking at it side-by-side with another laptop.
Apple didn't touch the design this year, which is a good thing for the Air M4, which remains one of the thinnest laptops at 0.44 inches. That level of portability is great, but it's the fact that it delivers nearly class-leading performance at that size that's even more impressive.
Looking at the benchmarks, the MacBook Air M4 scored 14,849 on Geekbench 6, well above the category average. Our Handbrake video transcoding test took 5 minutes and 40 seconds to transcode a 4K video to 1080p. This area seemed vulnerable for the Air M3 last year, but this leap puts it near the top again.
Apple's SSD performance is again outstanding, with a BlackMagic Write speed of 3,456.2 MBps and a Read speed of 3,018.4 MBps.
Thin, light, and powerful sounds like a recipe for battery woes, but the MacBook Air M4 lasted an average of 15 hours and 42 minutes in our Laptop Mag battery test.
Apple's new Center Stage 12MP webcam is another significant hardware upgrade this year, which now matches the MacBook Pro models. It's one of the best webcams in any laptop that I've tested.
The lack of ports may remain a concern for some people, with just a pair of Thunderbolt 4/USB-C ports, but at least MagSafe 3 keeps both ports free while charging.
Returning to the pricing, the MacBook Air 13-inch M4 now starts at $999, returning to that price point for the first time since the MacBook Air M1 in 2020. That's all the more notable since Apple upgraded the base RAM to 16GB on all MacBooks on October 30, 2024, which used to be a $200 add-on that we recommended to most people.
Need more screen real estate? Look no further than the 15-inch MacBook Air M4. It mirrors all of the strengths of its smaller sibling but with a larger 15.3-inch display.
One other important change this year, Apple didn't keep the previous MacBook Air around as it had since the introduction of the M2 Air in 2022, so if you are wondering about the MacBook Air M4 vs. M3, it's not a decision you will likely need to make as supplies of the latter should dry up soon.
See our full 13-inch MacBook Air M4 review
See our full 15-inch MacBook Air M4 review
More like this: Best Macbook
Click to view chart data in table format
| Header Cell - Column 0 | Apple MacBook Air 13-inch M4 | Lenovo Yoga Slim 7x | MacBook Air 13-inch M3 | Asus Zenbook 14 OLED (Q425) |
|---|---|---|---|---|
Geekbench 6 (Higher is better) | 14,849 | 13,750 | 12,087 | 12,908 |
Handbrake conversion (Lower is better) | 5.40 | 5.16 | 7.40 | 6.17 |
Battery life (Higher is better) | 15.42 | 14.14 | 15.13 | 12.21 |
DCI-P3 color gamut (Higher is better) | 79.6% | 155.4% | 77.8% | 81.7% |
Display brightness (Higher is better) | 463 | 464 | 476 | 354 |
Best laptop on a budget


Acer's Swift Go 14 is the easy choice for the best budget laptop. Starting at $749, the Go 14 isn't the cheapest laptop, but its value is incredible. We reviewed the slightly upgraded $999 configuration, but you will often find it for less than $700 today. The main trade-off is moving from an Intel Core Ultra 7 155H to a Core Ultra 5 125H, so if you stick to productivity work, browsing, and other general computing, it will be a negligible difference if you find a great deal on the Ultra 5 125H model.
The design remains the same at either price, with the Go 14 coming in at just 2.9 pounds. The metallic all-aluminum chassis gives off a faint sparkle that looks and feels far more premium than its price. Popping it open, the contrasting black chiclet-style backlit keyboard looks and feels excellent. Acer also gives you ports aplenty on this portable laptop with two Thunderbolt 4 ports, two USB Type-A ports, an HDMI port, a microSD card slot, a 3.5mm audio jack, and a Kensington lock slot.
The display lands just below the mainstream average for color at 79.1 percent of the DCI-P3 color gamut (85.2 percent is average), but it beats the category average in brightness at 374 nits (354 is average). Again, factoring in the price, these are strong results. You could also opt for the 2.8K display configuration if you value a sharper image.
Performance with our review model was everything we've come to expect from the latest Intel Core Ultra. Our Geekbench 6.2 overall performance test scored 12,434, overtaking more expensive options like the MacBook Air M3 (12,087). It also scorched the competition for our Handbrake video encoding test at 5 minutes and 18 seconds, almost four full minutes under the category average (9:07), again besting the MacBook Air M3 (7:54).
So what are the drawbacks? The battery life isn't bad, at 9 hours and 50 minutes in our testing, but it is well below top options like the MacBook Air M3 (15:21) or the Asus Zenbook 14 OLED (15:52). If you frequently travel or otherwise have difficulty plugging in, this could impact your decision. The built-in speakers are also less than stellar, so plan on some wireless headphones or earbuds.
However, these are minor concerns for most users, so if you are looking for the best laptop value, look no further than the Acer Swift Go 14.
See our full Acer Swift 14 Go (Intel Core Ultra) review
More like this: Best budget laptops
Click to view chart data in table format
| Header Cell - Column 0 | Acer Swift Go 14 (2023) | MacBook Air 13 M2 | Acer Swift Go 14 OLED (2023) |
|---|---|---|---|
Geekbench 6.2 (Higher is better) | 12434 | 9467 | 11950 |
Handbrake time (Lower is better, (MM.SS)) | 5.18 | 7.52 | 5.35 |
Battery life (HH.MM) | 9.5 | 14.06 | 7.26 |
DCI-P3 Color Gamut (Higher is better) | 79.10% | 75.90% | 175.70% |
Display Brightness (Nits) | 374 | 489 | 395 |
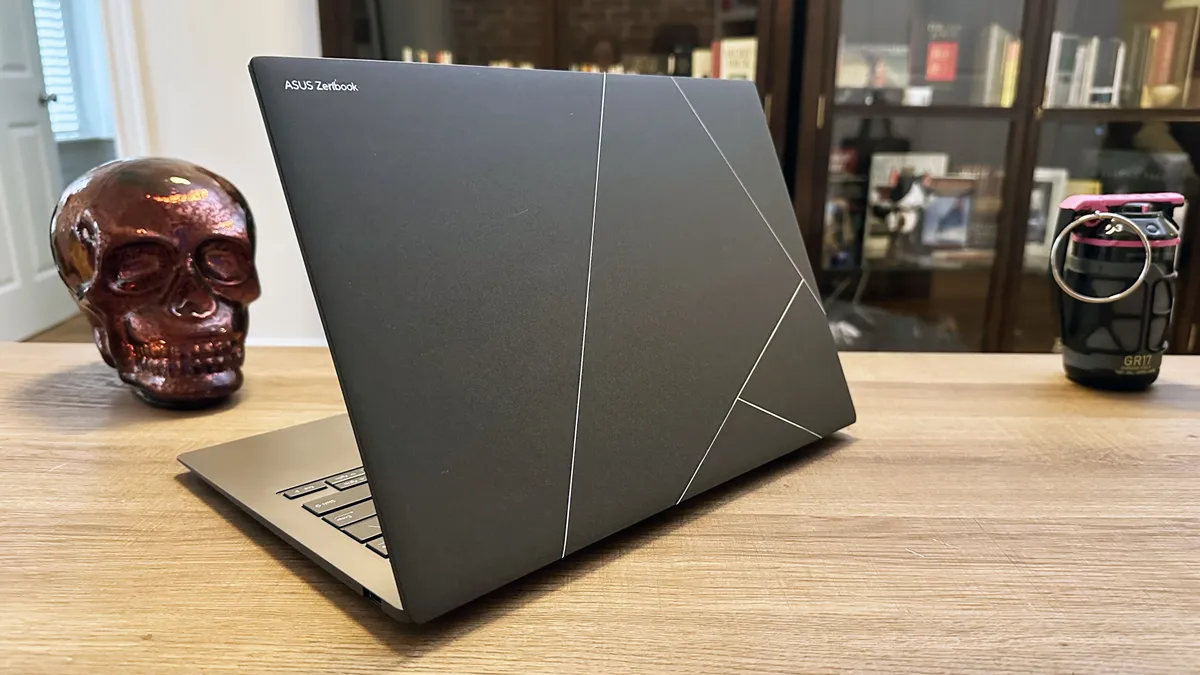
Best laptop for students


Asus has been on a roll with the Zenbook 14 OLED line for a few years, and this Zenbook is yet another significant leap forward.
This is partly due to its Intel Core Ultra chipset inside, which puts the Zenbook 14 OLED on par with any productivity and light content creation laptops on the market. It also absolutely blew the roof off our battery life test, with 15 hours and 52 minutes in our test.
Divining into some of the specifics on performance, it overtook the 13-inch MacBook Air M3 in multi-core Geekbench 6.2 (12,707 vs. 12,087). That wasn't its only win against the much-vaunted MacBook. The Zenbook also beat it in our Handbrake 1.6 test by converting a 4K video to 1080p in 6:36, over a minute faster than the Air M3's 7:54.
The OLED display looks excellent in person, but the benchmarking put it in the middle of the road when it comes to the DCI-P3 color gamut at 79.8 percent. That's below the mainstream average of 85.2 percent and just slightly ahead of the MacBook Air M3 (77.8 percent). It is extremely color accurate with a Delta-E of 0.21, which is relevant for content creators. Display brightness is a weak point against its competition at 339 nits, which is not a terrible result, but it's something we want to see Asus address for the next model.
The Zenbook weighs 3 pounds, which is not exactly ultralight, but not something that will weigh you down too much going from class to class or while commuting. Overall, the Zenbook 14 OLED ticks almost every box we like to see in a student laptop while going above and beyond with its performance and battery life.
This laptop should comfortably hold up through four years of college or for a high school student preparing to head to college in the next year or two.
See our full Asus Zenbook 14 OLED (Q425M) review
More like this: Best student laptops
Click to view chart data in table format
| Header Cell - Column 0 | Asus Zenbook 14 OLED (Q425) | MSI Prestige 14 Evo A12M |
|---|---|---|
Geekbench 5.4 (Higher is better) | 8590 | 9549 |
Handbrake time (Lower is better, (MM.SS)) | 8.4 | 8.31 |
Battery life (HH.MM) | 10.52 | 8.45 |
DCI-P3 Color Gamut (Higher is better) | 96.00% | 81.00% |
Display Brightness (Nits) | 377 | 295 |
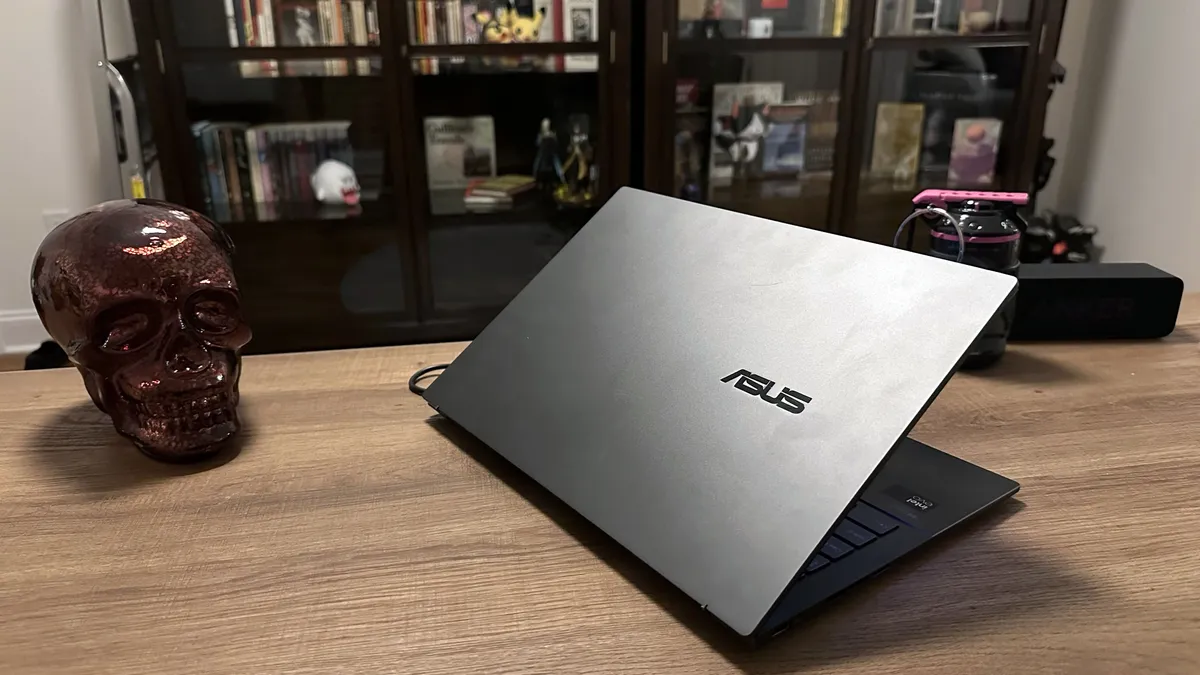
Best ultraportable Windows laptop:


The Asus Zenbook S 14 (UX5406) is currently our pick for the best AI PC laptop, but it deserves more praise than that. It features the new Intel Core Ultra 200V series processor, and even at its full price of $1,499, you are getting a compelling balance of performance, almost 14 hours of battery life, a stunning 14-inch OLED display, plus 32GB of RAM and 1TB of storage. Run whatever AI, productivity, or creative software you want, and the Zenbook S14 should remain a multi-tasking machine on the go.
In our review, staff writer Madeline Ricchiuto said, "From its stunning design to its vivid OLED display panel, there’s plenty to appreciate about the Asus Zenbook S 14."
In our Laptop Mag battery test, the Asus Zenbook S 14 lasted 13 hours and 51 minutes, which should let you leave the charger at home even for your worst day of work, school, or play. Speaking of on-the-go advantages, the Zenbook's scratch-resistant Ceraluminum ultralight chassis should keep it looking brand new even if you tote it everywhere with you.
If you care about your laptop's visuals, the Zenbook S 14's 3K (2,880 x 1,800) OLED display will leave you very happy. It is vividly colorful, capturing 82% of the DCI-P3 color gamut, which is an excellent result for the typically low-scoring OLED, and at 342 nits of brightness, it will hold up well in brightly lit environments.
Unlike many ultraportables, the Zenbook S 14 doesn't skimp on the port selection, with a pair of Thunderbolt 4 USB-C ports, a USB 3.2 Gen 2 Type-A port, an HDMI 2.1 port, and a 3.5mm headphone/mic jack. That should cover most people's needs and throws down the gauntlet for ultrabooks that went USB-C/Thunderbolt-only.
If you have greater performance needs, then something like the MacBook Air 13 M3 may be the answer at a similar size and weight, or if you are looking for a business-focused ultraportable, the Asus ExpertBook P5 is a strong choice. However, for a solid blend of performance, battery life, and price in a compact package, the Zenbook S 14 is a standout pick.
See our full Asus Zenbook S 14 (UX5406) review.
More like this: Best Ultrabooks
Click to view chart data in table format
| Header Cell - Column 0 | Asus Zenbook S 14 (UX5406) | Asus Zenbook S 16 (AMD Ryzen AI 9) | Dell XPS 9345 (Snapdragon X Elite) |
|---|---|---|---|
Geekbench 6.2 (Higher is better) | 11157 | 13282 | 14635 |
Handbrake time (Lower is better, (MM.SS)) | 8.3 | 5.08 | 4.41 |
Battery life (HH.MM) | 13.51 | 11.35 | 19.01 |
DCI-P3 Color Gamut (Higher is better) | 82% | 79.70% | 66.90% |
Display Brightness (Nits) | 342 | 357 | 455 |
Best high performance laptop:


Our mid-tier configuration of the 16-inch MacBook Pro M4 Pro delivered performance and battery life results beyond the 16-inch MacBook Pro M3 Max, offering 7 percent better overall performance and almost three extra hours of battery life! All of that in a configuration that, with matching storage, would cost $900 less.
Our $3,499 review configuration of the MacBook Pro 16 M4 Pro featured the base 14-core CPU and 20-core GPU, paired with 48GB of RAM and a 2TB SSD, but you can max those out with the M4 Max at up to a 16-core CPU, a 40-core GPU, up to 128GB of RAM and an 8TB SSD. Maxing out all of the options would put you at $7,349, so you'll want to consider your upgrades wisely.
In almost every performance metric, the MacBook Pro 16 M4 Pro is at the top of the charts. Its Geekbench 6 score of 22,822 is more than double the premium laptop average. Turning to our Handbrake test, which has the laptop transcode a 4K video to 1080p, the MacBook Pro finished in 2 minutes and 38 seconds. That's more than twice as fast as the premium laptop average and over 30 seconds faster than the creator-focused Asus ProArt PX 16 2024. If you do creative work professionally and value your time, the MacBook Pro M4 Pro or M4 Max is the way to go.
Battery life remains the most mystifying trick that this powerhouse of a laptop has up its sleeve. Achieving 20 hours and 46 minutes in the Laptop Mag battery test, that's over 7 hours longer than the premium laptop average and more than double its Windows content creation rivals like the Lenovo Yoga Pro 9i 16 Gen 9 (9:51) or the Asus ProArt PX16 2024 (9:32). If you need are regularly working away from an outlet, this should make for an easy choice.
Is there any reason to avoid the 16-inch MacBook Pro M4 Pro or M4 Max? Price and macOS are the two big reasons. The M4 Pro configurations start at $2,499, and the M4 Max configurations start at $3,499. That's at the upper end of premium for anything other than a workstation or gaming laptop, but considering the performance, efficiency, and build quality, it's not outlandish.
As for macOS, it's a smooth and well-supported operating system, but if you need Windows-only apps or your work just doesn't support macOS, you'll either is a great operating system, but if you have Windows-only apps that you need to use or you're business doesn't support macOS, it could be a dealbreaker.
Finally, Apple continues to improve its gaming support, but it remains distantly behind Windows for gamers. As long as none of these concerns spoil things for you, the 16-inch MacBook Pro M4 Pro or M4 Max is in a class by itself for a mainstream high-performance laptop.
See our full MacBook Pro 16 M4 Pro review.
More like this: MacBook Air vs. MacBook Pro
Click to view chart data in table format
| Header Cell - Column 0 | Apple MacBook Pro 16-inch (M4 Pro, 2024) | Apple MacBook Pro 16-inch (M3 Max, 2023) | Lenovo Yoga Pro 9i 16 Gen 9 | Asus ProArt PX16 2024 |
|---|---|---|---|---|
Geekbench 6 (Higher is better) | 22,822 | 21,182 | 12,141 | 15,286 |
Handbrake conversion (Lower is better, MM.SS) | 02:38 | 02:36 | 03:53 | 03:15 |
Battery life (HH.MM) | 20.46 | 18.05 | 9.51 | 9.32 |
DCI-P3 Color Gamut (Higher is better) | 81.40% | 81.80% | 105.70% | 85.50% |
Brightness (Higher is better, Nits) | 565 | 558 | 373 | 356 |
The best gaming laptop overall:


If you want the absolute best, prepare to pay for it — because the MSI Raider 18 HX AI doesn’t mess around. Packed with an Nvidia GeForce RTX 5080 with 16GB of VRAM, this oversized gaming rig is built for dominance, not portability.
In our review, Madeline Ricchiuto writes: “For a premium desktop replacement laptop like the Raider, the miniLED panel is more than just a utility feature; it’s a key selling point.” And she’s right. The 18-inch 4K MiniLED display delivers impressive color (83.1% DCI-P3) and brightness (668 nits), giving you the visibility you need when sneaking through dimly lit alleyways — or just trying not to get sniped in Warzone.
Performance? Off the charts. The Raider hit 153 fps in Assassin’s Creed: Mirage (Ultra, 1080p), outperforming both the Razer Blade 16 (120 fps) and Gigabyte Aorus Master 16 (145 fps). Even in Cyberpunk 2077, one of the most punishing games around, the Raider held strong at 64 fps, just behind the Blade (66 fps) and ahead of the Aorus (62 fps).
You’re also getting a full-size keyboard with great spacing and comfortable travel. Whether you're typing raid callouts, spamming hotkeys, or writing a term paper, the Raider’s keys won’t let you down.
But there are trade-offs. The fans are loud, the chassis gets hot, and the battery life barely scrapes past 2.5 hours. Oh, and it costs more than most people’s monthly rent.
Still, if you're chasing top-of-the-line gaming performance and want a laptop that doubles as a desktop slayer, the MSI Raider 18 HX AI is the machine to beat.
See our full MSI Raider 18 HX AI review.
More like this: Best gaming laptops
Click to view chart data in table format
| Header Cell - Column 0 | MSI Raider 18 HX AI | Razer Blade 16 (2025) | Gigabyte Aorus Master 16 | MSI Titan 18 HX (2024) |
|---|---|---|---|---|
Geekbench 6 (Higher is better) | 21851 | 16025 | 19175 | 16501 |
Handbrake conversion (Lower is better, MM.SS) | 2.07 | 3.12 | 2.18 | 2.33 |
Battery life (HH.MM) | 2.33 | 7.22 | 5.02 | 2.4 |
DCI-P3 Color Gamut (Higher is better) | 83.10% | 144.60% | 81% | 112.40% |
Brightness (Higher is better, Nits) | 668 | 372 | 378 | 559 |
Best 2-in-1 laptop:


Asus may not be the first name you think of in 2-in-1 laptops, but the best Asus laptops have been knocking it out of the park for the last couple of years, so it's no surprise the company delivered a standout 2-in-1 in the Vivobook 16 Flip.
The 16 Flip features strong overall performance from its Intel Core Ultra 7 258V processor with Intel Arc 140V integrated graphics, notably performing better on battery power than previous generations. It's not going to replace one of the best gaming laptops, but the iGPU impresses with enough power for gaming at 1080p on medium settings.
If watching content is one of your goals with the Flip 16, our reviewer Madeline Ricchiuto writes that "The Vivobook sports a glossy 16-inch, 2880 x 1800, 120Hz OLED touchscreen panel, which presents that lush, infinite contrast ratio." And if you aren't wearing headphones, the audio is outstanding in tent mode, which is ideal for watching videos.
Typically, you want a 2-in-1 for flexibility on the go, and the Flip 16 is well-suited to that. The one knock against it might be the 3.9-pound weight, but you could drop to the smaller Vivobook 14 Flip to get that down to 3.46 pounds.
Battery life is another concern for totable notebooks, but with 13 hours and 47 minutes in our Laptop Mag battery test, the 16 Flip should last through your toughest days.
So what are the concerns? Our reviewer finds the keyboard "membrane feels mush, and there's no satisfying click activation." While she adjusted, if an outstanding keyboard experience is a high priority for you, consider one of the best laptops for writers. She's also unimpressed by the distorted webcam colors, but one of the best webcams solves that problem.
This is an outstanding 2-in-1 laptop at an affordable price, which is why it earned 4.5 stars and our coveted Editor’s Choice award.
See our full Asus Vivobook Flip 16 (TP3607) review.
More like this: Best 2-in-1 laptops
Click to view chart data in table format
| Header Cell - Column 0 | Asus Vivobook 16 Flip (TP3607SA) | Acer Swift 16 AI (Intel) | Lenovo ThinkBook 16 Gen 7 (G7 QOY) | Asus Zenbook S 16 (UM5606) |
|---|---|---|---|---|
Geekbench 6 (Higher is better) | 10,987 | 10,951 | 11,517 | 13,282 |
Handbrake conversion (Lower is better) | 07:41 | 7:48 | 9:19 | 5:09 |
25GB File Transfer Test (Lower is better) | 15.29 | 13.93 | 24.79 | 29.55 |
25GB File Transfer Test (SSD speed) | 1,756 | 1,928 | 1,083 | 908 |
Heat (Degrees Fahrenheit) | 85.8 | 87.6 | 86.0 | 105.5 |
Battery life (Higher is better) | 13:47 | 12:58 | 21:02 | 11:35 |
Display brightness (Higher is better) | 356 | 385 | 289 | 357 |
sRGB color gamut (Higher is better) | 119.2% | 196.3% | 63.7% | 112.6% |
DCI-P3 color gamut (Higher is better) | 84.4% | 139.0% | 45.1% | 79.7% |
Color accuracy (Lower is better) | 0.22 | 0.3 | 0.24 | 0.23 |
3DMark Fire Strike (Higher is better) | 8,830 | 8,167 | 3,631 | 7,468 |
3DMark Time Spy (Higher is better) | 4,292 | 4,173 | 1,038 | 3,728 |
3DMark Steel Nomad (Higher is better) | 811 | 732 | 233 | 579 |
Sid Meier's Civilization VI: Gathering Storm (1080p, fps) | 56.523 | 50.862 | 14.756 | 63.212 |
Best Chromebook overall:


The Samsung Galaxy Chromebook Plus gives you a premium laptop experience at a more affordable price than a comparable Windows laptop. It features better specs than the typical Chromebook with an Intel Core 3 100U 14th gen processor, Intel integrated graphics, 8GB of memory, 256GB of SSD storage, and a 15.6-inch FHD AMOLED display.
In our review, James Pero said, "While Samsung's Galaxy Chromebook Plus isn't the first premium Chromebook, it's probably the best."
The Galaxy Book boasts enough computing power to get the most out of ChromeOS and Google Gemini AI, without unnecessarily weighing the laptop down or adding to its cost. You can run Android apps or juggle Chrome tabs without any slowdowns.
As expected from a Samsung device, the display is one of the highlights, with a 15.6-inch AMOLED that puts most other Chromebooks to shame. Measuring 108.5% on the DCI-P3 color gamut, the Galaxy Chromebook Plus outperforms many Windows laptops and MacBooks. Brightness again dramatically outperforms its category at 377 nits of average peak brightness, enough to overpower lighting in most environments.
Lasting 11 hours and 12 minutes on the Laptop Mag web surfing battery test, the Galaxy Chromebook Plus isn't among our longest-lasting laptops, but it beats most modern Chromebooks and is enough for all-day usage.
The $699 price may feel expensive for a Chromebook, but this is superior hardware to the typical Chromebook and still more affordable than a comparable Windows laptop. If you want an affordable and easy-to-use laptop, a Chromebook is an excellent choice, and Samsung gives you the best Chromebook experience possible at a slight premium.
See our full Samsung Galaxy Chromebook Plus review.
More like this: Best Chromebook
Click to view chart data in table format
| Header Cell - Column 0 | Samsung Galaxy Chromebook Plus | HP Chromebook Plus 14a | Acer Chromebook Spin 714 |
|---|---|---|---|
Geekbench 6 (Higher is better) | 15,114 | 11,968 | 12,358 |
Jetstream 2 (Higher is better) | 6015 | 4087 | 6335 |
Battery life (HH.MM) | 11.12 | 8.50 | 12.43 |
DCI-P3 Color Gamut (Higher is better) | 108.5 | 41.7 | 76.0 |
Display Brightness (Nits) | 377.2 | 289.0 | 389.0 |
Best battery life:
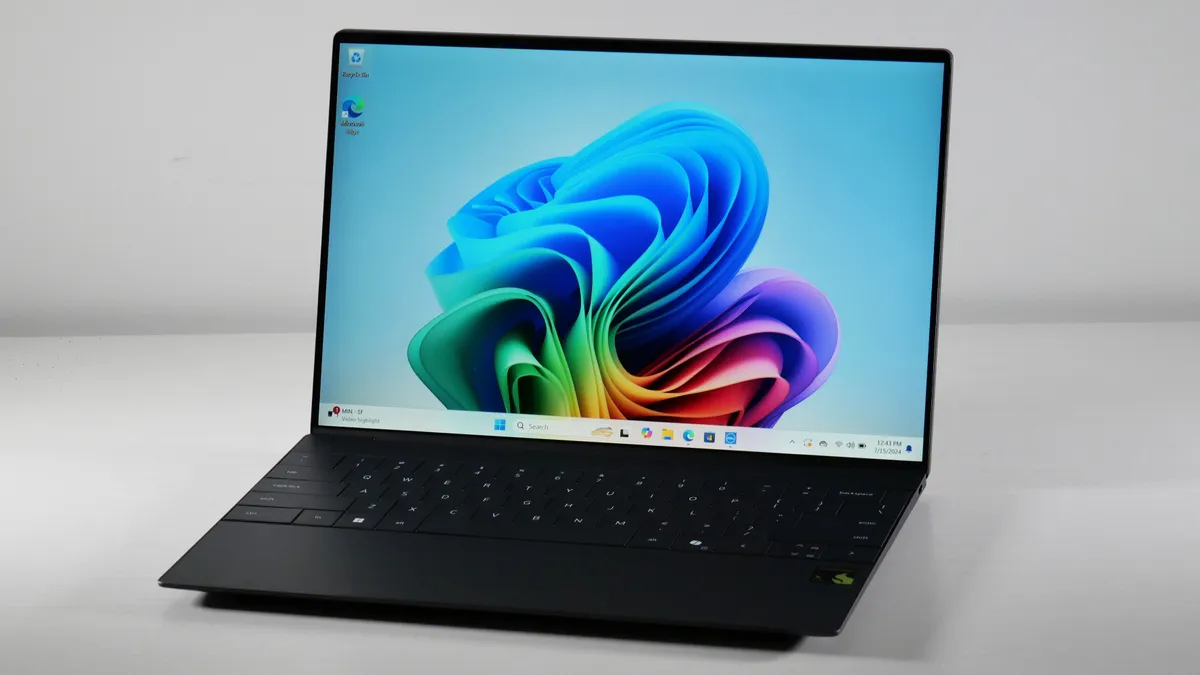


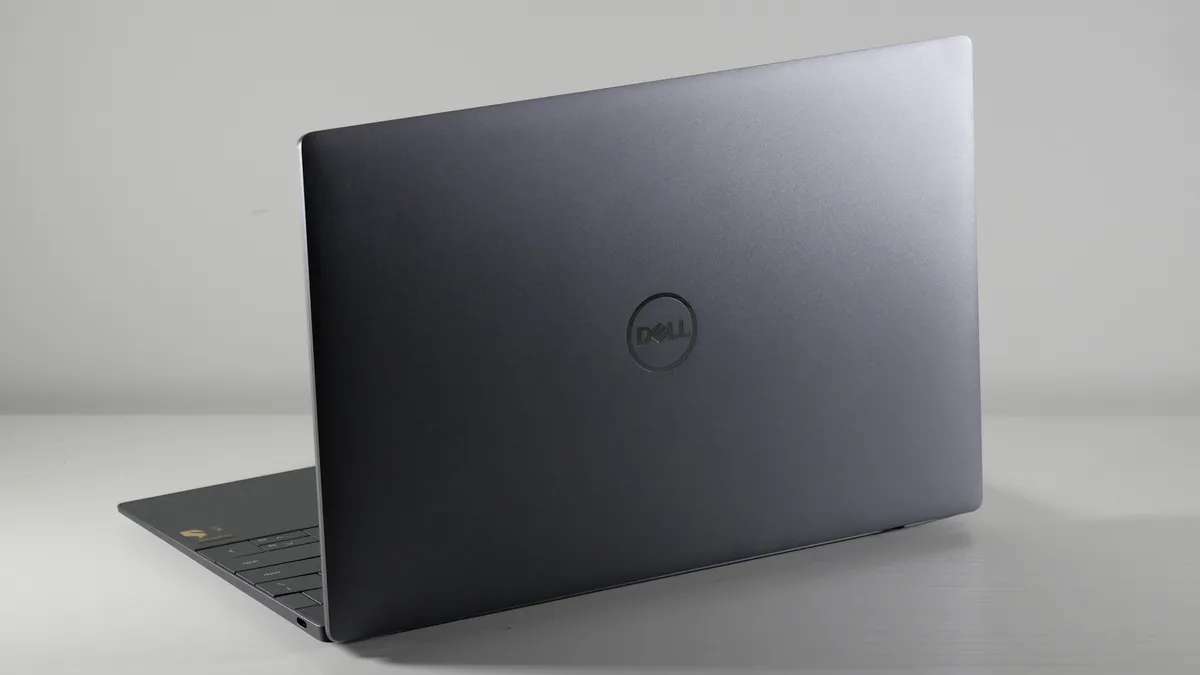
The Dell XPS 13 9345 is a Copilot+ PC powered by Qualcomm's Snapdragon X Elite chipset. This gives you access to various AI-fueled Windows features that promise to enhance work and play on your laptop. Even if you aren't sold on the AI revolution just yet, this laptop serves up a potent combination of features.
The battery life is the undeniable star of this show, coming in at 19 hours and 1 minute and an even more astounding 20 hours and 51 minutes after we installed the BIOS 1.7.0 update. The average premium laptop lasts 11 hours and 13 minutes in this test. If you are a student or a frequent traveler who needs to stay powered up on the go, the Dell XPS 13 9345 is unmatched.
Lest you think that battery life comes from a power-sipping processor, the Snapdragon X Elite also delivers an incredible 14,635 multi-core score in the Geekbench 6.3 overall performance test. That obliterates the premium laptop average of 8,927 and its nearest competitors like the MacBook Air M3 (12,087) or Zenbook 14 (12,707).
It's not the perfect laptop, though. Two ports will leave some users running for a docking station or USB-C hub. At just 66.9% of the DCI-P3 color gamut, the display is rather dull, and our reviewer found the keyboard to be cramped.
While the Dell XPS 13 9345 remains the longest-lasting laptop we recommend to most people, if you are in the market for a business laptop, the Lenovo ThinkPad T14S Gen 6 did outlast it at 21 hours and 3 minutes. Prefer macOS? The 14-inch MacBook Pro M4 delivered an impressive 18 hours and 32 minutes.
See our full Dell XPS 13 9345 (Snapdragon X Elite) review
More like this: Laptops with the best battery life
Click to view chart data in table format
| Header Cell - Column 0 | Dell XPS 13 9345 | MacBook Air 13 M3 | Asus Zenbook 14 OLED |
|---|---|---|---|
Geekbench 6 (Higher is better) | 14,635 | 12087 | 12707 |
Handbrake time (Lower is better, (MM.SS)) | 4.41 | 6.32 | 6.36 |
Battery life (HH.MM) | 19.01 | 15.13 | 15.52 |
DCI-P3 Color Gamut (Higher is better) | 66.90% | 77.80% | 79.80% |
Display Brightness (Nits) | 456 | 476 | 339 |
The best business laptop:


The Asus ExpertBook P5 is a near-perfect business laptop that covers the needs of 99% of business users at an affordable price. The feature list includes a fast and efficient new Intel Core Ultra 7 258V processor, over 14 hours of battery life, a 144Hz display, all the RAM a multi-tasker could need, and enough ports for you to skip the USB-C hub or docking station.
In our review of the ExpertBook P5 (P5405), our managing editor, Sean Riley, said: "The 144Hz refresh rate is the most eye-catching spec...if you spend all day on your laptop, it is easier on your eyes as it reduces the almost imperceptible flicker of your laptop display." Combine this with the 465 nit of brightness, and you have one of the most formidable business laptop displays around.
The new Intel processor and ample RAM make the Asus ExpertBook P5 a productivity workhorse if you use a typical combination of office apps and browser-based tasks. If you need more robust performance for photo or video work, 3D rendering, on-device LLMs, or similar tasks, you may want to consider an affordable workstation like the Lenovo ThinkPad P1 Gen 7 or one of the best laptops for Photoshop.
To put the ExpertBook P5's performance in perspective, it scored 11,259 in the Geekbench 6 overall performance test performed by our lab. That's roughly 9% higher than the average premium laptop's score of 10,308 but 7-12% behind some of its competitors like the Asus Zenbook S 14, MacBook Air M3, and HP EliteBook Ultra. That's close enough that performance alone shouldn't tip you to them over the ExpertBook P5.
Another highlight of the ExpertBook P5 is the webcam. If you are regularly on video calls, you'll appreciate its color accuracy and sharp focus. No more toting around one of the best webcams in your bag.
The ExpertBook P5 also has excellent thermal management, so it won't scorch you if you need to work on your laptop or a plane. After playing back a video for 15 minutes, the hottest temperature recorded on it was 95.4 degrees Fahrenheit. The HP Elite x360 1040 G11, by comparison, reached 103.1 degrees on the underside. The Zenbook S 14 and Zenbook S 16 reached 97.7 and 105.5, respectively, and the Dell XPS 13 reached an alarming 120.
See our full Asus ExpertBook P5 review.
More like this: Best business laptops
Click to view chart data in table format
| Header Cell - Column 0 | Asus ExpertBook P5 (P5405) | HP EliteBook Ultra | MacBook Air 13 M3 | HP Elite x360 1040 G11 |
|---|---|---|---|---|
Geekbench 6 (Higher is better) | 11259 | 12717 | 12087 | 12857 |
Handbrake conversion (Lower is better, MM.SS) | 7.27 | 6.4 | 6.32 | 4.54 |
Battery life (HH.MM) | 14.22 | 16.01 | 15.13 | 9.57 |
DCI-P3 Color Gamut (Higher is better) | 77.30% | 84.70% | 77.80% | 80% |
Brightness (Higher is better, Nits) | 465 | 321 | 476 | 342 |
Recently Reviewed
We review new laptops every week, but we don't make the best laptop selections lightly, so there aren't weekly changes to our picks. Here's a look at our recently reviewed laptops that didn't make the cut for this page, some were still excellent, while others missed the mark completely.

 | Intel Core Ultra 7 256V | Intel Arc integrated graphics | 16GB RAM | 1TB SSD")

 | Intel Core Ultra 7 256V | Intel Arc 140V integrated graphics | 16GB RAM | 1TB SSD")


 SSD")
 | Qualcomm Snapdragon X X1-26-100 | Qualcomm Adreno integrated graphics | 16GB RAM | 512GB SSD")


How We Test Laptops


Over the course of a year, we review over 100 laptops, covering every price point and use case. Whether you’re looking for a productivity workhorse, a badass gaming system, or a multimedia machine to kick back and watch a movie or two, we can help you find your ideal match.
To make our best laptops of 2026 list, the system needs to score at least 4 out of 5 stars on our reviews and deliver on the things shoppers care about most. Our evaluations focus on design and comfort, display quality, the keyboard and touchpad, performance, battery life, and value.
Our expert reviewers also test each product to see how it looks, feels, and performs in everyday situations. Because we see so many different notebooks, we can compare each to its direct competitors and give you an idea of how it compares to the average laptop in its price band.
When we bring a laptop into our laboratory, we aim to see how it would work if you brought it into your home or office. While we use industry-standard benchmarks such as Geekbench and 3DMark, we focus heavily on real-world tests that we have developed in-house.
To test endurance, the Laptop Mag Battery test surfs the web at 150 nits of brightness until the system runs out of juice. We use a giant spreadsheet macro that matches 65,000 names with their addresses to judge pure processing power, the Handbrake video transcoder converts a 4K video to 1080p, and the Geekbench 6 synthetic test. We measure graphics prowess with both 3DMark Ice Storm / Fire Strike and a series of games, including Assassin's Creed: Mirage, Shadow of the Tomb Raider, and Red Dead Redemption 2, just to name a few.
We use a colorimeter to measure screen brightness and color gamut, while other instruments help us determine a laptop's key travel and ambient heat. For more details on our benchmarking procedures, see this page on how we test laptops.
Following these tests, the laptop is given to our expert reviewers for extensive hands-on testing. Our reviewers will spend days using the laptop as part of their typical workflow to get a sense of the real-world performance and live with the laptop to come away with a thorough understanding of the hardware and software experience. This blended lab testing and hands-on approach allows us to offer you a clear and comprehensive view of every laptop that comes through Laptop Mag.
FAQs
Q: When is the best time to buy a laptop?
A: This will vary depending on whether you prioritize the latest hardware or the best value when you are buying a laptop.
If it's the former, you will want to buy a laptop sometime between late January and early June. New laptop chips are typically announced at CES in Las Vegas in early January, and these models usually ship by early June.
For anyone more focused on value, picking up a new laptop sometime in July through December is the better bet. This is when some of the biggest deals events of the year happen, with Amazon Prime Day in July and October, and then Black Friday in November, leading directly into end-of-year sales.
While these are good general rules, there are always exceptions. The new MacBooks typically arrive in March and November every year, while mid-year refreshes to various laptops happen in the second half of the year as well.
We also track the best laptop deals all year long, and while those major sales events offer the widest range of discounts, there are plenty of smaller sales throughout the year. These can offer individual deals that are as good or better than what we see during the bigger events.
Q: What are the best laptop brands in 2025?
A: This question comes up regularly, but there isn't an easy answer that will be universally applicable to every laptop from any manufacturer. Most major laptop brands offer a broad spectrum of laptops that range from affordable to premium, with the latter expectedly offering superior build quality, components, and often more limited bloatware. I would generally recommend that you stick to consulting individual reviews rather than trying to view a brand as entirely safe or entirely bad. Our lab testers and reviewers will find flaws in a laptop if they exist, and a great laptop can come from any brand.
When it comes to tech support, viewed as a combination of both support and warranty coverage, we do have stronger opinions. Based on our most recent Tech Support Showdown special report, Apple, Razer, and Lenovo stand out as among the best. Acer, Asus, Dell, and Microsoft are a step below that top group but still excellent. Samsung and HP represent the next tier, missing a few of the extras available to the top groups, while MSI falls to the bottom of our list.
Q: Is an AI laptop worth it in 2025?
A: Following the explosion of generative AI, including chatbots like ChatGPT, AI PCs are sweeping the industry along with new chips geared toward AI like Qualcomm's Snapdragon X Elite, Intel's Lunar Lake, Apple's M4, and AMD's Ryzen AI 300-series. AI may soon supercharge your computing experience, but today, Laptop Mag hasn't found many game-changing AI features, even with Microsoft's Copilot+ PC push. But we are seeing groundbreaking improvements in performance and efficiency thanks to these new chips. So we wouldn't direct you to purchase a laptop specifically because it is an AI PC, but some of the latest AI PCs are the best laptops overall.
Q: Should I get a MacBook, Windows laptop, or Chromebook?
A: This is a good early question to decide on when identifying the best laptop for you and it largely depends on your needs, budget, and what kind of experience you are looking for overall.
MacBooks are known for premium build quality, long battery life, and solid performance. The current MacBook lineup uses Apple's M4 chip, but there are variations to consider when looking at the MacBook Air vs. MacBook Pro. If you're heavily invested in the Apple ecosystem already (iPhone, iPad, AirPods, etc.), that may tip you to one of the best MacBooks, as Apple offers excellent integration between them. Price or software are the factors that may drive you away from the MacBooks, as they start at $999, and not all Windows software and games are available on MacOS.
Windows laptops cover the full gamut of laptops available in 2025 — starting with budget models for under $500 and ranging up to gaming laptops or workstations for $4,000 or even more. The vast majority of the best laptops live somewhere in between, but this shows the versatility available on the Windows side. If you have specific software needs that are only available on Windows, whether that's games or enterprise software, that may be the decision maker. Finally, in 2025, there's no denying that Windows has the edge regarding AI integrations with Copilot+ PCs and other AI laptops.
Chromebooks are usually the most affordable option available, and while their capabilities have grown in recent years, they remain the ideal choice if you are doing basic tasks like browsing, streaming, or simple productivity work (Google Docs, Sheets, etc.). If you need a simple and affordable laptop that won't cause you headaches with troubleshooting, the best Chromebooks are an excellent option.
How to Find the Right Laptop
When shopping for a laptop, there's a lot to consider. To help you choose a system, we've included our up-to-date list of favorite notebooks above, along with five points to remember.
Budget: What you get for the money.
You can find good cheap Windows laptops and high-quality Chromebooks for under $500. However, better mainstream laptops usually cost over $700, and premium Ultrabooks are over $1,000. The best gaming laptops can cost $2,000 and up, but you can play the latest titles at decent frame rates on gaming laptops under $1,500.
Screen Size: 13 to 14 inches for portability
Knowing a laptop's screen size tells you a lot about its overall portability. If you want to carry it regularly, go for one with a 13 or 14-inch display. If it won't leave your desk too often, a 15- or 16-inch model gives you more screen real estate while remaining portable. Some gaming rigs, media machines, and workstations even have 17- or 18-inch screens, but consider how often you'll want to tote around these often 7+ pound laptops.
2-in-1 or clamshell?
More and more of today's laptops are 2-in-1s with screens that either bend back 360 degrees or detach so you can use them as tablets. If you like the idea of using your laptop in slate mode for drawing, media consumption, or just standing up, a 2-in-1 could be for you. However, like an Ultrabook or any thin-and-light laptop, you can often get better features or a lower price by going with a traditional clamshell-style laptop, so consider your priorities.
Battery life: 11+ hours for portability
Battery life matters unless you only plan to use your laptop on your desk. Even within the home or office, having plenty of juice enables you to work or play more freely, whether going to the couch or the conference table.
The last year has been a game-changer for laptop battery life with new chips extending battery life hours beyond what we were accustomed to. We recommend getting a laptop that lasts at least 10 hours on the Laptop Mag Battery Test. If you are a frequent traveler or a student regularly working away from an outlet, look for over 12 hours; there are plenty of options. The longest-lasting laptops endure for over 19 hours.
Specs: 1080p / 16GB RAM / 256GB SSD are minimums
You can spend hours digging into specs, but here are the key components to consider. With few exceptions, do not buy a laptop with less than 16GB of RAM, a 256GB SSD, and a 1080p screen. While some of the best Chromebooks or best laptops under $500 may justify dropping below these minimums, in general, you will expand your laptop's usable life and guarantee a more enjoyable user experience by sticking to these guidelines.
- Screen Resolution: Don't settle for anything less than a 1920 x 1080 (aka 1080p or full HD) resolution. If you're a content creator, you'll want to look into at least a 2K resolution panel or even a 4k laptop. Gamers should pay attention to the refresh and response rate. We recommend 144Hz and 3-millisecond, respectively.
- CPU: An Intel Core Ultra 5 provides good mainstream performance. Get a Core Ultra 7 or 9 for gaming or high-end productivity tasks such as video editing and 3D modeling. AMD is enjoying a renaissance with its Ryzen line of processors. Ryzen 200 series doesn't focus on AI performance, while the Ryzen AI 300 covers high-end performance and AI needs. And, of course, we can't forget Apple, with its M-series chips, including the current Apple M4 based on ARM architecture, which has taken the industry by storm. Speaking of ARM-based chips, Qualcomm is the newest player in the laptop chip market, and its Snapdragon X Elite and X Plus chips are strong contenders as well.
- RAM: 16GB is the right choice for most users as it will ensure better performance over your laptop's life. Professional power users, content creators, and gamers will look for 32GB and beyond, but that is overkill for most people. While we would not recommend 4GB systems in general, if it is a secondary laptop that will see use predominantly for light web browsing and steaming, it will suffice.
- Storage: 256 GB of internal storage is probably enough unless you're a gamer, content creator, or power user. On budget laptops, look out for eMMC memory; while still flash memory, it is much slower than an SSD.
- Graphics Chip: Gamers and creative professionals should get one of the latest Nvidia GeForce RTX 40 series or AMD Radeon 7000 series GPUs. Laptops with the latest Nvidia GeForce RTX 50 series just started shipping in March with many more expected in April and May, so wait for those if the latest and greatest are critical to you. Everyone else will be happy with the CPU's built-in integrated graphics (iGPUs), which have improved considerably in recent years.
Why Trust Laptop Mag
Laptop Mag reviews over a hundred laptops yearly, from paperweight ultralights to everyday workhorses to lumbering gaming notebooks that scorch the frame rates of even the hottest AAA games. We're not just experts in the laptop field, as we go one step further by meticulously testing smartphones, tablets, headphones, PC accessories, software, and even the latest in gaming.
We are 100% independent and have decades of experience to help you buy with confidence. In fact, Laptop Mag has been testing and reviewing products for three decades and continues to deliver trustworthy reviews you can rely on.
Our experienced team of writers and editors scour the available information about the laptop and put it through its paces to determine which is best for you. But before they start, the testing team subjects each system to a rigorous regimen of synthetic and real-world tests to see how a system handles the type of work and games you’re most likely to throw at it.
One of the world's largest technology publishers, Future Publishing, enforces our editorial trustworthiness. As a company, we have unrivaled experience across every tech sector — and we're the group's specialist for all things mobile tech.
