How to Create a Guest Account in Windows 10
Sign up to receive The Snapshot, a free special dispatch from Laptop Mag, in your inbox.
You are now subscribed
Your newsletter sign-up was successful
Windows' guest account lets other people use your computer without being able to change PC settings, install apps or access your private files. That comes in handy when you have to share your computer temporarily. In Windows 10, you can no longer easily turn on the guest account from the Control Panel. Here's a workaround to enabling a guest account -- that actually works.
Across the web, you'll find articles that tell you how to enable the "hidden" guest account in Windows 10, using the Command Prompt or the group policy editor in Windows. While these methods do make it look like the guest account is enabled, they don't actually work. When you try to switch to the guest account, you'll be instead forced to log into your current account.
There is a method, however, that I've tried that does work, adapted from a tip offered by Super User member The Professional: Create a new user account and assign it to the guests group. This will make that account act the same way the built-in guest account should: The user will be able to use your computer without accessing settings or installing apps. Since "Guest" is a reserved account name in Windows, we'll use "Visitor."
- Here's how To Disable Taskbar on a Second Monitor in Windows 10
- This is how to Take a Scrolling Screenshot in Windows 10
- See how to Hide a Recovery Partition (or Any Disk) in Windows 10
- Click-clack: Here's how to enable keyboard typing sounds in Windows 10
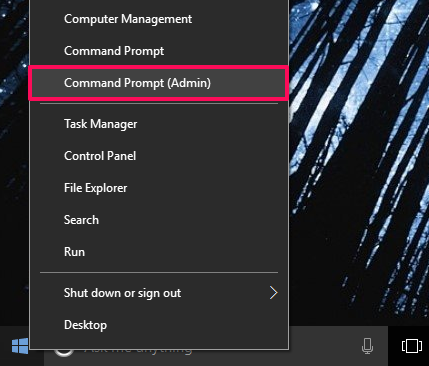
1. Right-click on the Windows button and select Command Prompt (Admin). This is the quickest way to open the Command Prompt as an administrator.
2. Click Yes when asked if you want to continue.
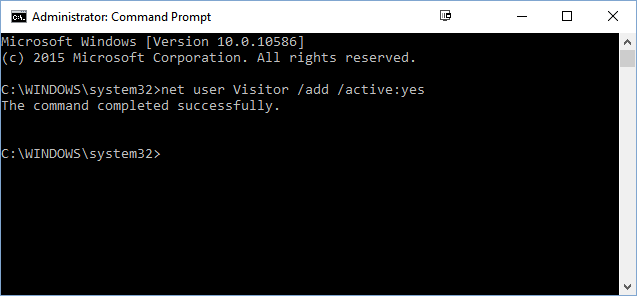
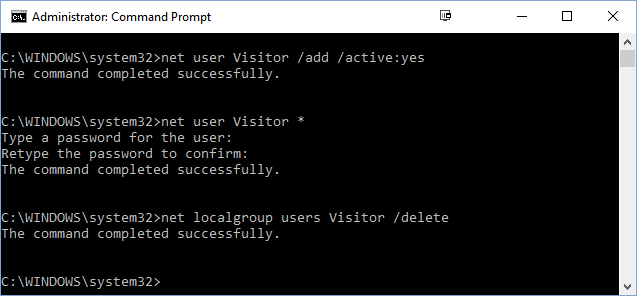
3. Type the following command and then click Enter:
net user Visitor /add /active:yes
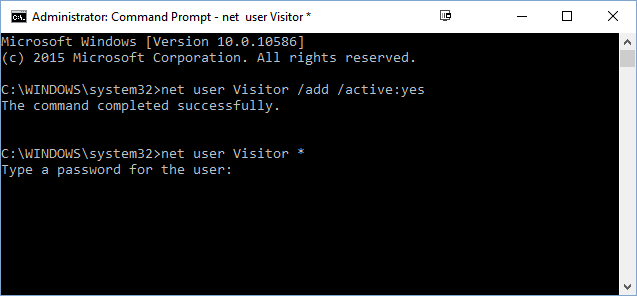
4. Press Enter twice when asked to set a password. This will create a blank password for the account.
Sign up to receive The Snapshot, a free special dispatch from Laptop Mag, in your inbox.
5. Type the following command and then hit Enter:
net localgroup users Visitor /delete
This removes the Visitor user from the default users group.
6. Type the following command and then hit Enter:
net localgroup guests Visitor /add
This adds the Visitor user to the guests group, which is more restricted than local users.
That's all there is to it. You can now close the Command Prompt window.
How to Switch to the Guest Account
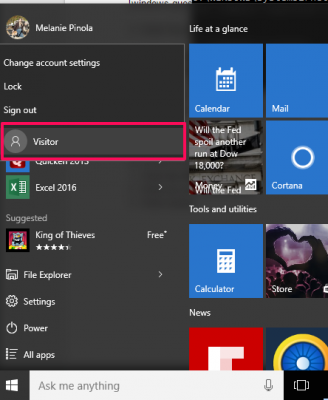
1. Click the Windows button.
2. Click on your username.
3. Click Visitor.
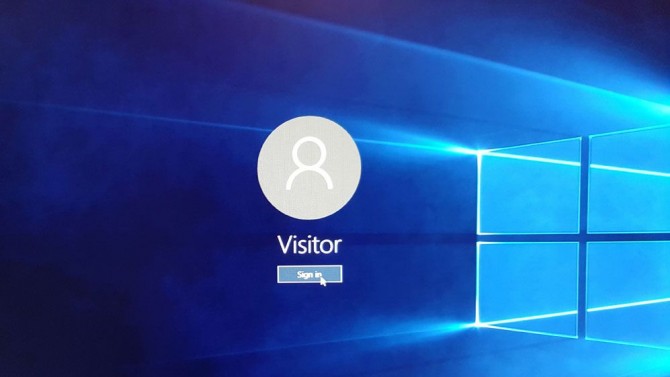
Alternatively, you can choose the Visitor account from the Windows login screen.
Now that you've learned how to create a guest account in Windows 10, why not figure out how to map a network drive so you can quickly access shared folders, or read our guide on how to access the BIOS on your Windows 10 system to change important settings.
Windows 10 Security and Networking
- Use the Windows 10 Parental Controls
- Find Your MAC Address
- Turn Your Windows PC into a Wi-Fi Hotspot
- Password Protect a Folder
- Create a Guest Account in Windows 10
- Enable Windows Hello Fingerprint Login
- Set Up Windows Hello Facial Recognition
- How to Restrict Cortana's Ever-Present Listening in Windows 10
- Automatically Lock Your PC with Dynamic Lock
- Blacklist Non-Windows Store Apps
- Find Saved Wi-Fi Passwords
- Set Up a Metered Internet Connection
- Use Find My Device
- Stream XBox One Games
- All Windows 10 Tips
- Map a Network Drive
- Create Limited User Accounts
- Set Time Limits for Kids
- Pin People to Your Taskbar
Melanie was a writer at Laptop Mag. She wrote dozens of helpful how-to guides, covering both the software and the hardware side of things. Her work included topics like SSDs, RAM, Apple, Excel, OneDrive, and detailed guides for Windows users. Outside of all her useful advice, Melanie also penned a few reviews for Laptop Mag, including Android emulators that help you run apps on your PC.
