How to Transform Your Text Case in Excel
Hopefully by now you’re getting the picture that editing individual cells within Excel is a timesuck, and should be avoided at all costs. This tutorial is no exception. When editing your cells to capitalize the first letter of specific entries -- or perhaps the whole thing -- it’s best left to Excel’s tools to automate the process, rather than picking through entries one by one.
Today we’re going to learn how to do just that.
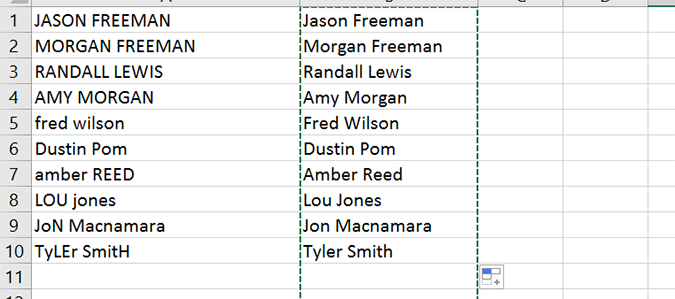
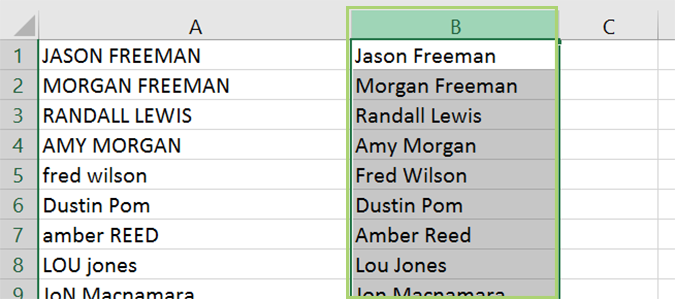
1. Open an Excel workbook.In this case, I’m just going to use a new workbook, and add a set of dummy data (names) using all sorts of random cases, both capitalizing entire names, and just random letters.
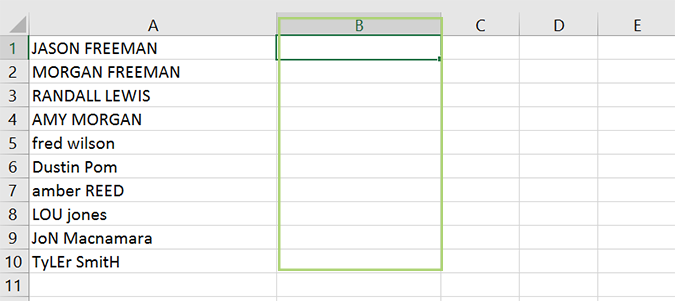
2. Use the column to the right of column A (column B) to create a temporary column. You can delete this later, or use a blank column elsewhere on the page, if needed. You don’t need to move any of your existing data if it’s already in column B.
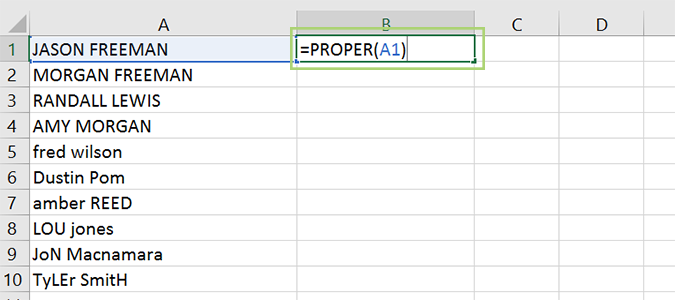
3. In cell B1, type the following: =PROPER(A1) and then press Enter.
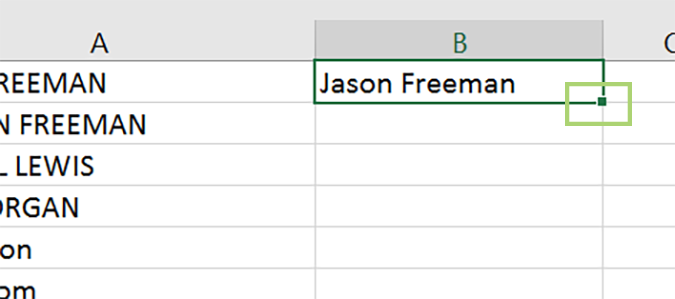
4. Grab the little square in the bottom right of cell B1, and drag it down to the end of your data set. This will apply the formula to each of the cells in column A.
5. Now we’re going to select all of the names in that column, and press CTRL + C to copy.
Sign up to receive The Snapshot, a free special dispatch from Laptop Mag, in your inbox.
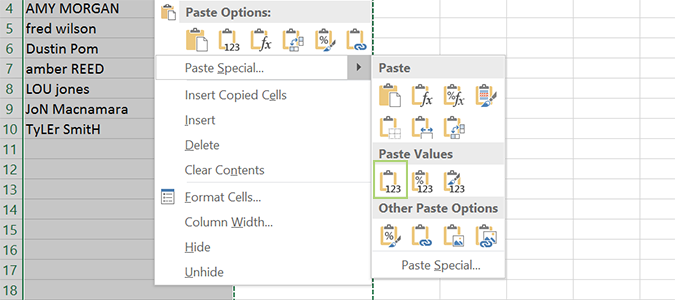
6. Right click in cell A1 (or the appropriate area on your workbook), and click Paste Special > Values. This pastes just the names, and not the underlying formula that created them -- which you shouldn’t need at this point.
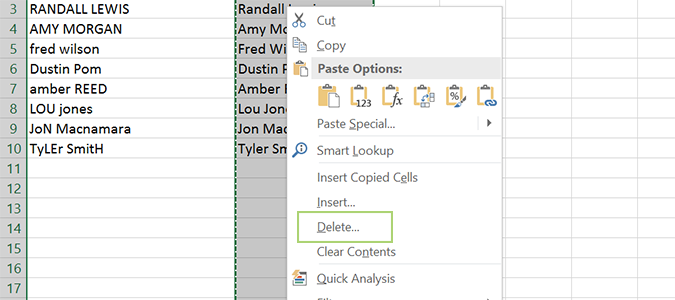
7. Select column B again, and delete it, shifting the cells to the left once you do.
Microsoft Excel Tips
- Use VLOOKUP in Excel
- Back Up Files Automatically in Excel
- Remove Duplicate Data in Excel
- Create a Waterfall Chart in Excel
- Lock Cells in Excel
- Freeze Rows and Columns in Excel
- Build a Forecast Chart in Excel
- Create a Funnel Chart in Excel
- Make a Treemap in Excel
- Convert Excel Sheets to Google Sheets
- Open Google Sheets in Excel
- Combine Data from Different Cells
- Merge Cells to Span Multiple Columns
- Use AutoFill for Repetitive Data
- Copy and Paste Repetitive Data the Easy Way
- Use Text to Columns
- Draw Diagonal Line in a Cell
- Create a New Shortcut Menu
- Transpose Columns Using Paste Special
Bryan covers everything you need to know about Windows, social media, and the internet at large for Laptop Mag. Thanks to his extensive knowledge of operating systems and some of the most popular software out there, Bryan has written hundreds of helpful guides, including tips related to Windows 11 drivers, upgrading to a newer version of the OS, editing in Microsoft Photos, or rearranging pages in Google Docs.
