How to Make Word 2016 Show All Changes Inline
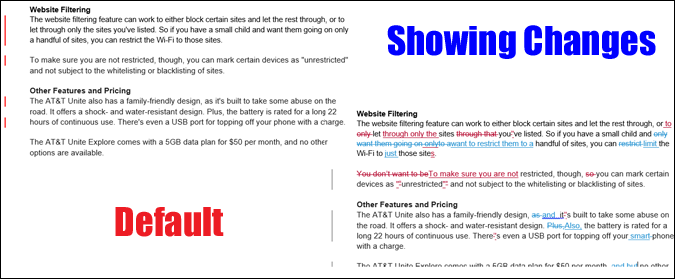
One of Microsoft Word's most useful features is its ability to track changes when someone edits your document. Annoyingly, Word 2016 tracks those changes but does not actually show all of them by default. So, if someone has erased a word or added a new phrase, you can accept those changes but you can't view them beforehand, unless you tweak one setting.
Here's how to get Word 2016 to show changes.
1. Open a document in Word if one is not already open; it can be a blank one.
2. Click the Review Tab.
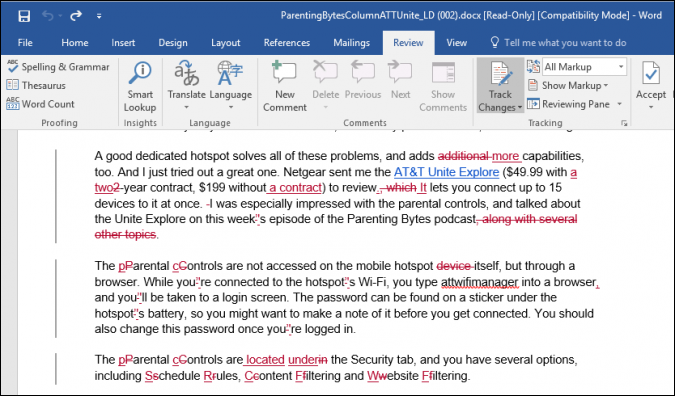
3. Select "All Markup" from the pulldown menu that's to the right of the Track Changes button. It shows "Simple Markup" by default.
The changes your editor made will now appear inline in different colors.
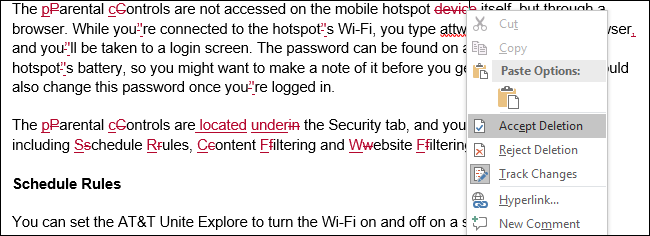
Right-click each potential change to accept or reject it.
Sign up to receive The Snapshot, a free special dispatch from Laptop Mag, in your inbox.
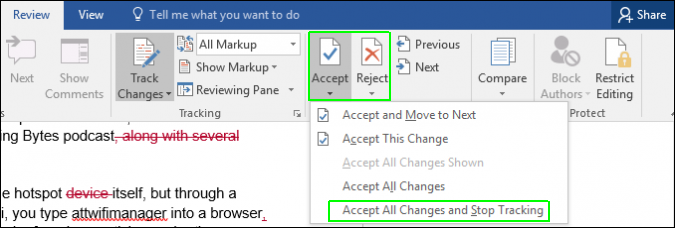
Accept or reject all changes by using the Accept or Reject buttons in the ribbon and selecting the "Accept all" or "Reject all" options.
Microsoft Word Tips
- Show Formatting Marks in Microsoft Word
- See All of Microsoft Word's Keyboard Shortcuts
- Select All Text with Similar Formatting in Microsoft Word
- Create Table Templates in Microsoft Word
- Use Microsoft Office's Lorem Ipsum (Random Text) Generator
- Add a Table of Contents in Word
- Co-Edit a Document in Word
- Add or Remove Page Breaks in Word
- Put Microsoft Office into Touch-Friendly Mode
- Compare Docs Side-by-Side
- Configure Spell Check and Autocorrect
- Remove Double Spaces After a Period
- Compare and Combine Two Docs
- Copy and Paste Text from Multiple Locations


