How to Install QuickTime on Windows 10
If you're switching from a Mac to a PC, one thing you wind up losing is the proprietary technology that Apple bakes into OS X. The QuickTime player software — which allows for a number of streaming videos to play — is one of those pieces you'll need to add on your own.
Apple, to its credit, makes it easy for Windows users to download and add QuickTime to their PCs. Once you have QuickTime installed, your PC can play the HD movie trailers that Apple streams online, video clips recorded on Apple devices and various other videos that are broadcast over the internet.
One note: you may notice that Apple only lists Windows Vista and Windows 7 in the QuickTime download page, but rest assured, we've tested this download and it works on Windows 10. Here's how to install QuickTime, and we've also included a link to a website with plenty of QuickTime-formatted videos.
How to Install QuickTime on Windows 10
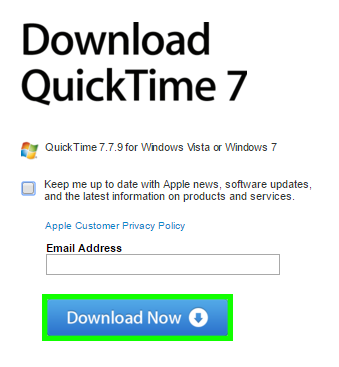
1. Visit the QuickTime download page and select Download Now. You don't need to fill in your email address, and you can uncheck the "Keep me up to date" box.
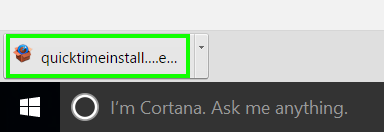
2. Open the downloaded file quicktimeinstaller.exe.
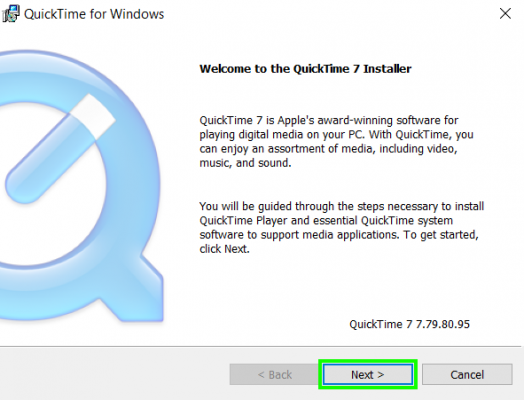
3. Select Next.
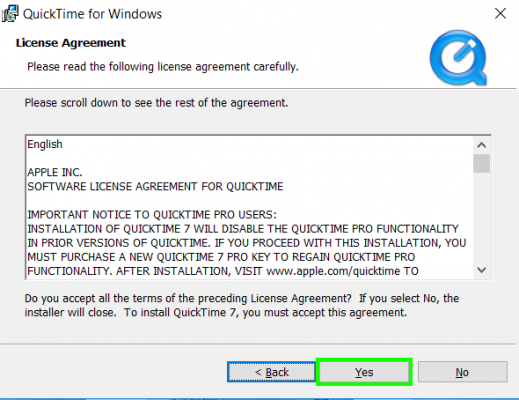
4. Select Yes.
Sign up to receive The Snapshot, a free special dispatch from Laptop Mag, in your inbox.
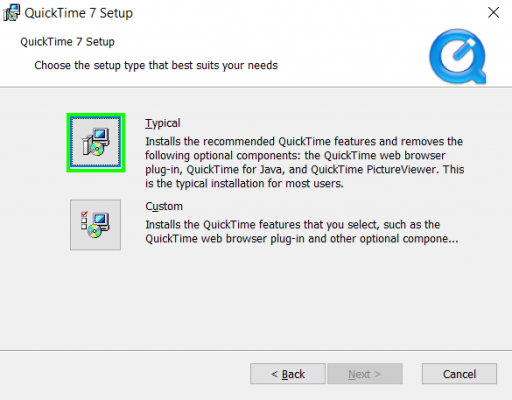
5. Tap on the icon next to Typical.
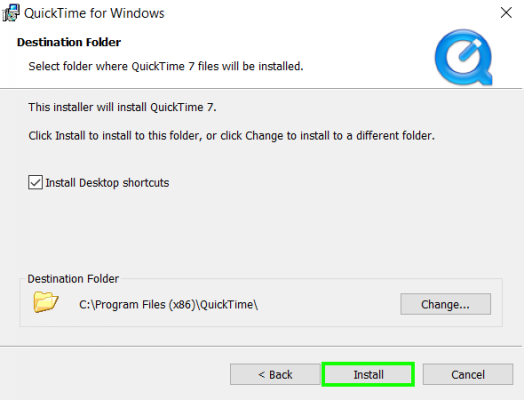
6. Click Install. Feel free to uncheck the box next to Install Desktop shortcuts. You probably will wind up deleting that shortcut if it's installed.
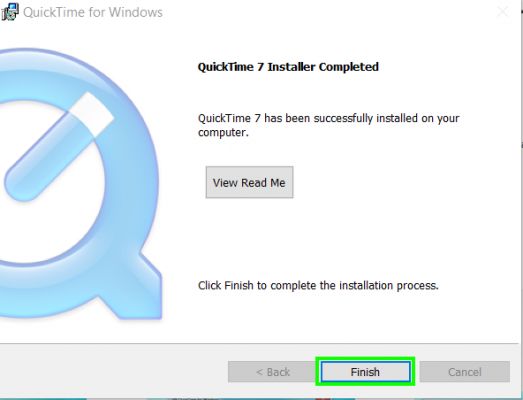
7. Select Finish.
Congrats, QuickTime for Windows has been installed. Here's a link to Apple's Movie Trailers site, where you can put QuickTime to use!
Mac to PC Guide: How to Make the Switch
- Create a Microsoft Account
- Set Up and Use iCloud on Windows
- Format a Hard Drive For Both Windows and Mac
- Move Your Mac files to a Windows PC
- Convert Mac-Specific Files To Work on Windows 10
- Authorize Your New PC with Your iTunes Account
- How to Import iPhone Photos to Windows 10
- A Guide to Windows 10 Touchpad Gestures for Mac Users
- A Mac User’s Guide to Windows 10 Keyboard Shortcuts
- Sign Into Facebook and Twitter in Windows 10
- Set Up iCloud Email and Calendars on Windows 10
- How to Force Quit in Windows 10
- How to Install Apps in Windows 10
- Make Desktop Shortcuts in Windows 10
- Snap 4 Windows at Once in Windows 10
- How to Use Cortana in Windows 10: Tips and How-Tos
Henry was a contributing writer at Laptop Mag. He penned hundreds of articles, including helpful how-tos for Windows, Mac, and Gmail. Henry has also written about some of the best Chromebooks, and he has reviewed many Apple devices, including various MacBook Air laptops. He is now a managing editor at our sister site Tom's Guide, covering streaming media, laptops, and all things Apple.
