
Want a big expansive view of your data, websites, games, and apps but can’t afford to splurge on a $1,000+ large 4K screen? There’s another way to go big – very big – on a monitor: put together your own dual-monitor display.
By mounting a pair of screens on a special stand, you can combine their abilities, creating an ultra-wide display that will not only make your work and play a lot easier, but will let you stretch out your data. I’ll show you how to do it from start to finish, and give you a few tips and tricks along the way to make the build quicker, easier and anxiety-free.
Don’t be intimidated, this is not a hard project to accomplish and all the tools you’ll need are included with the stand. Let’s start with the parts.
Screen starter
It all starts with the screens. While it’s best to get two displays of the same model, you don’t have to. Today’s monitors generally have enough adjustments for color, brightness and contrast so you can closely match two different models, making them seem like a single limitless expanse.
For the visuals, I’ll be using a pair of Acer CB242Y displays. They sell for about $140 each, although you can catch them on sale for $100. The screens have 1080p (HD) resolution, a gamer-friendly response rate of 1 millisecond and very narrow side bezels. This is important because a larger frame would show up where the two screens meet.

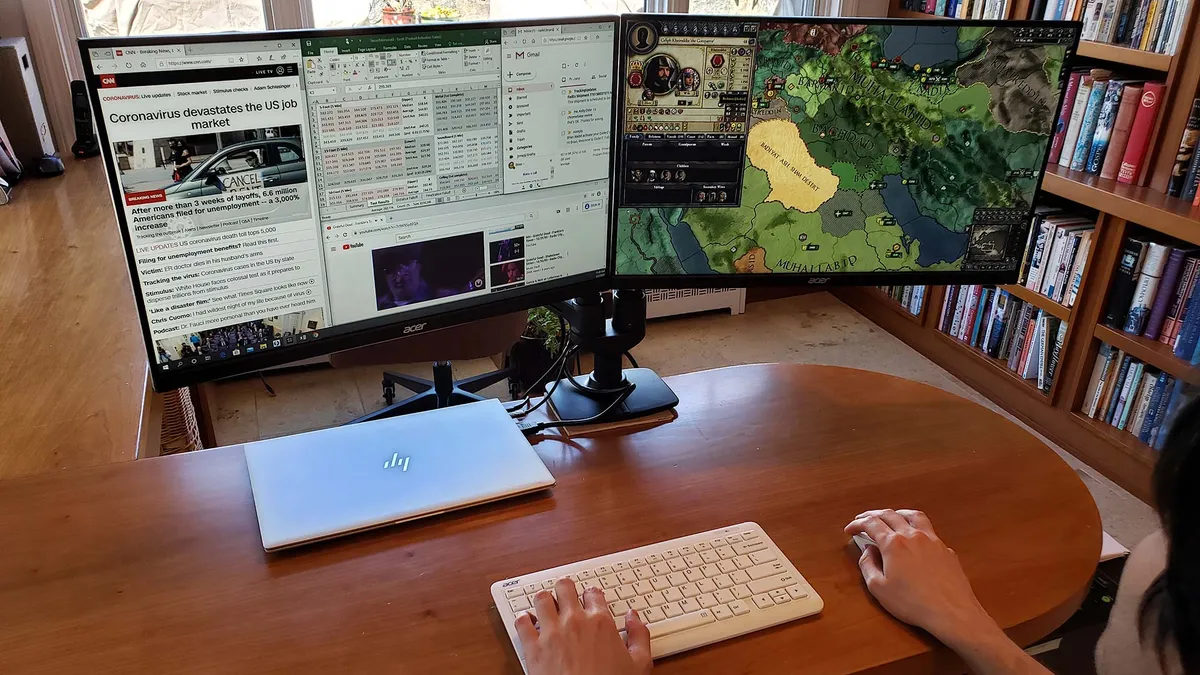
For me, the pair of 23.8-inch screens will yield the equivalent of a 43-inch display with a combined resolution of 3840 x1080. More to the point, it will be long and narrow enough to comfortably fit five or six open windows.
Stand by me
With its ability to hold the pair of displays securely next to each other, the Ergotron LX Dual Side by Side Arm clamped easily onto my desk. The key is that each arm is articulated and has a 100 millimeter VESA mounting plate for screwing into each screen. The arm’s pull-out cord tray does a pretty good job of hiding the power and video cables.

The stand allows each screen to be tilted or moved up or down so they meld into one continuous panel. The $300 stand can be ordered in silver or black, but there are cheaper alternatives. In addition to the LX, Ergotron makes a $275 LX Desk Dual Direct Arm.
Connect and conquer
There are two ways to connect my HP EliteBook G4 1040 to a pair of screens:
- If your computer’s graphics can handle it, the easiest method is to connect them directly to the laptop. For me, this means using its HDMI port and cable for one screen and a Plugable USB-C adapter cable for the other.
- Another method relies on an external graphics adapter, like Startech's $70 MSTCDP122HD; it creates two HDMI streams out of a USB-C connection.


While this build uses a notebook, it might be easier with a desktop computer. That’s because many tower systems have two video outputs, like an HDMI along with a DVI or VGA port.
Putting it all together
Now that we have all the parts ready to go, let’s put it together. I suggest starting with the stand, then adding the displays and finally, plugging it all in.
1. My first step is to clamp the stand to the desk. I’m using a thin piece of wood to protect the desk’s surface.

2. Next, I put the arm onto the base and got the first display ready.

3. Then, I screwed the mounting plate to the back of the display using the included thumbscrews.

4. Once ready, I put the display on the stand’s arm.

5. I finished by hiding the cables in the arm’s cord tray and pressing in the covers that hide the screw holes.


6. Repeat steps 2 through 5 with the second screen. The displays should look like a pair of wings.

7. Turn the computer on and plug an HDMI cable into the notebook’s port and the first display, followed by plugging the USB C-to-HDMI-adapter cable into the computer and second display.

8. There’s another way: I plug both screens into the Startech MSTCDP122HD with HDMI cables and then plug it into the USB-C port of the host notebook.

9. Either way, the computer’s Display Settings section now shows both screens. Click on Identify and the screens should display a “1/2” (for the host notebook and the left screen), and a “3” (for the right screen).

10. If they don’t match up with what’s on the computer’s display, reverse the cables. Finish by changing the Multiple Displays to Duplicate.

11. I want to use the notebook with its lid shut, so I go to the Advanced Settings section of the Power & Sleep category and set the system to not turn off when I close the lid.

12. I finish up by connecting the wireless transmitter for the wireless keyboard and mouse.

It’s a good idea to do some tweaking. Start by adjusting the height and angle of the screens to make them match. Then, set the distance from your chair to roughly two feet. You have two major layout choices: flat or angled. The former provides a long, narrow view of your apps and data, but you might need to refocus your eyes to see the extremities. The latter allows my head to be in the middle of the action, surrounded by two screens. I suggest setting them at roughly a 150-degree angle, which is a nice compromise.


When I’m happy with the layout, I tighten the stand’s screws with the included hex key.

Relax and enjoy the show
Now that it’s all done, I love the wide expansive view of my digital world. This project was well worth the time, effort and cost. All told, it’s not only bigger but better than a 42-inch display because, for me, the long narrow 3820 x 1080 resolution provides plenty of room to work with five or six horizontal windows. At a little more than $600 and 45 minutes of my time, the dual-display has transformed my desk and online life.
I frequently use it to play a game of Crusader Kings, while I try to do some work using Word, Excel and a browser window or two. It all fits without feeling crowded, making everything a lot easier.
This project worked so well that it’s got me thinking that two displays might not be enough. How does four screens sound?
Bill of Materials
| 1. Ergotron LX Dual Side-by-Side Arm | $300 |
| 2. Pair of Acer CB242Y displays | $220 |
| 3. Startech MSTCDP122HD | $70 |
| 4. Cables and adapters | $30 |
| Total | $620 |
Amount of time required: 45 minutes
