How to Sync Your Settings in Windows 10
With its synced settings option, Windows 10 allows owners of multiple devices to keep their system preferences in harmony. This way, you don't need to spend time with the repetitive work of manually entering theme customizations, browser options and various other settings into all of your machines.
All you'll need in order to take advantage of this feature is a Microsoft Account, and, if you don't already have one, we've got step-by-step instructions for how to make one. To enable the device sync:
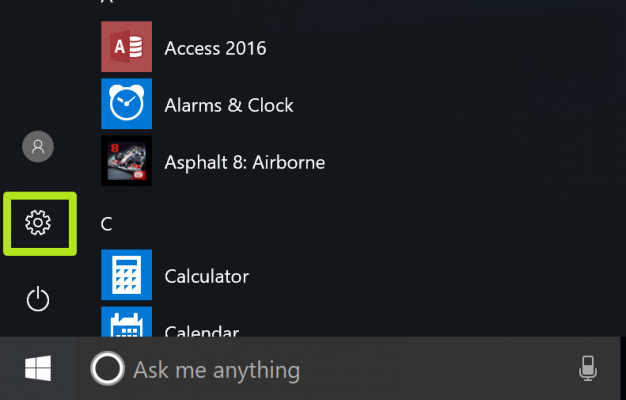
1. Click the Start button.
2. Click the Settings icon.
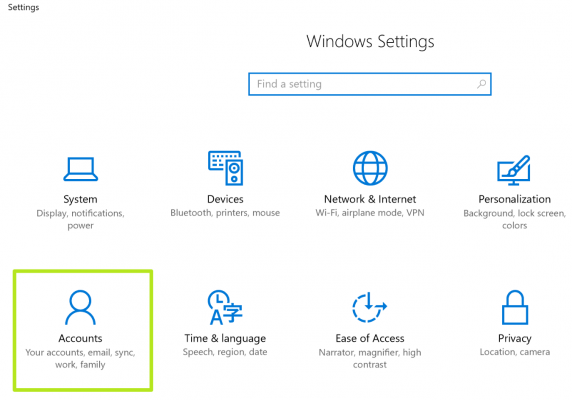
3. Click Accounts.
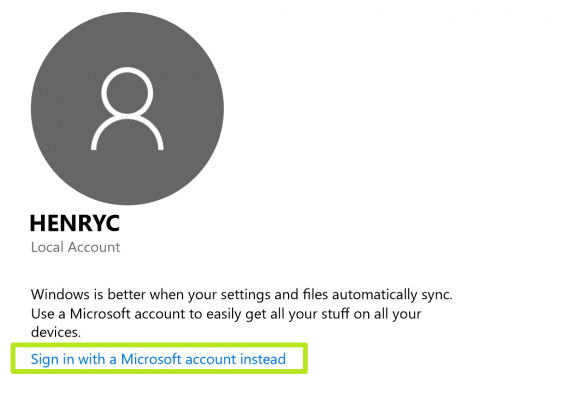
4. Click Sign in with a Microsoft account and enter your account information. Move to step 5 if you don't see that option.
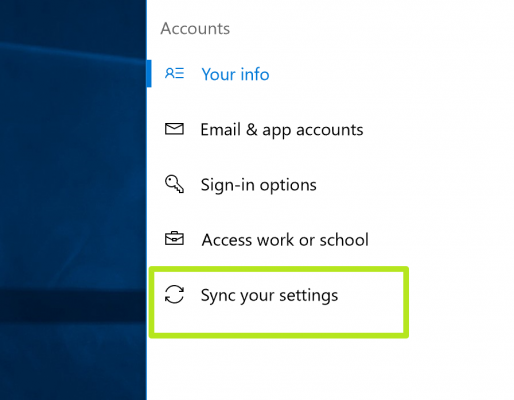
5. Click Sync your settings.
Sign up to receive The Snapshot, a free special dispatch from Laptop Mag, in your inbox.
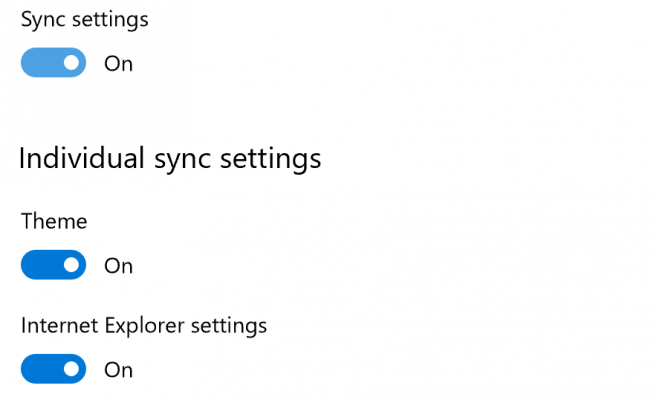
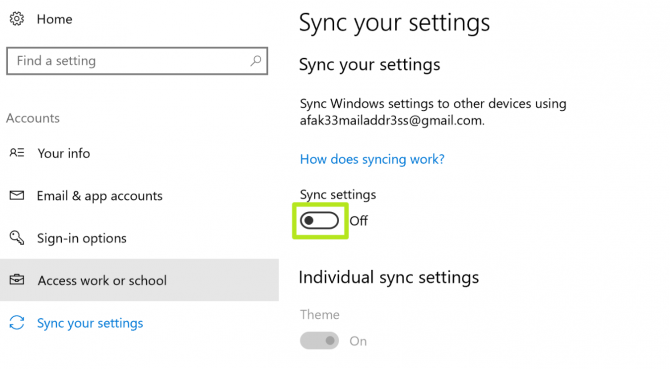
6. Turn on the switch next to Sync Settings. Apply steps 1-6 on your other Windows 10 machines.
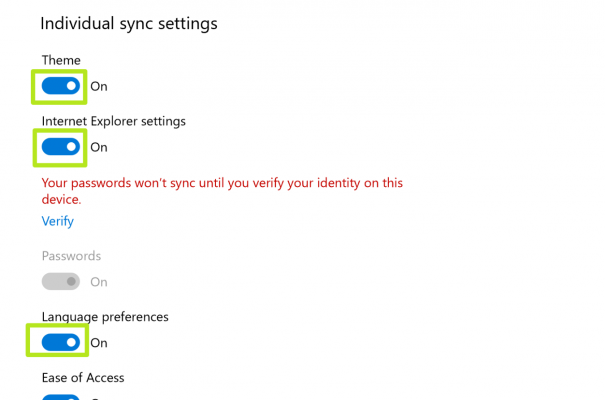
Disable any individual settings if you want certain things to not sync.
Windows 10 Basics
- 7 Settings to Change Right Away
- Windows 10 Keyboard Shortcuts to Save You Clicks
- 5 Ways to Take Screenshots
- Change Your Password in Windows 10
- Uninstall Programs in Windows 10
- Enable or Disable Tablet Mode
- Add a User (Child or Adult)
- Change the Screen Resolution
- Sync Your Settings Across Devices
- Sync iPhone with Windows 10
- Control Windows 10 with Your Voice
- Upgrade to Windows 10 From Windows 7 or 8
- Eliminate Blue Light With Night Light
- Create a New Folder
- Get to the Desktop in Windows 10
- Add a Printer
- All Windows 10 Tips
- Set Alarms
Henry was a contributing writer at Laptop Mag. He penned hundreds of articles, including helpful how-tos for Windows, Mac, and Gmail. Henry has also written about some of the best Chromebooks, and he has reviewed many Apple devices, including various MacBook Air laptops. He is now a managing editor at our sister site Tom's Guide, covering streaming media, laptops, and all things Apple.
