7 ways to improve sound on your MacBook
These hacks will give your MacBook a major sound boost
Sign up to receive The Snapshot, a free special dispatch from Laptop Mag, in your inbox.
You are now subscribed
Your newsletter sign-up was successful
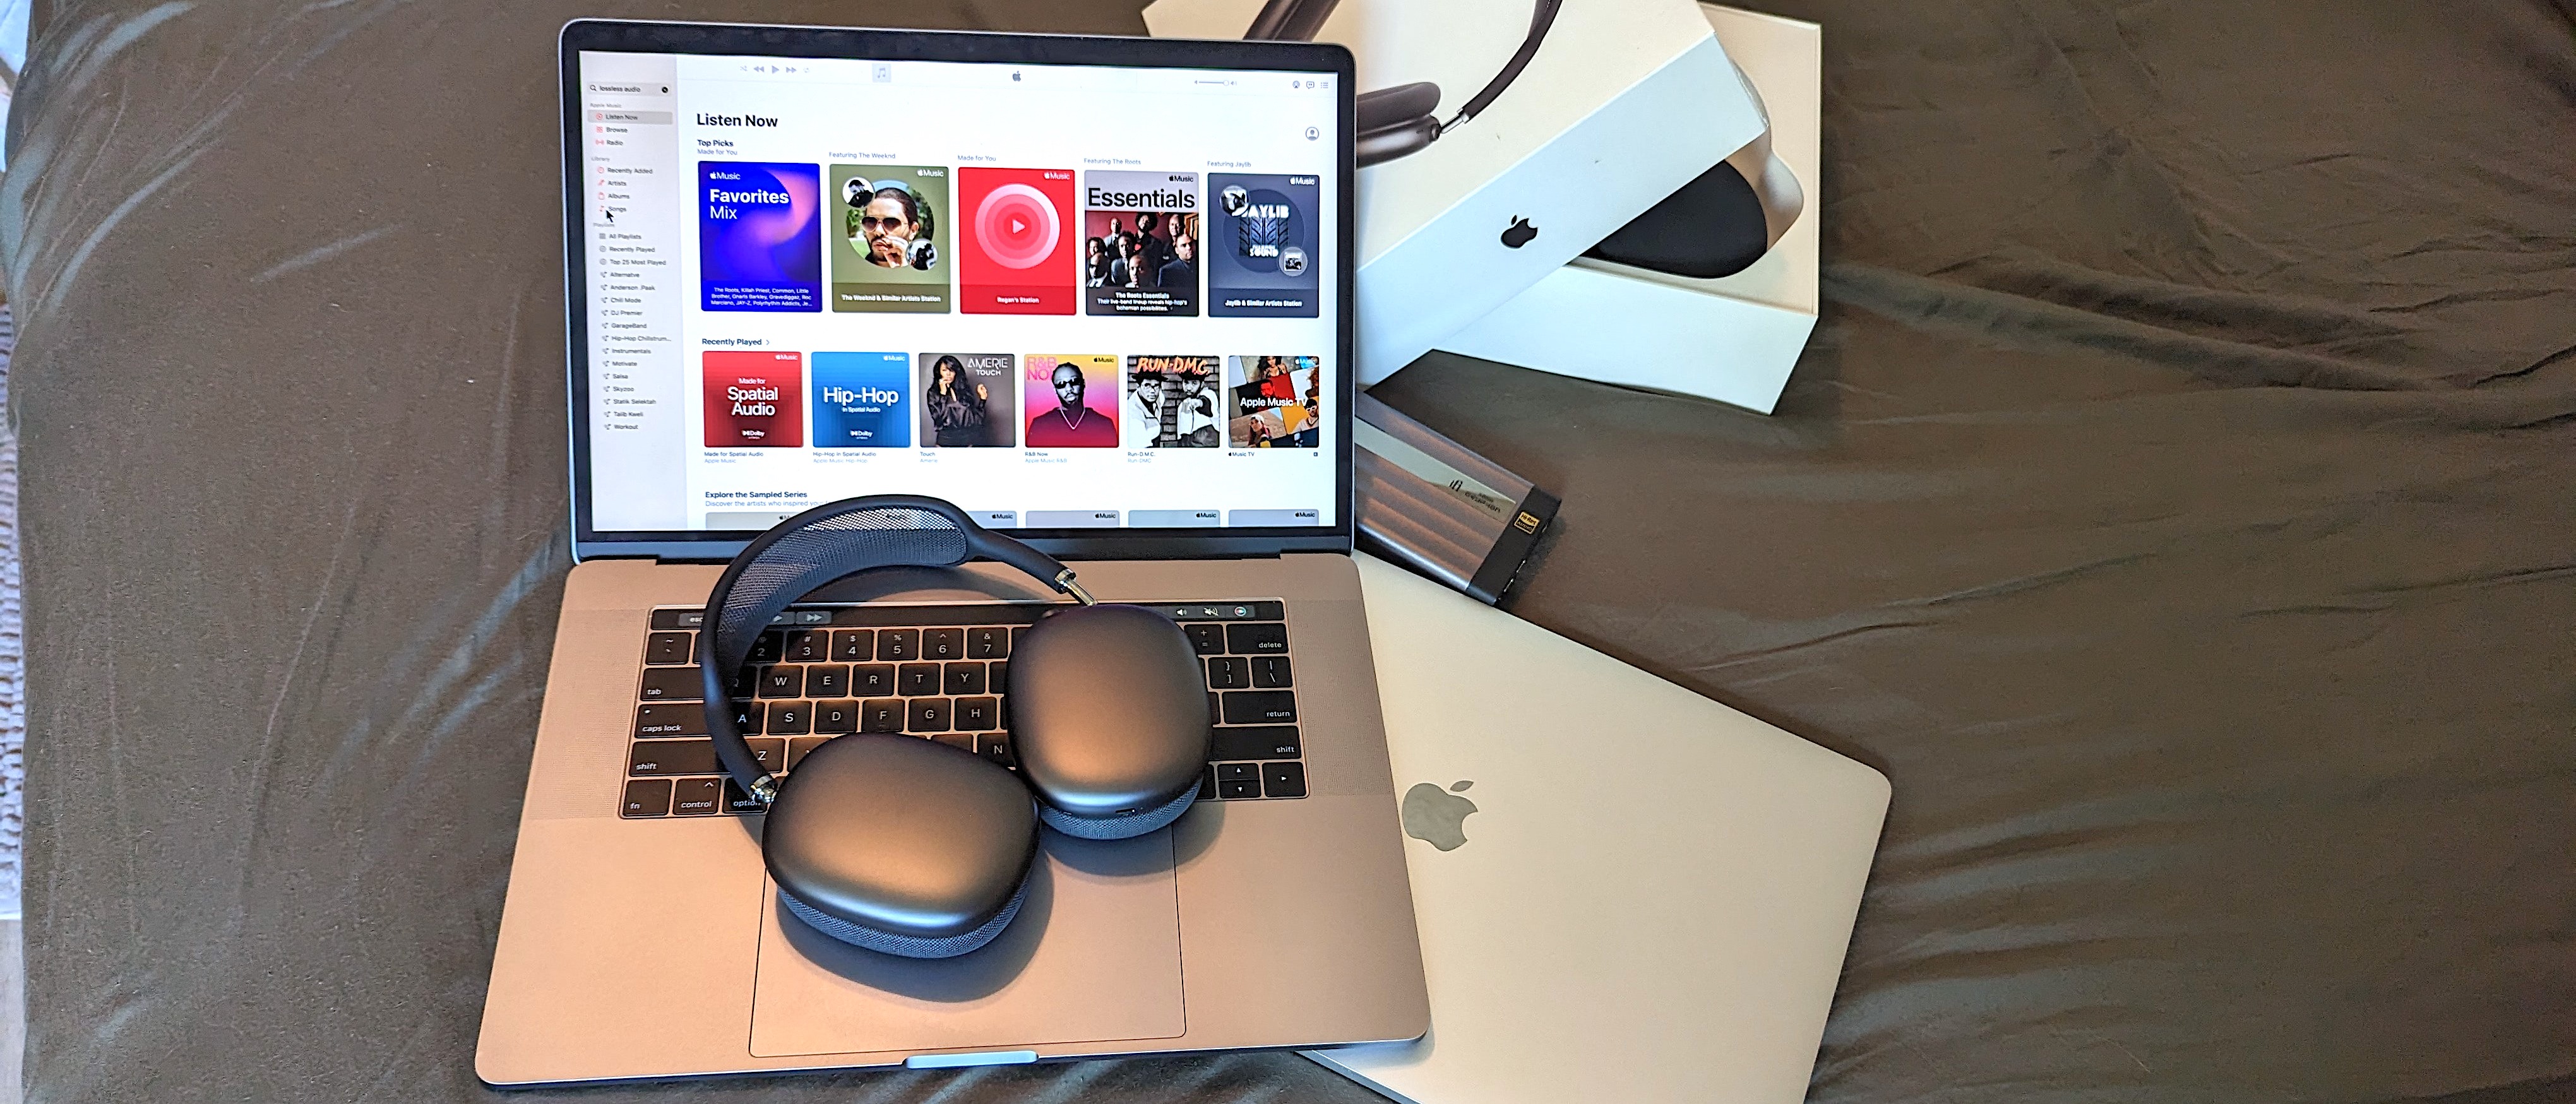
For some of us, our MacBook is our most prized possession. We rely on it to get work done at home or on the go, as well as roam the Internet, shop online, and socialize with family and friends (via FaceTime and Facebook/IG). Moreso, we value it as a stereo system to hear and enjoy our favorite media: music, movies, podcasts, video games, etc. There’s just one gripe: the sound on Apple’s laptops could be a lot better.
The speakers on current MacBooks are impressive. Also, the AirPods Pro 2 and AirPods Max deliver high-quality wireless sound, though their sonic capabilities are limited to within Apple’s ecosystem. For instance, the Apple Lossless Audio Codec (ALAC), which is the company’s newest lossless, hi-resolution sound technology, isn’t even supported by any AirPods model. Many of the best wireless headphones and best wireless earbuds won’t get you lossless audio on a MacBook either.
However, there are workarounds to achieve hi-res audio. It starts with some of the hidden menus in Apple Music and trickles down to third-party solutions that strengthen music presentation. Here are 7 tips and tricks that I’ve used to improve sound on a MacBook.
1. Use Apple Music’s Sound Enhancer
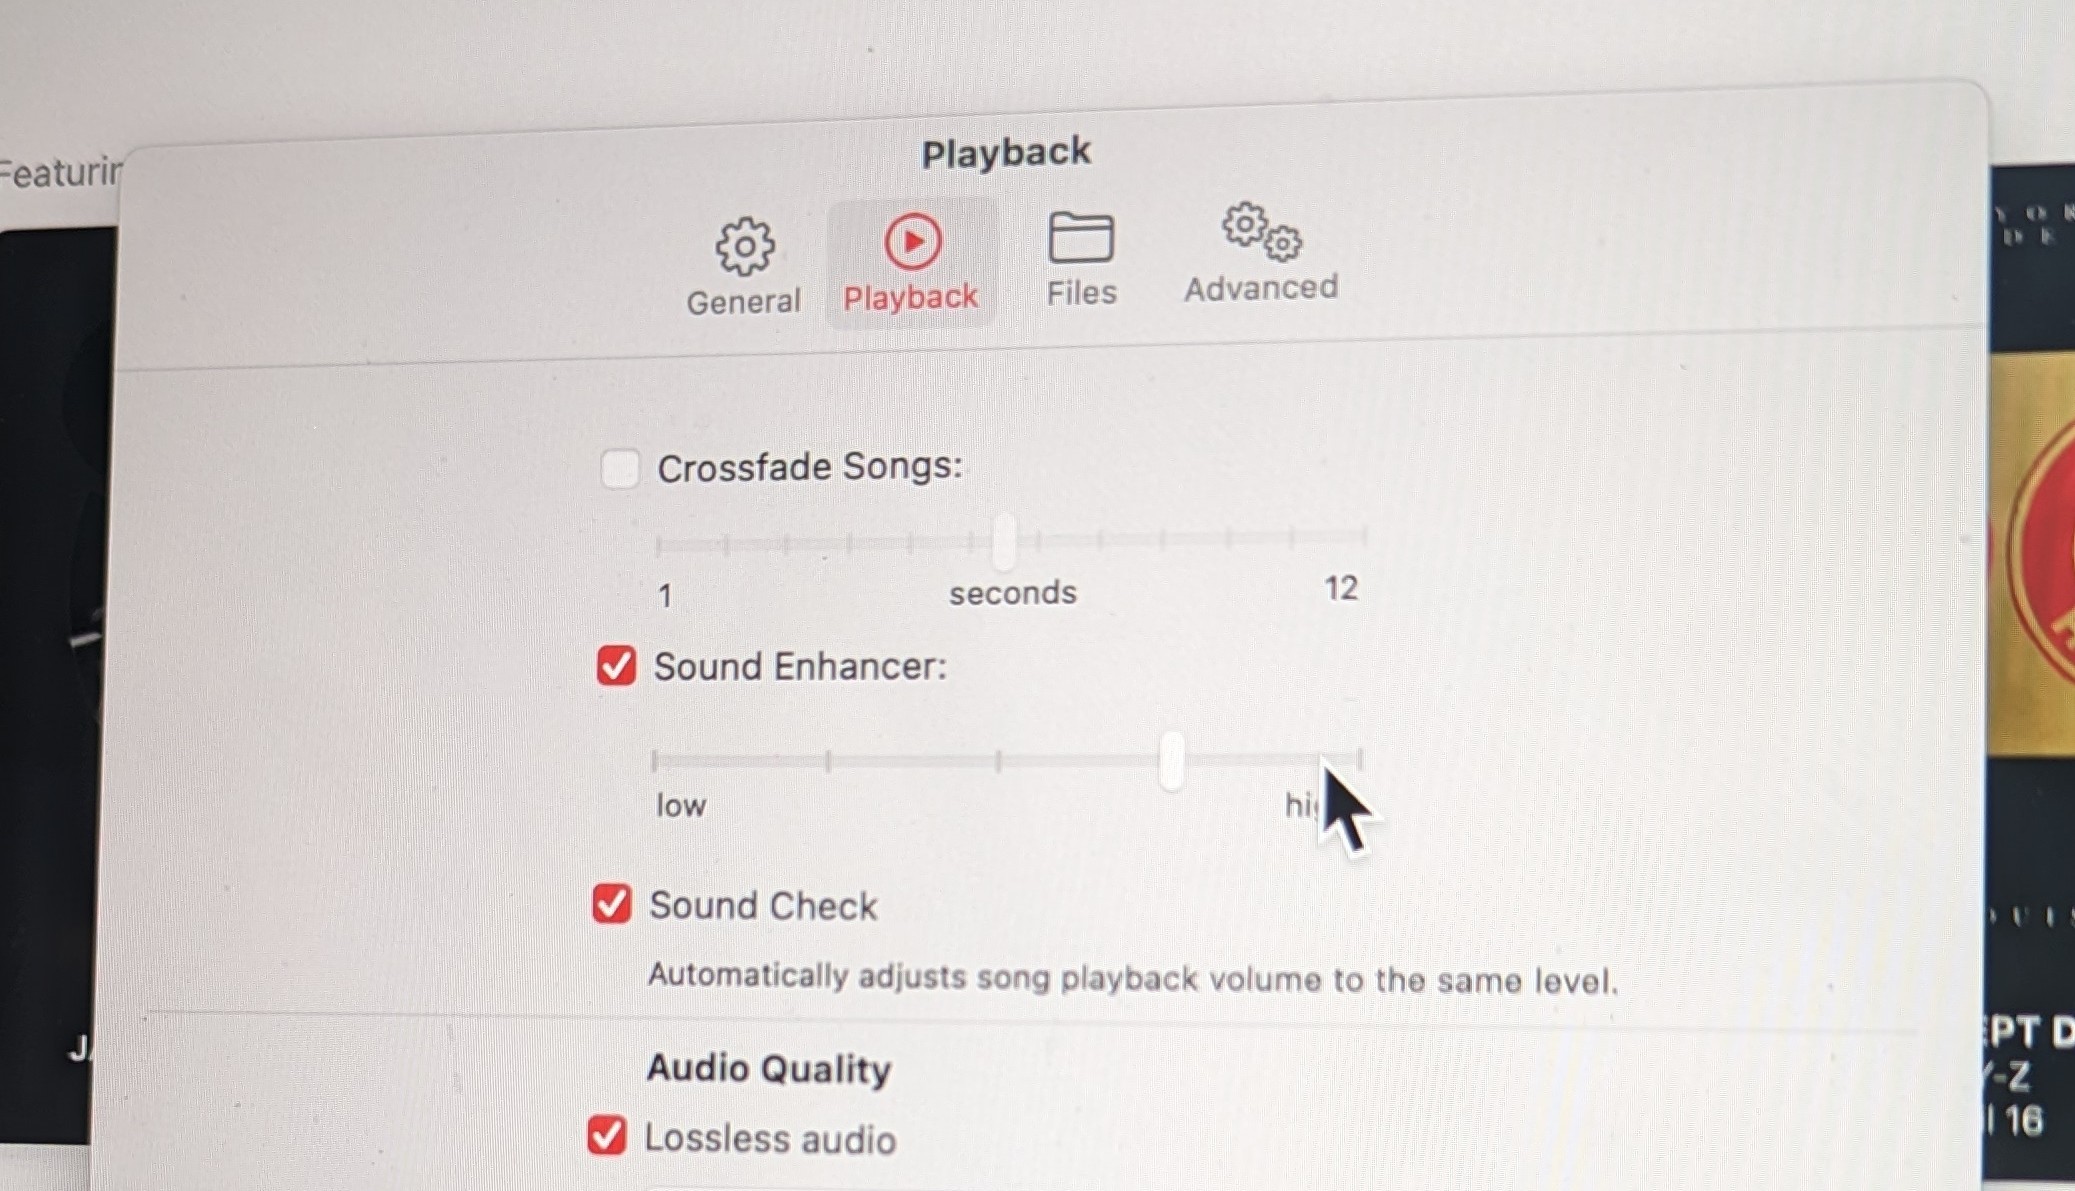
Sound Enhancer is a feature hidden within the Apple Music settings that increases the “perceived ‘wideness’ of the stereo effect by modifying bass and treble response.” Notice the slider that can be dragged to increase or decrease the effect. It takes about 3 seconds to kick in after adjustment and expands the soundstage to feel more bass and treble, depending on preference. I recommend testing it out on EDM, hard rock, and hip-hop tracks to see what works best for you.
Music tab > Settings > Playback > Sound Enhancer
2. Pair your Mac with a DAC
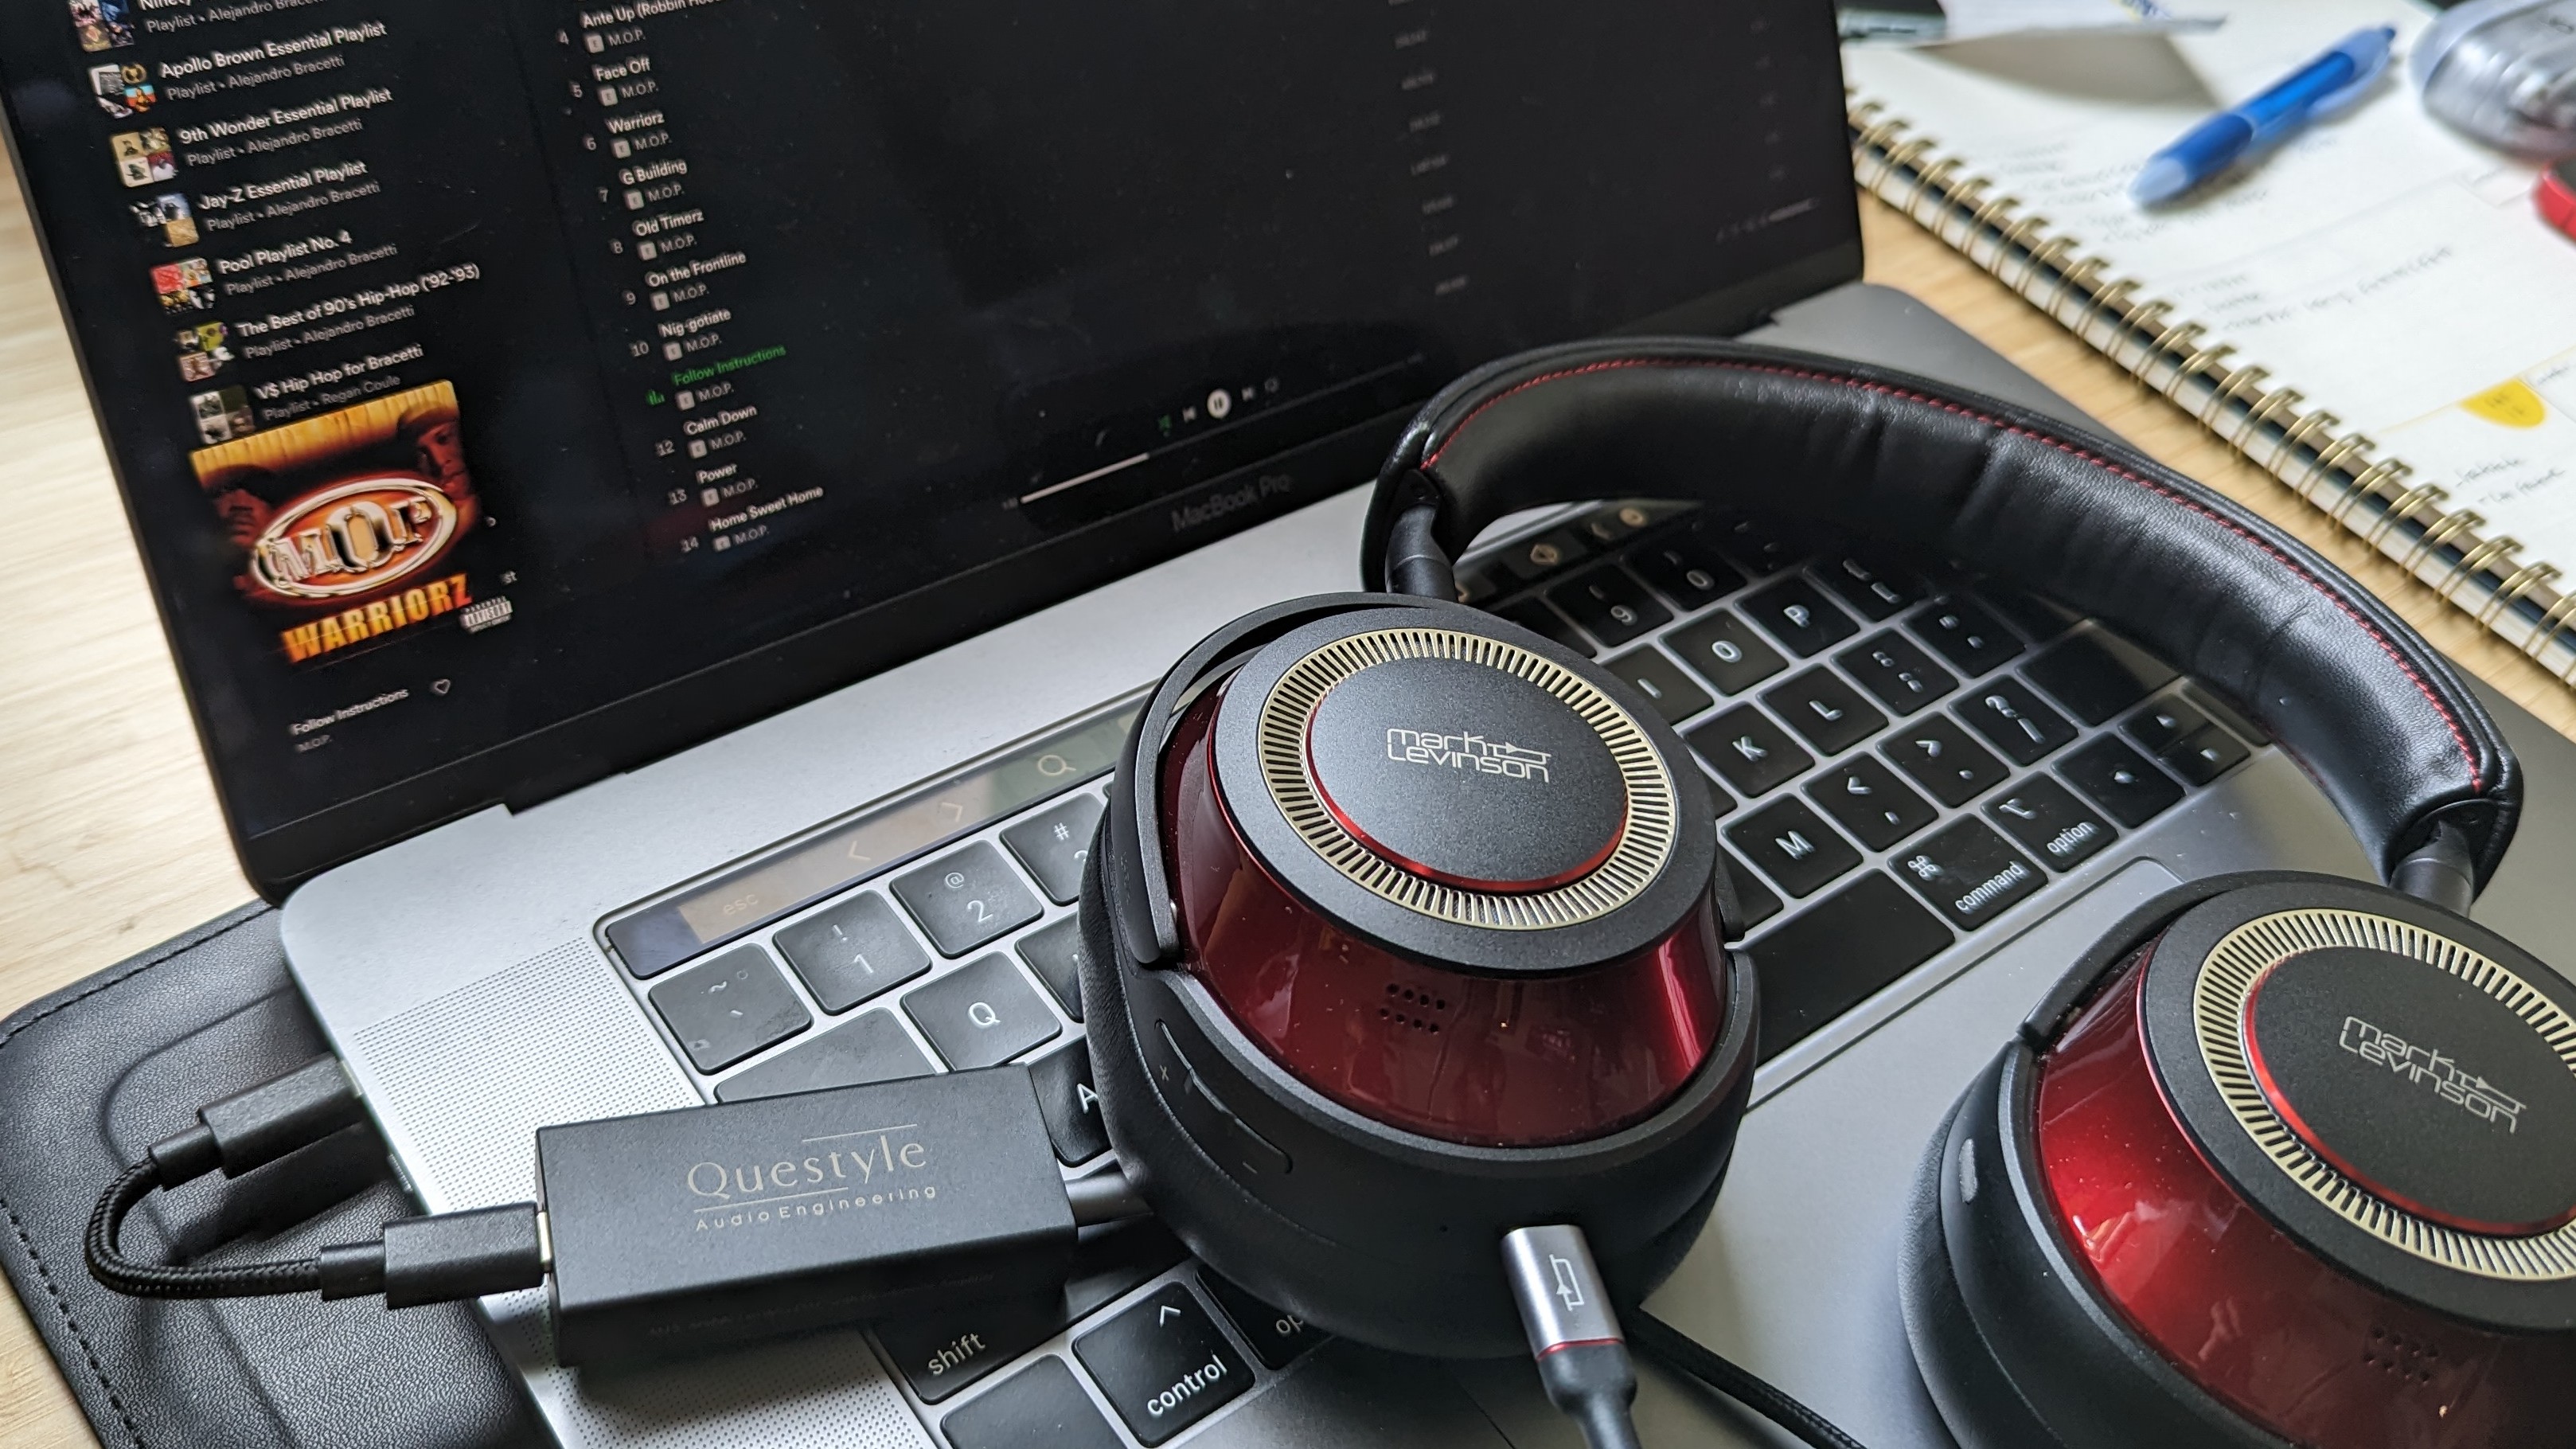
Investing in a digital-to-analog converter (DAC) is the easiest external solution for enjoying hi-res sound on Apple Music and all other streaming platforms. Yes, it’s another expense, but one that rewards you with audiophile sound. DACs can reproduce super-high bitrates, as well as remove unwanted noise and distortion from music tracks. A pair of wired headphones are required, so consider ordering a lightning to 3.5mm audio cable for your AirPods Max.
Sign up to receive The Snapshot, a free special dispatch from Laptop Mag, in your inbox.
3. Customize sound with the Apple Music Equalizer or third-party software
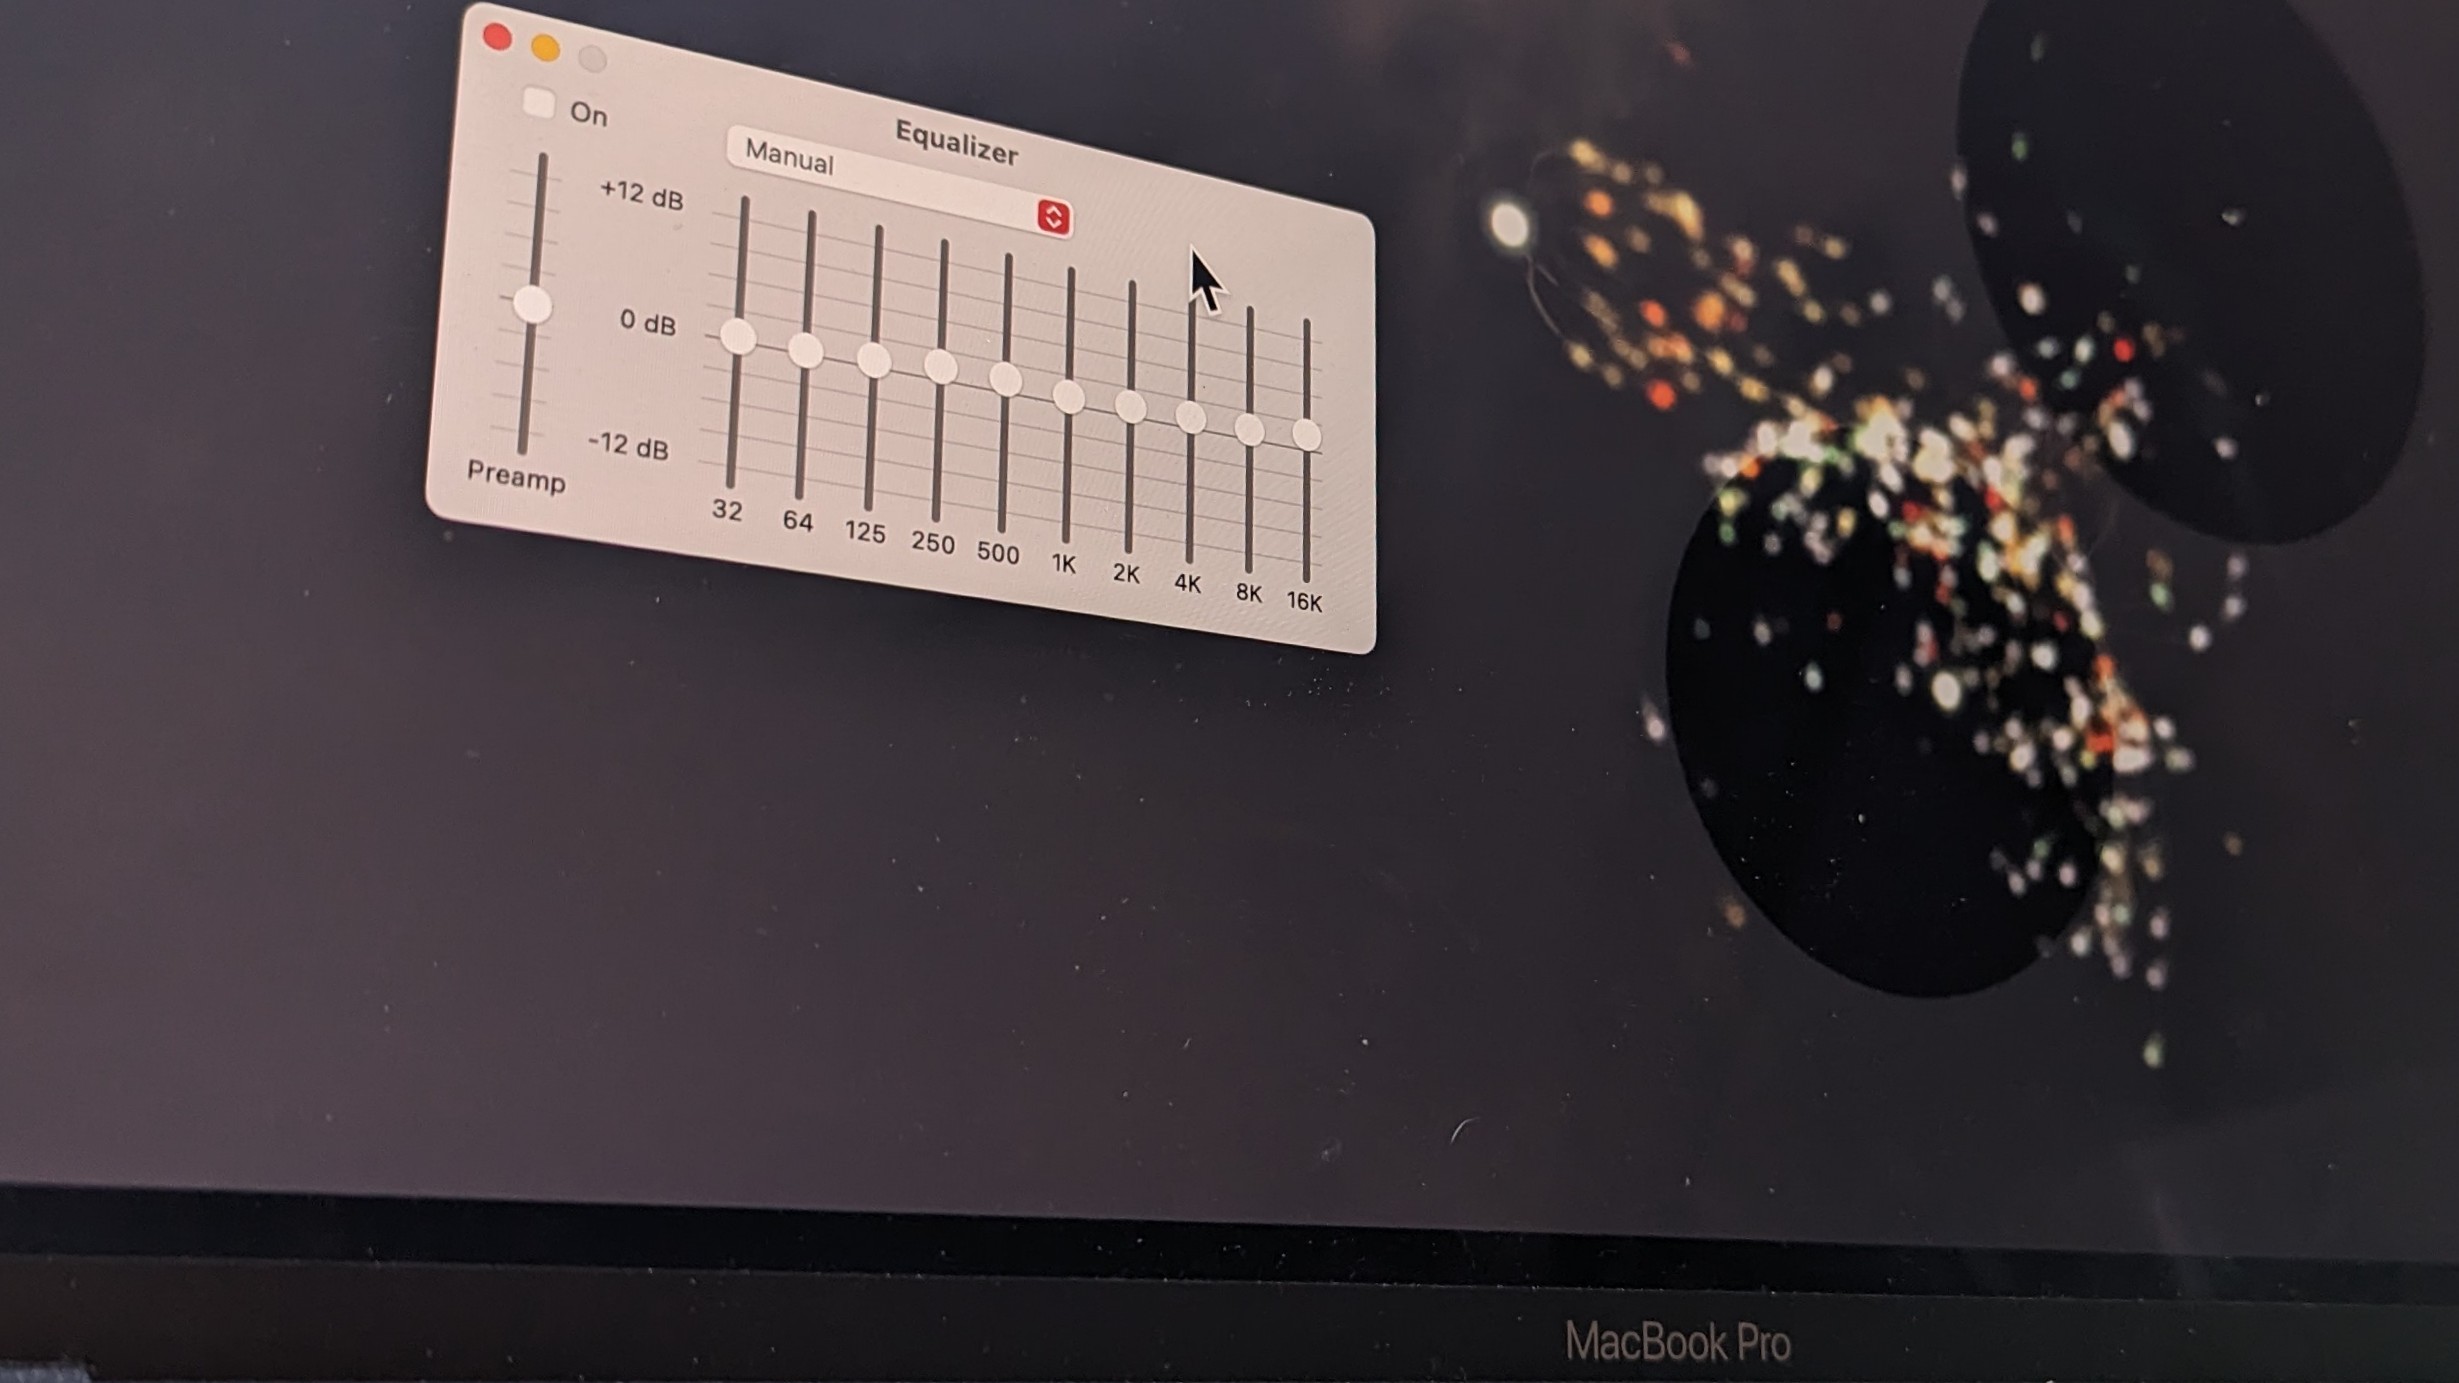
Apple Music’s Equalizer can be found in the app’s settings. There’s a 10-band EQ with preamp slider to create your own sound profile, along with 22 presets for different music genres, media, and sound characteristics.
The following presets come part of the package: Acoustic, Classical, Dance, Deep, Electronic, Flat, Hip-Hop, Increase Bass/Treble/Vocals, Jazz, Latin, Loudness, Lounge, Piano, Pop, R&B, Reduce Bass/Treble, Rock, Small Speakers, and Spoken Word. They aren’t expertly engineered like some of the presets on Sony’s headphones, but the majority work well for their respective categories.
Windows tab > Equalizer
Shortcut: Option + Command + E
Another option is investing in advanced sound EQ software like Boom 3D, which is a system-wide program that equalizes volume and sound output. It also creates an enhanced copy of a track, giving you access to both the original and sonically modified version.
4. Switch streaming quality to Lossless
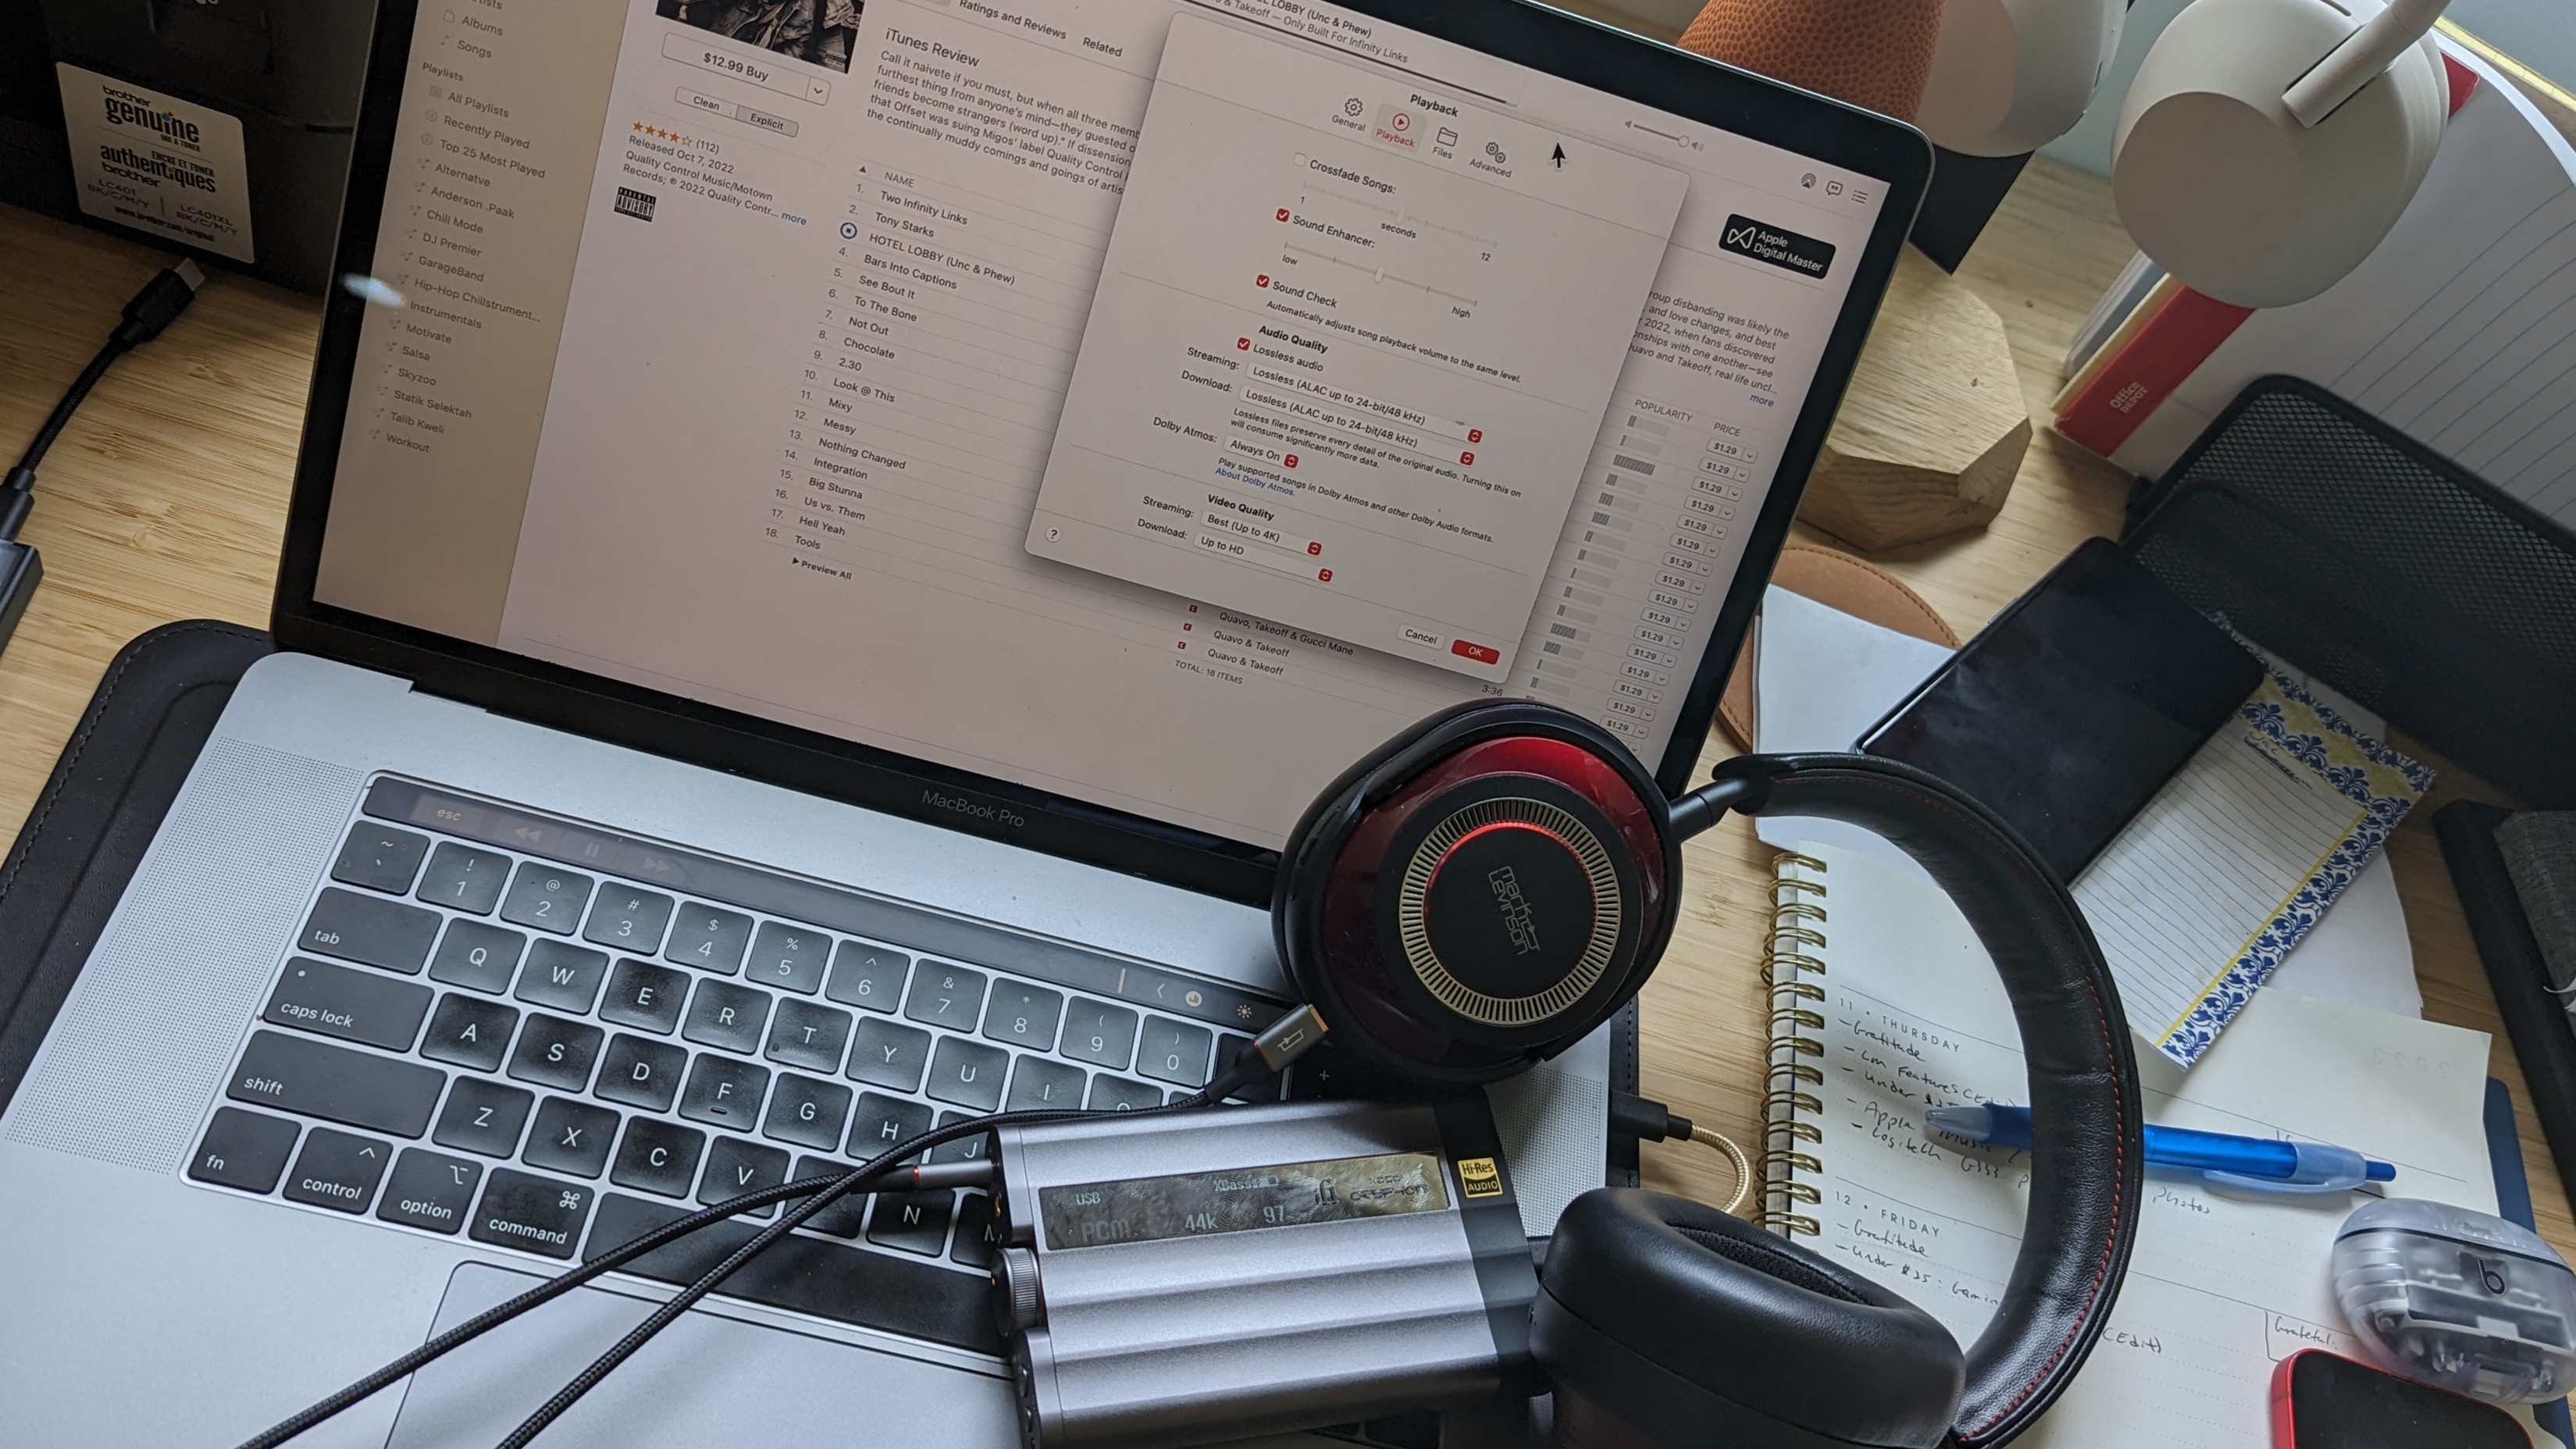
You’re not getting the real Apple Music listening experience unless you enable ALAC. It’s simple to do. There is a caveat: you need both a DAC and wired headphones. Why true lossless audio won’t work with the $549 AirPods Max remains a mystery. The irony is that you can purchase a pair of wired cans and a DAC for nearly the same price as Apple’s flagship headphones. Once you’ve gathered this audio setup, go into the Apple Music settings, then change the streaming quality to Lossless (ALAC up to 24-bit/48 kHz).
Music tab > Settings > Playback > Audio Quality > Streaming > Lossless (ALAC up to 24-bit/48 kHz)
5. Turn on Dolby Atmos
You should already know how to enable Spatial Audio on the AirPods Pro, AirPods 3 or AirPods Max. Apple’s 360-degree sound platform creates an audio mix that surrounds you, making it seem like you’re at the heart of everything. It also piggybacks off Dolby Atmos to add an extra layer of realism for movies, music, and other media. Listen to Dolby Atmos-engineered tracks in Apple Music and hear for yourself.
Music tab > Settings > Playback > Dolby Atmos > Always on
6. Use Tidal and its awesome features
Apple Music is great, but Tidal is the superior hi-res streaming platform. Not only does it provide CD-quality sound for over 90 million tracks, but it also supports FLAC and MQA (Master Quality Authenticated) file formats, along with Dolby Atmos. Most importantly, it has a plethora of performance-boosting features you wouldn’t know existed unless you were told. Changing the streaming quality to MQA increases resolution up to 24-bit/192kHz, granted you’ll need audiophile headphones that can handle that performance (we recommend the Mark Levinson No. 5909 or Sony WH-1000XM5).
Settings > Streaming > Master
Tidal offers Dolby Atmos content that is easily searchable. There’s even a Loudness normalization setting to automatically normalize tracks that may have been mastered at different levels.
My Collection > Settings > Playback > Loudness normalization
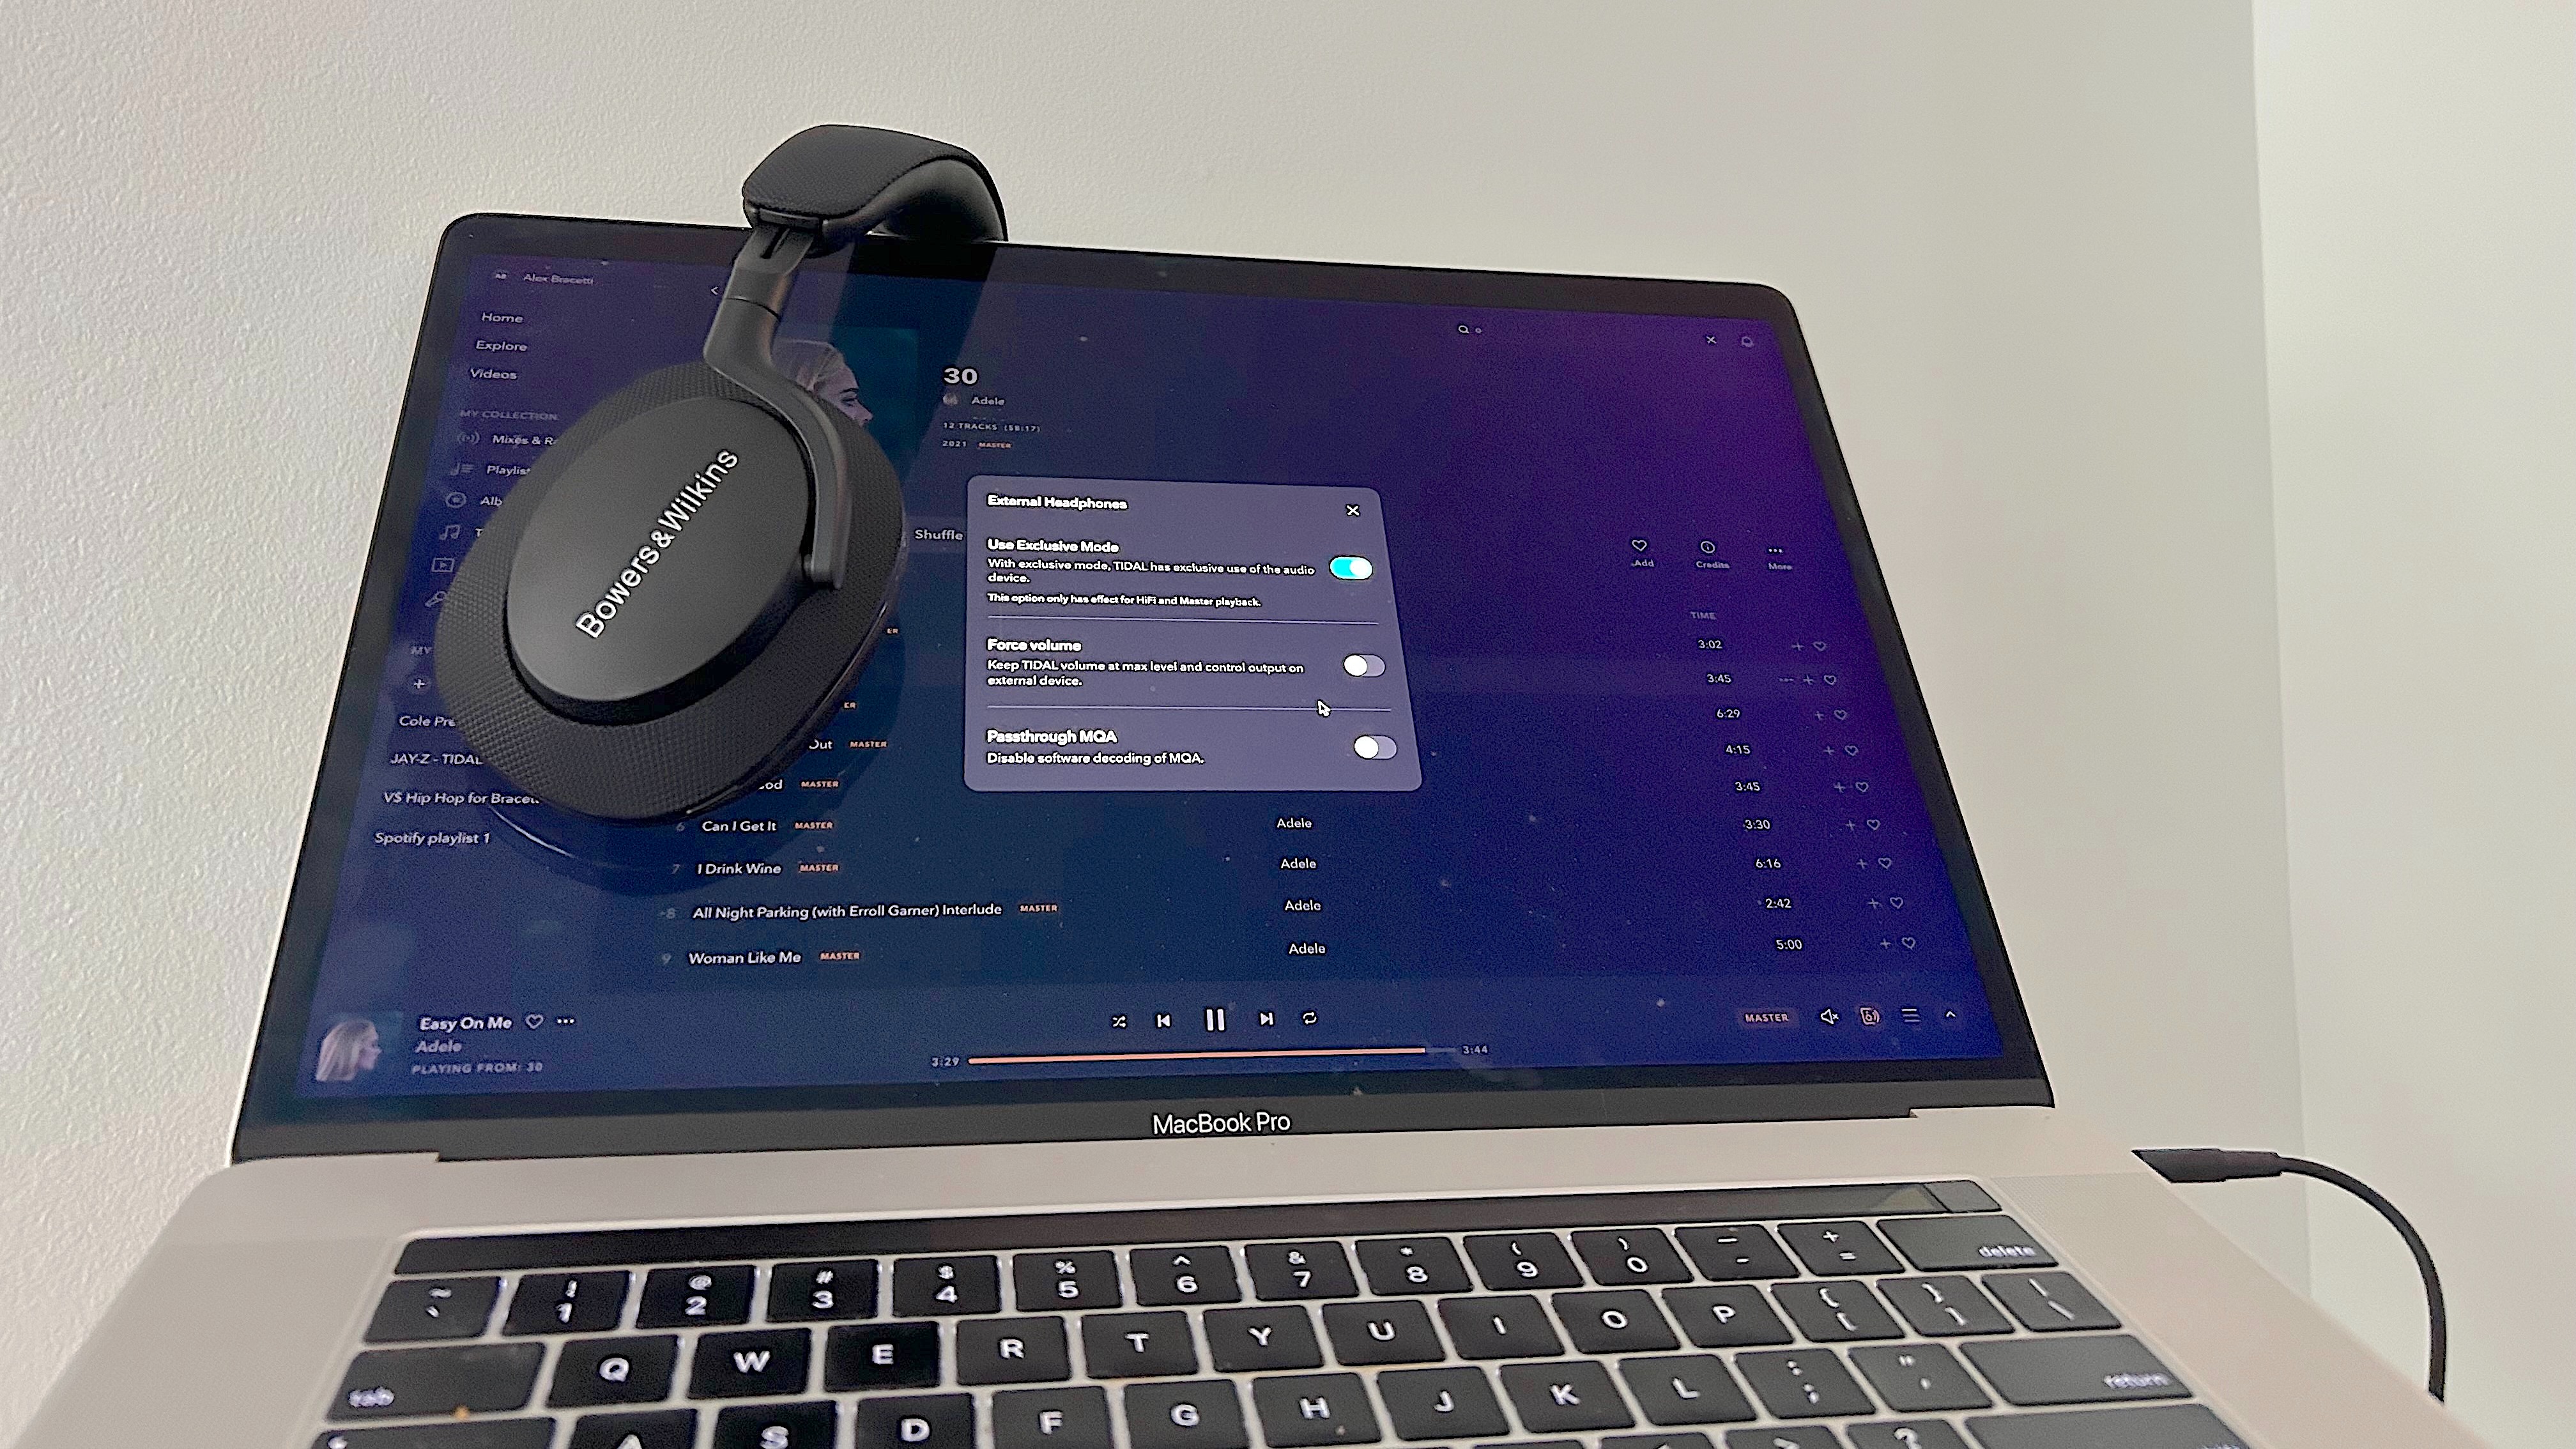
However, Tidal’s killer feature is its most unknown: Passthrough MQA. This one best applies to audiophiles using older DACs that don’t support the MQA codec. It will disable the software MQA unfolding in Tidal, which then lets your DAC process Tidal Master recordings.
Settings > Streaming > Master
Settings > Sound Output > Select DAC
Sound Output (speaker icon on music player) > More Settings > enable Exclusive Mode > enable Passthrough MQA
7. Download Dolby Atmos-quality tracks for offline listening

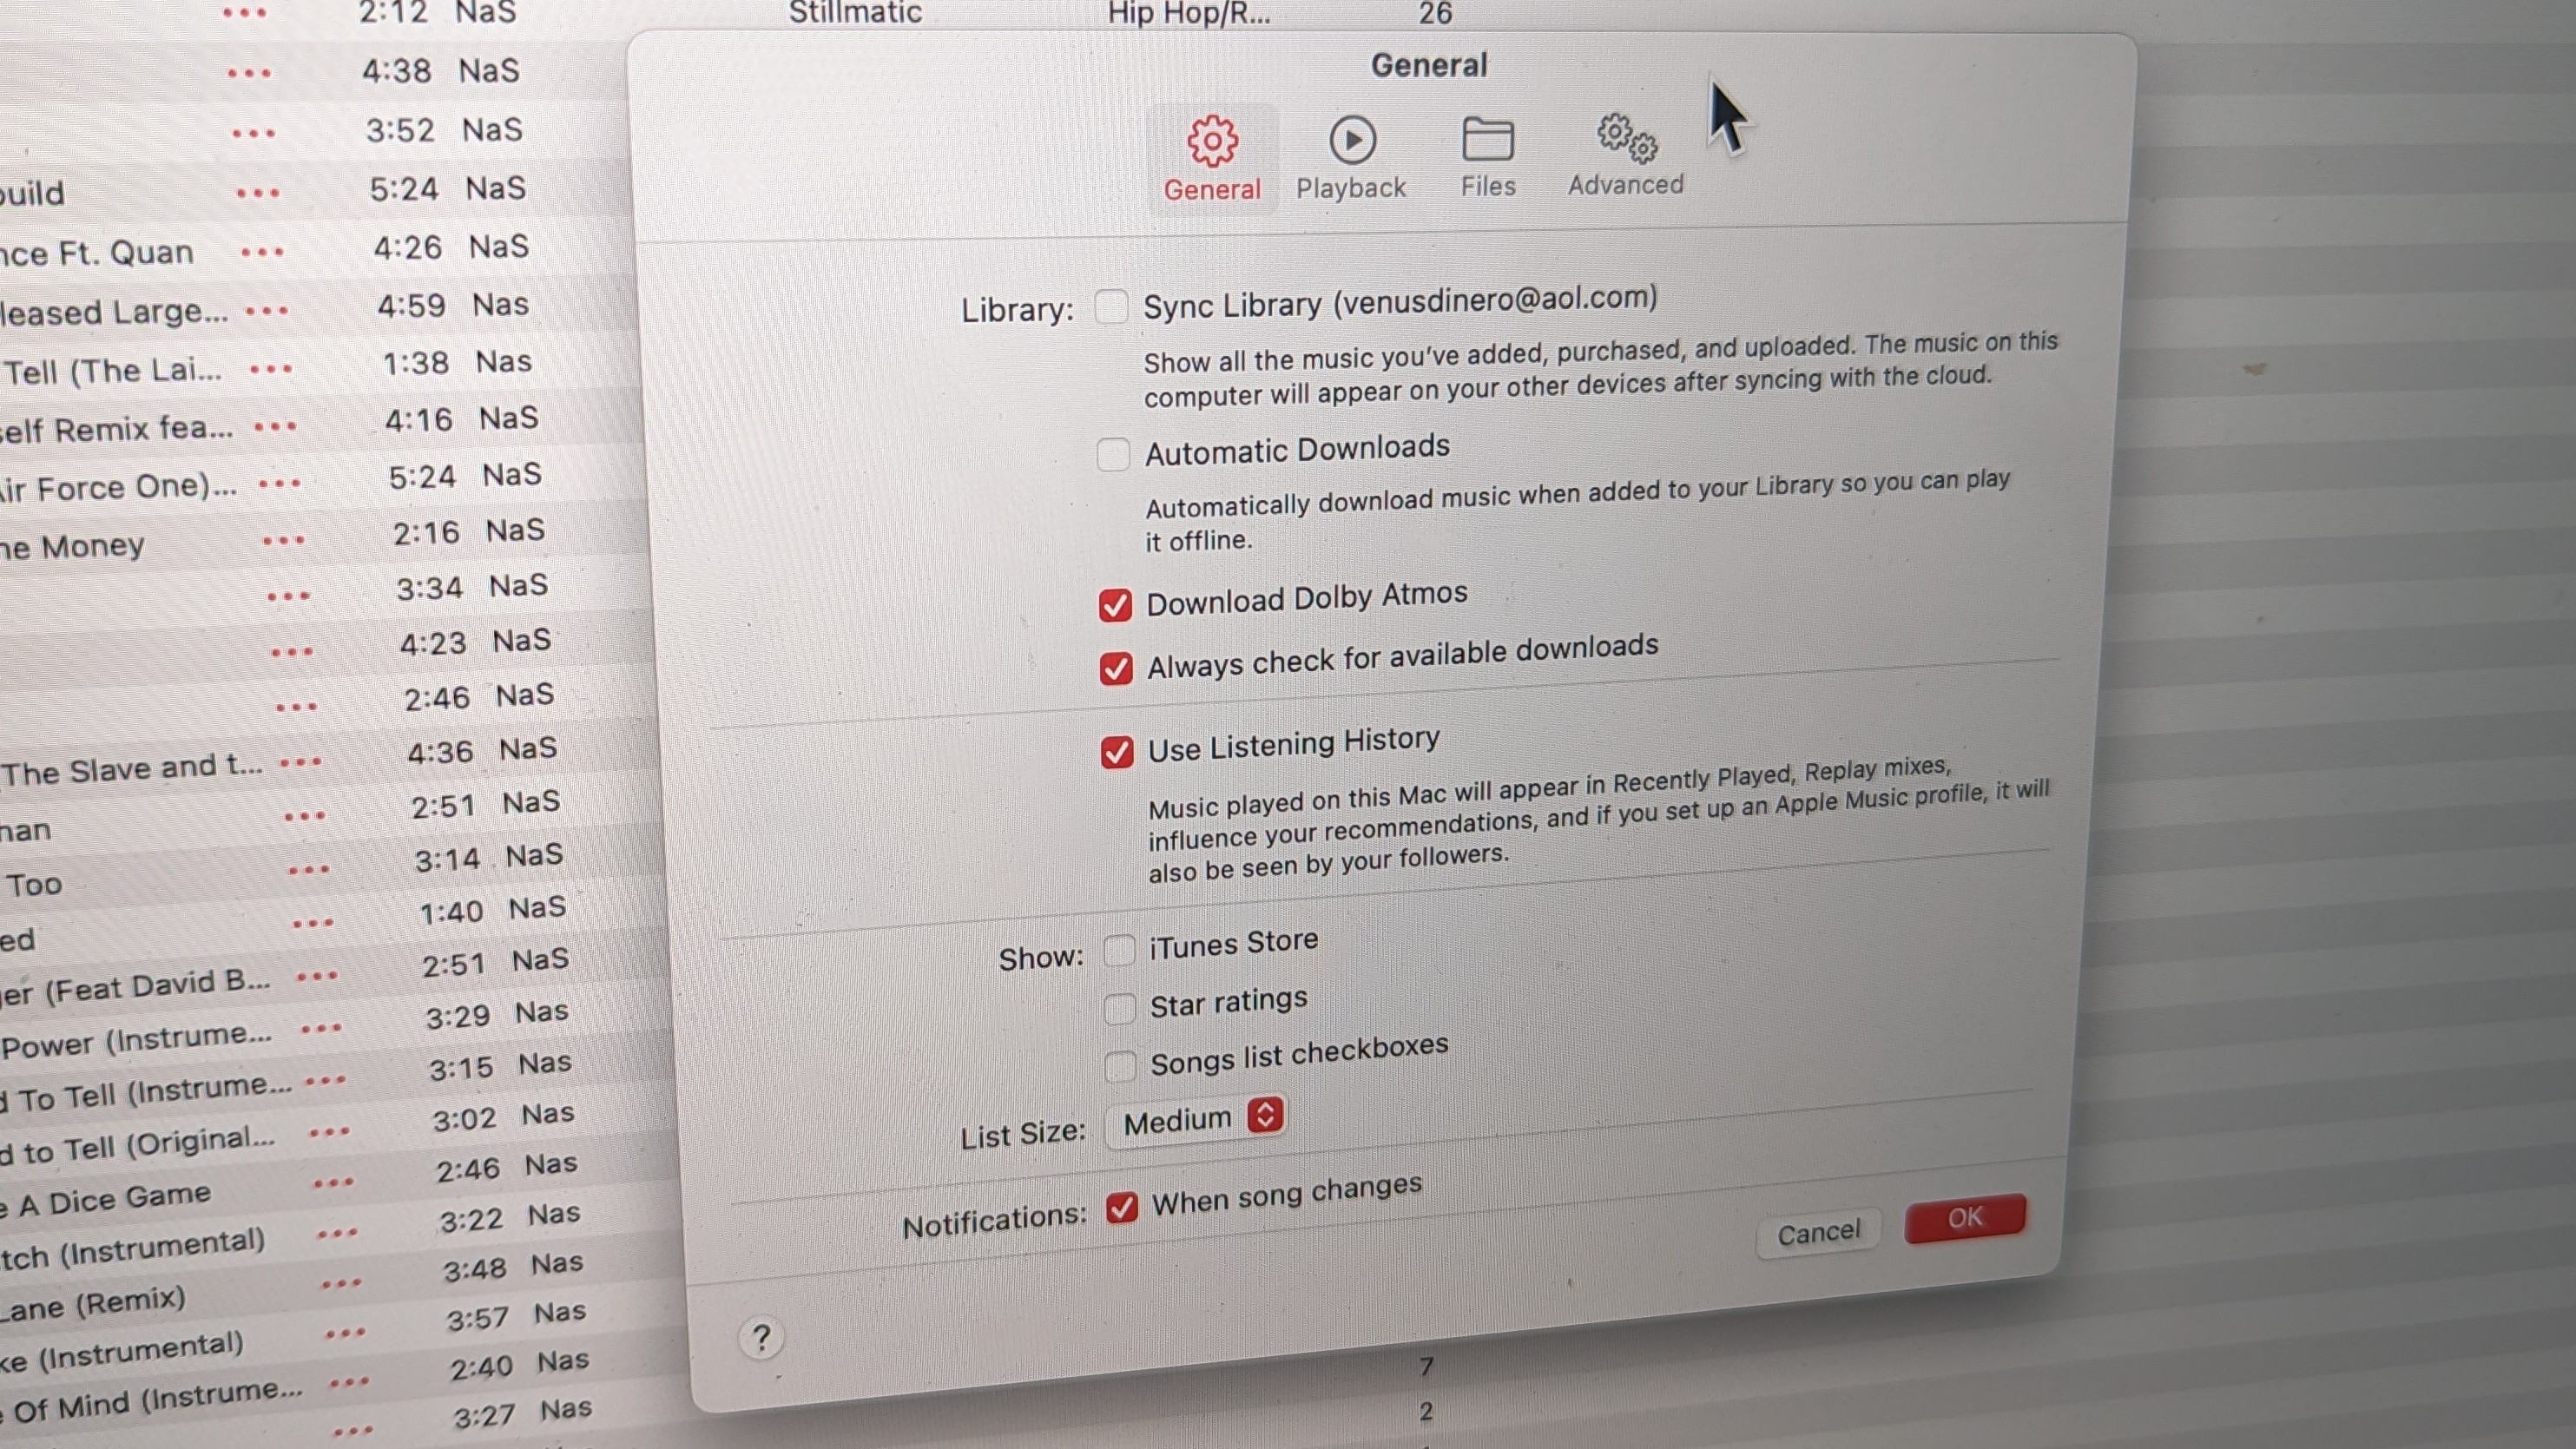
This is most helpful for travelers wanting hi-res music when Wi-Fi isn’t available. Apple lets you download Dolby Atmos-quality tracks form Apple Music to enjoy offline. The first step is to ensure that the Download Dolby Atmos box is checked in the settings.
Music tab > Settings > General > Download Dolby Atmos
From there, make sure Lossless is enabled and selected in the streaming and download drop menus via Playback tab. A downward arrow should appear when hovering the cursor over Dolby Atmos tracks that are available for download.
Note: Your Apple Music library must be merged with your account. Otherwise, you won’t be able to add a Dolby Atmos track to your library and download it.
More from Laptop Mag
- The best noise-cancelling headphones for every budget and occasion
- Check out the best cheap noise-cancelling headphones: $100 or under
Alex Bracetti writes about all things related to audio at Laptop Mag. From insightful reviews of Sony earbuds to hands-on experience with the Beats Studio Pro, Alex covers everything you need to know in order to buy the best pair of headphones or earbuds. Alex has also written about speakers and audio apps. Outside of Laptop Mag, Alex's work has appeared in our sister site Tom's Guide.
