How to Hide the Navigation Pane in Windows 10 File Explorer
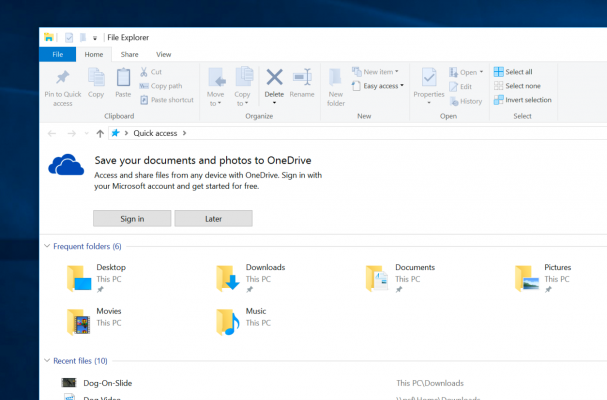
The File Explorer Ribbon is a handy tool, but it’s a bit over-populated. It’s not always easy, at a glance, to find what you’re looking for, or to change things you need. The Navigation pane is typically enabled by default, but if you’d rather hide it -- or learn how to get it back after you hid it on accident -- then we’ve got you covered.
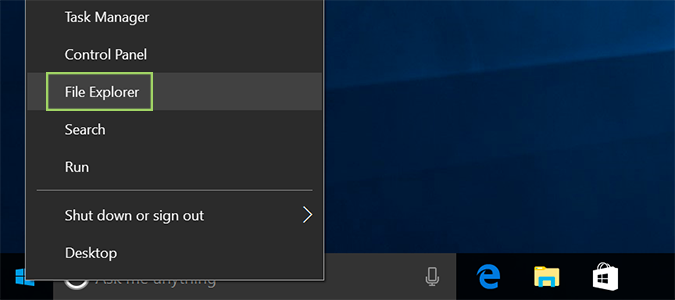
1. Right click the Start menu and choose File Explorer from the available options.
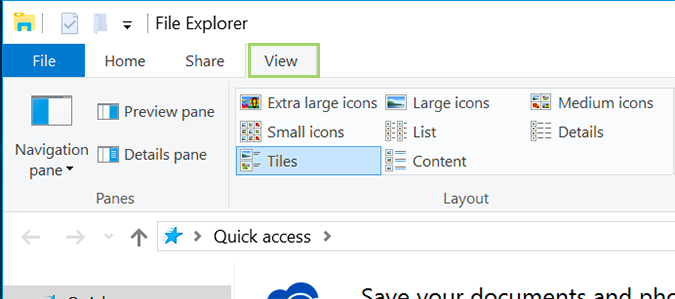
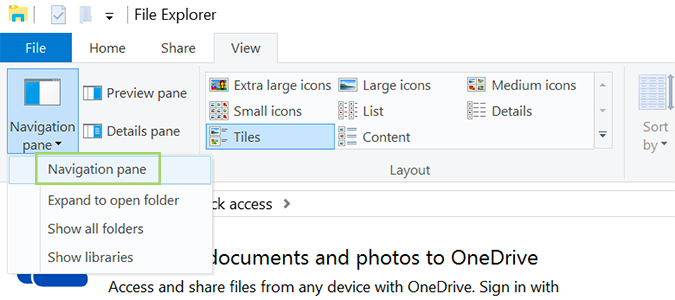
2. Click the View tab atop the File Explorer ribbon to open your view options. The Navigation pane is on the left by default, but we’re going to hide it.
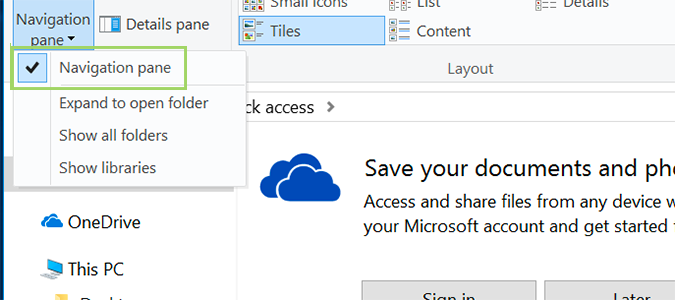
3. At the left, select Navigation pane, and and then click Navigation pane from the dropdown to remove the checkmark. From here, you’ve just disabled the left sidebar and moved the content over ever-so-slightly.
4. To show the Navigation pane, simply repeat steps one through three, this time ensuring the Navigation pane gets a check mark after clicking. If so, you should see the Navigation pane.
Windows File Explorer Tips
- Change Default Folder
- Add Control Panel
- Disable Quick Access
- Hide the Navigation Pane
- Pin File Explorer Searches to the Start Menu
- Star-Rate Your Files
- Share Files
- Remove Duplicate Files
- All Windows 10 Tips
- Take Ownership of a Folder
- Disable Ads in Explorer
Sign up to receive The Snapshot, a free special dispatch from Laptop Mag, in your inbox.
Bryan covers everything you need to know about Windows, social media, and the internet at large for Laptop Mag. Thanks to his extensive knowledge of operating systems and some of the most popular software out there, Bryan has written hundreds of helpful guides, including tips related to Windows 11 drivers, upgrading to a newer version of the OS, editing in Microsoft Photos, or rearranging pages in Google Docs.
