In previous versions of macOS, screenshots were saved on the desktop and unless you wanted to play around in Terminal, there wasn’t much you could do about it. But not anymore.
New in macOS is a built-in tool that captures the screen in an intuitive and accessible way. You can easily access it from the Dock, or use the keyboard shortcuts you’ve grown accustomed to over the years.
Using the Screenshot app we can now change the folder, without any of the confusing and anxiety-inducing Terminal edits. In fact, you could change the location in minutes, and then change it back when you’re done; it’s that easy.
Article continues below
1) Click on the Screenshot app in the Dock, or open it from the Applications folder.
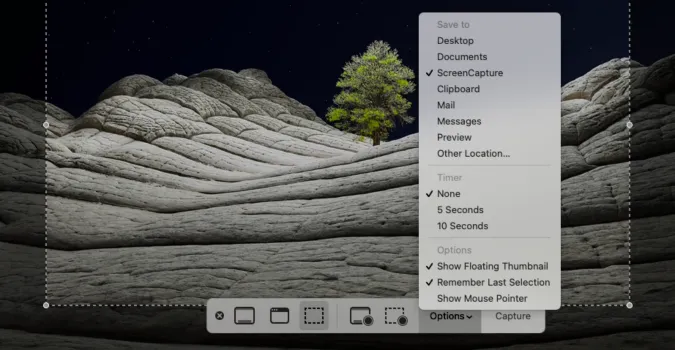
2) On the floating menu bar, click Options.

3) In the menu that opens, under Save to options, select the folder where you want to save the screenshot. It will now default to this folder until you change it back, if ever.

