How to Calibrate Your Monitor in Mac OS X
You'll get the best viewing experience from your monitor if you calibrate it. Mac OS X's calibrating tool takes just minutes to use and will ensure colors are accurate when you're working with photos, watching videos, and even playing games.
The Display Calibrator Assistant walks you through the calibration process. Before you begin, make sure your monitor has been turned on for at least half an hour (so it's properly warmed up) and clean.
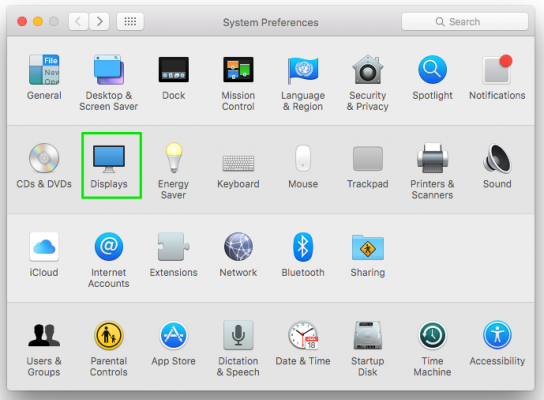
1. Open System Preferences and click Displays.
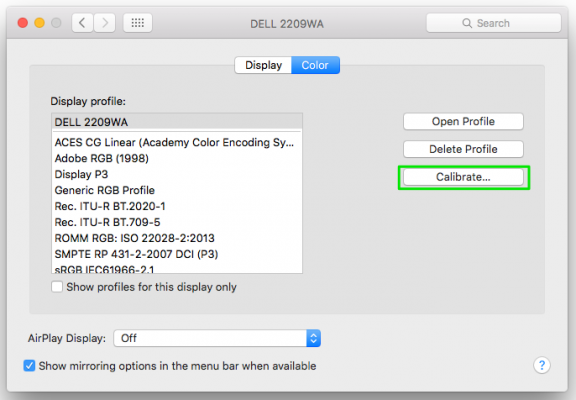
2. Click the Calibrate button on the Color tab.
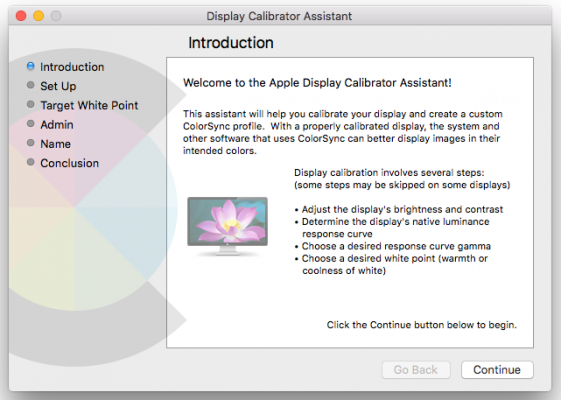
3. Click Continue to start the display calibrator.
Follow the steps in the assistant to calibrate your monitor. These will instruct you to:
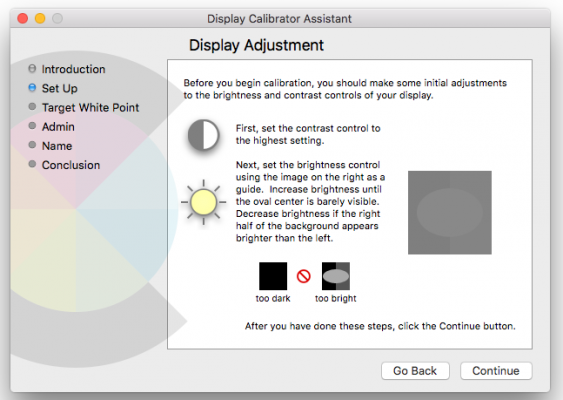
- Set contrast as high as possible and adjust your monitor's brightness. You'll need to use your monitor's on-screen controls for this--usually accessed from a menu button on the front of your monitor.
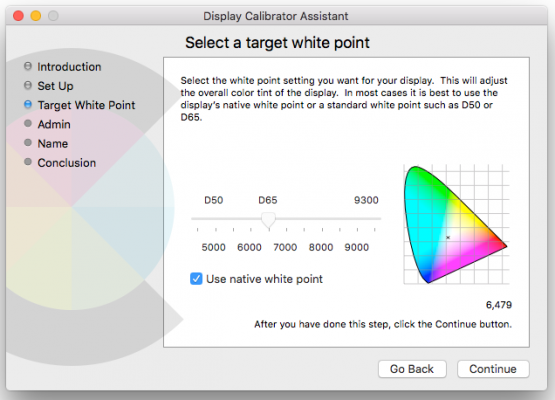
- Select a target white point, the tint for your display. Apple recommends using the native white point.
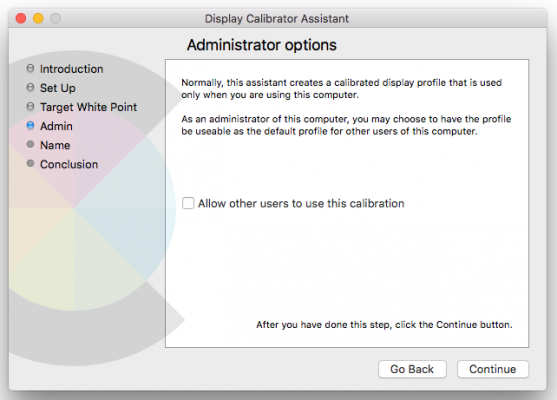
- Decide whether or not to make your settings the default for other Mac users.
- For some displays, you may also be able to adjust the display's gamma and luminance.
After giving your calibration settings a profile name, they'll be set as the default monitor settings.
Sign up to receive The Snapshot, a free special dispatch from Laptop Mag, in your inbox.
If you have more than one monitor, use the calibration assistant on one monitor and then try to get the additional monitor to match as closely as possible. Test patterns that you can use to compare both monitors, such as those provided by Display Calibration can help.
Display Calibration can also help you customize your Mac's monitor even further than Apple's calibration tool. If you need a professional level of color accuracy, you could invest in a colorimeter, such as the Datacolor Spyder5PRO. For quickly getting more accurate looking images, though, the Display Calibrator Assistant is the simple tool for the job.
Melanie was a writer at Laptop Mag. She wrote dozens of helpful how-to guides, covering both the software and the hardware side of things. Her work included topics like SSDs, RAM, Apple, Excel, OneDrive, and detailed guides for Windows users. Outside of all her useful advice, Melanie also penned a few reviews for Laptop Mag, including Android emulators that help you run apps on your PC.
