How to Use Smart Folders in Mac OS X
Smart Folders automatically find and organize files on your Mac by your search criteria. Because they update continuously, these folders can save you a lot of time and effort. For example, you can create a Smart Folder to show you the most recent documents created in the last month, all the files on your computer over a certain size, and even all the songs on your hard drive with a specific tempo. Let's take a look at how to create a Smart Folder.
Note that Smart Folders don't actually store the files that match your search rules in a separate folder; your files remain where you originally saved them. A Smart Folder is more like an index gathering files by type and keywords, pointing you to the actual files.
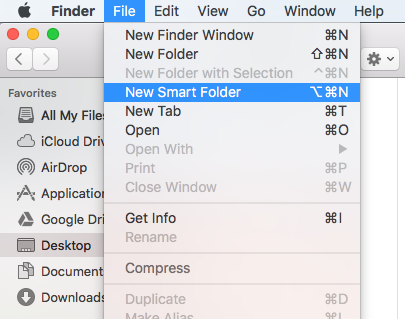
1. Go to File > New Smart Folder in Finder. You could also use the keyboard shortcut Command+Option+N.
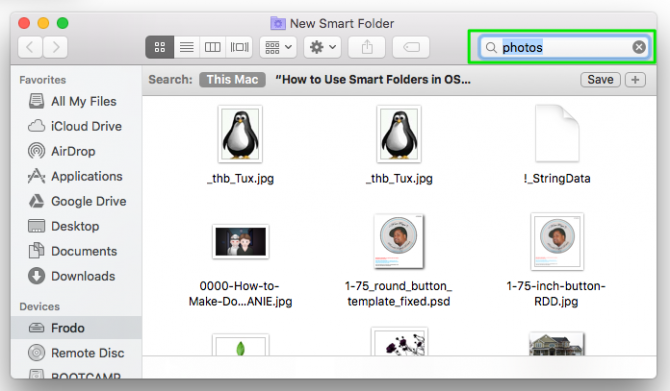
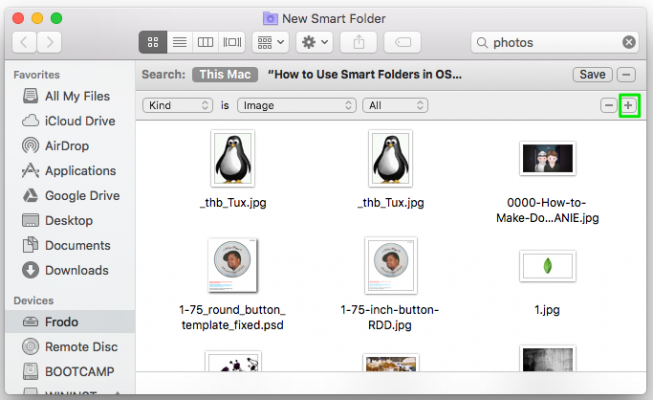
2. Enter your main criteria in the search field and hit Enter. In this example, we'll look for all photos created in the last year on the Mac.
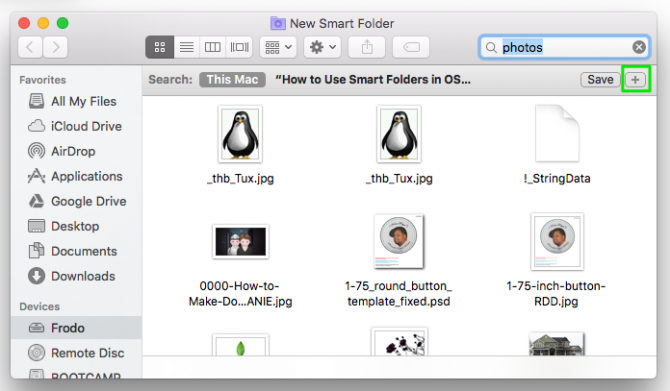
3. Click the plus (+) sign next to the save button to add more search criteria.
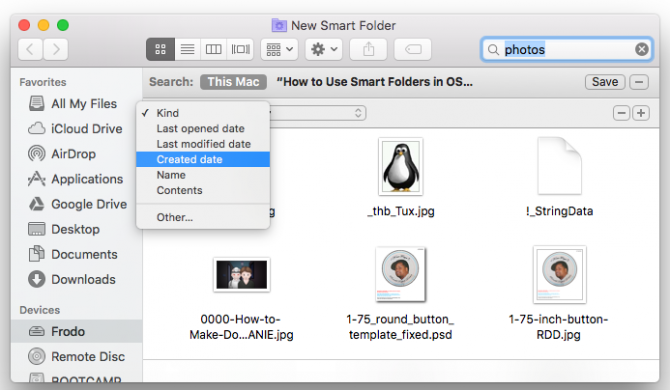
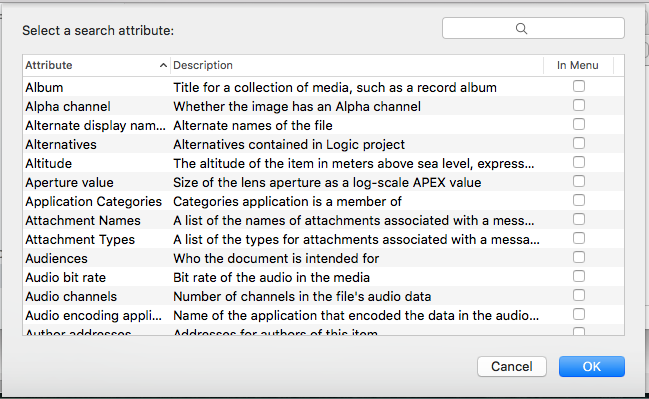
4. Use the dropdown boxes to refine your search.
For example, you can search by date, filename, file contents, and many other search attributes.
Sign up to receive The Snapshot, a free special dispatch from Laptop Mag, in your inbox.
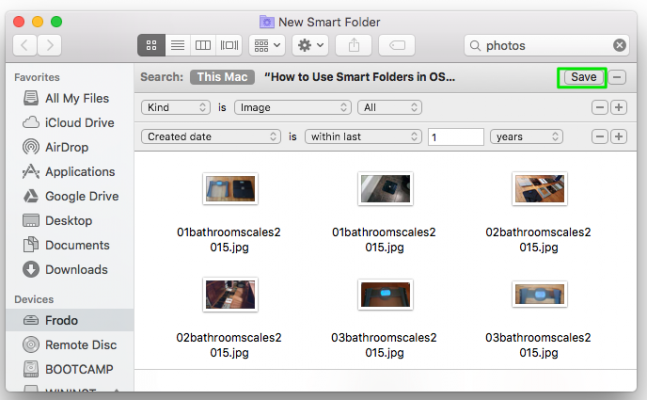
5. Click the plus sign to add additional search criteria. You can also click the minus button to remove a criteria from the search.
6. Click Save to finish creating the Smart Folder.
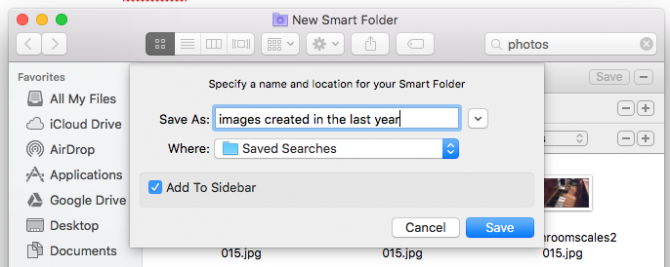
7. Give your Smart Folder a name and click Save.
Once saved, your Smart Folder will gather any files that match your search criteria. You can find all your Smart Folders in the Saved Searches Folder under your username > Library or in the Finder sidebar if you enabled that option when you saved the folder.
- How to Use Full-Screen Apps in Mac OS X
- How to Make Desktop Shortcuts in Mac OS X
- How to Find Downloaded Files in Mac OS X
Melanie was a writer at Laptop Mag. She wrote dozens of helpful how-to guides, covering both the software and the hardware side of things. Her work included topics like SSDs, RAM, Apple, Excel, OneDrive, and detailed guides for Windows users. Outside of all her useful advice, Melanie also penned a few reviews for Laptop Mag, including Android emulators that help you run apps on your PC.
