How to convert HEIC images to JPEG on macOS
Converting your HEIC files from iOS to JPEG
Sign up to receive The Snapshot, a free special dispatch from Laptop Mag, in your inbox.
You are now subscribed
Your newsletter sign-up was successful
Knowing how to convert HEIC images to JPEG on macOS is a crucial skill if you are all-in on the Apple ecosystem in recent years as the HEIC photo format is the default on iPhone and iPad and it can be frustrating when trying to share or move the photos to your laptop.
We've covered how to turn off HEIC on iPhone if you want to cut this problem off at the source, but if you still want the benefits of HEIC, but occasionally need to make your iOS images more easily shareable then you can convert them individually on macOS. Follow these steps for the quickest and easiest way to convert your HEIC media to JPEG using your MacBook.
1. Connect your Apple device to your Mac computer and transfer your files. Make sure to save them somewhere you can easily remember.
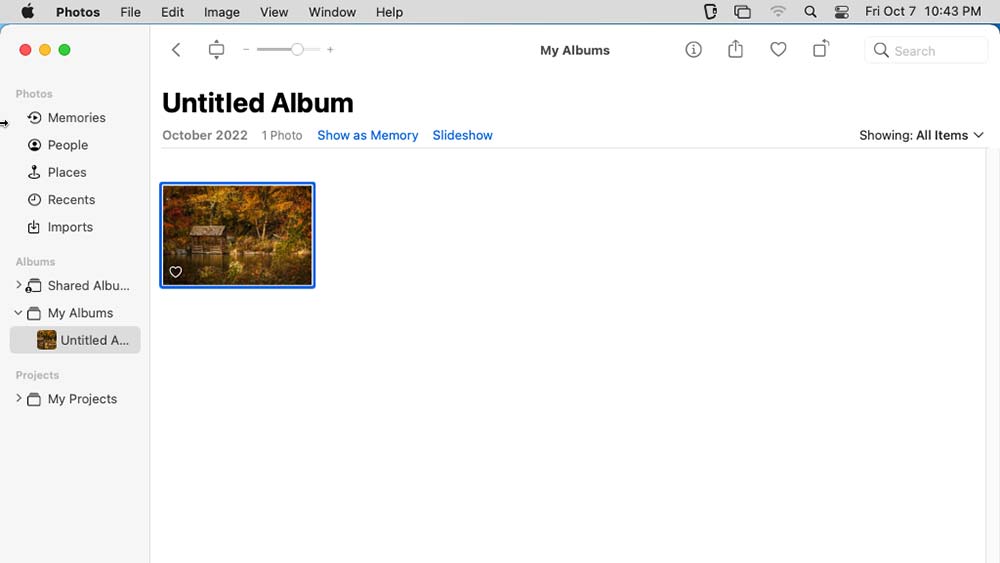
2. Locate and select your images using the Photos app.
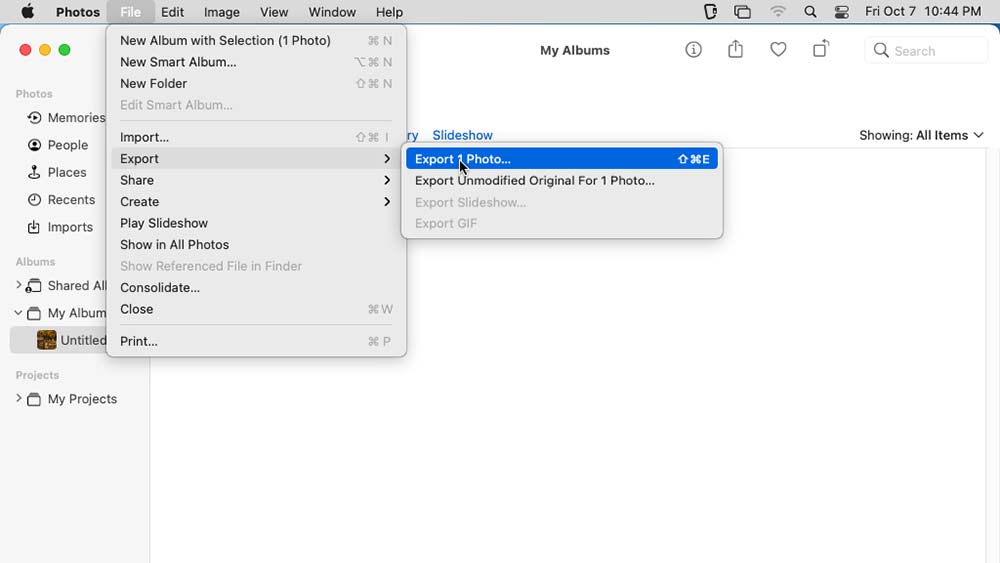
3. After selecting the images you want to convert, go to File > Export > Export Photo.
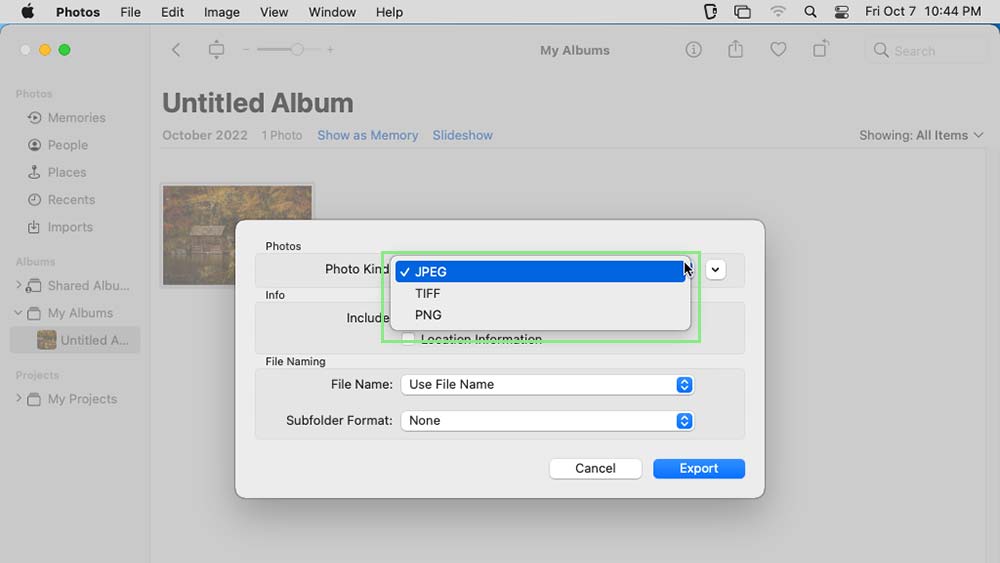
4. From the menu that appeared, select the File Format that you want your images to be converted to.
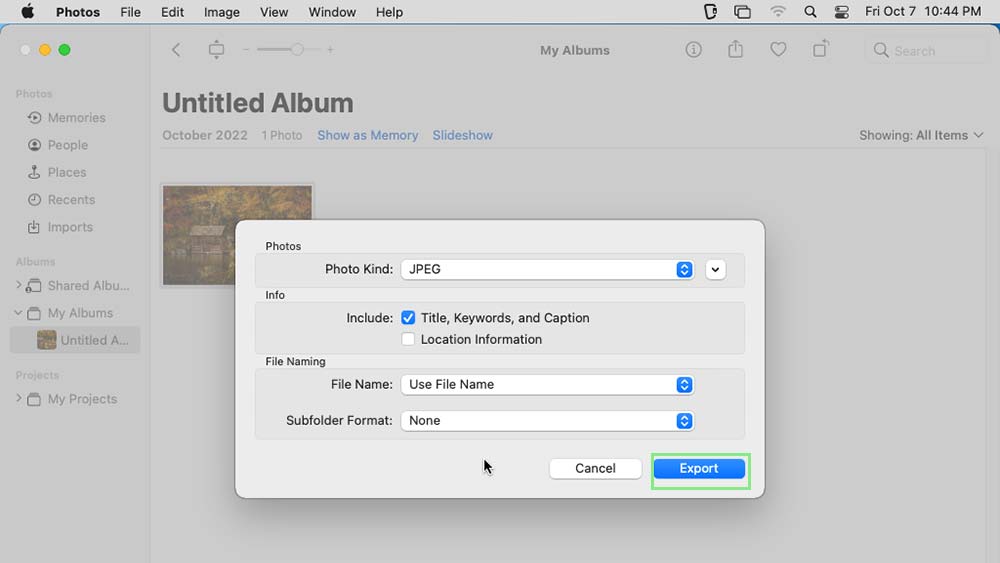
5. Lastly, click Export, select your destination folder, and click Export again.
Sign up to receive The Snapshot, a free special dispatch from Laptop Mag, in your inbox.
