6 handy Windows 11 tricks that make my life easier — are you using all 6?
Haven’t tried these Windows 11 tips? Check them out now
Sign up to receive The Snapshot, a free special dispatch from Laptop Mag, in your inbox.
You are now subscribed
Your newsletter sign-up was successful
Windows 11 is Microsoft’s fancy, modernized OS that many PC users are adopting thanks to the free upgrade. While it (finally) leaves behind worn-out interfaces and aging software, many may have realized that it doesn’t function all that differently from the tried and true Windows 10.
But what many may not realize is that there are a bundle of super-helpful features hidden within the OS. Sure, some handy tools like recording your screen in Windows 11 may work the same way, but Microsoft has other secrets hiding in plain sight — like decluttering your desktop by shaking a window and other game-changing Windows features.
With a few keyboard shortcuts here and tweaks in settings there, you’ll be seeing Windows 11 in a whole new light. Plus, who wouldn’t want to boost their PC’s performance for free? If you're looking to make the most out of your laptop, these secret Windows 11 tricks will do the, erm, trick.
1. Tap and swipe away with advanced gesture controls
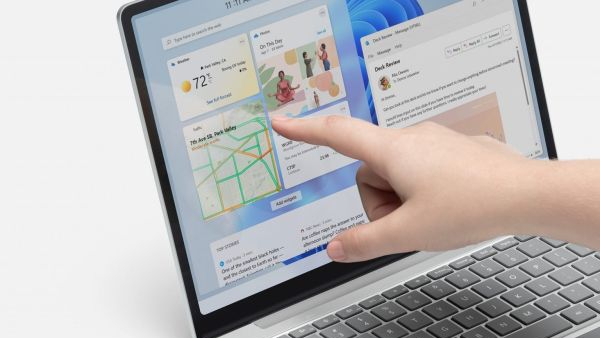
It’s no secret that Windows lets you use different gestures on a touchpad to perform certain tasks, such as using three fingers to display all the apps that are currently open or using a four-finger tap to open the date and time window. Those are some useful basic Windows gestures, but it’s time to step it up and notch to advanced levels.
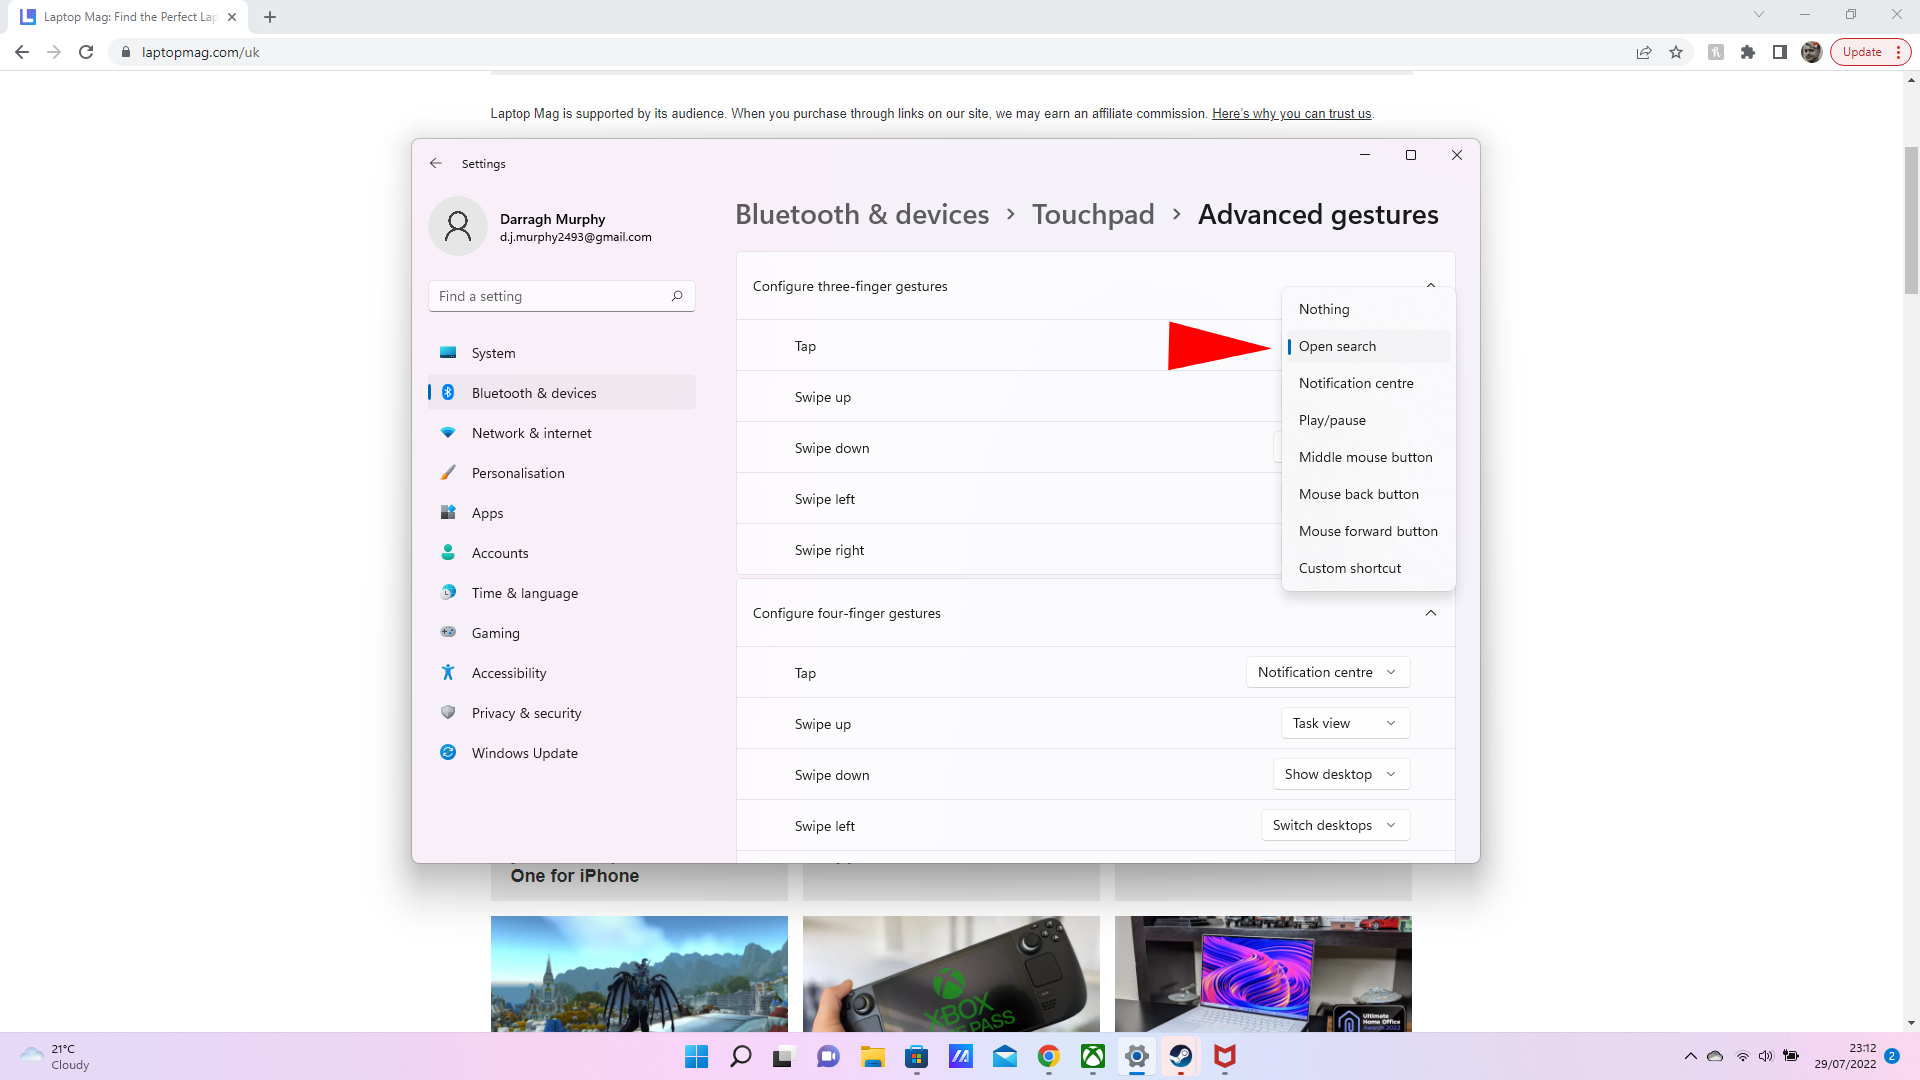
Thanks to Advanced Gestures in settings, you can completely customize three- and four-finger gestures. Want to use a three-finger tap to act as a middle mouse button? Sure thing. Or maybe you want to hide everything except for the app in focus with a simple four-finger swipe to the left? Go for it. There are plenty of configurations to make, whether it be tapping or swiping left, right, up, and down. What’s more, you can set a custom shortcut for a specific action not on the list.
1. Open Settings.
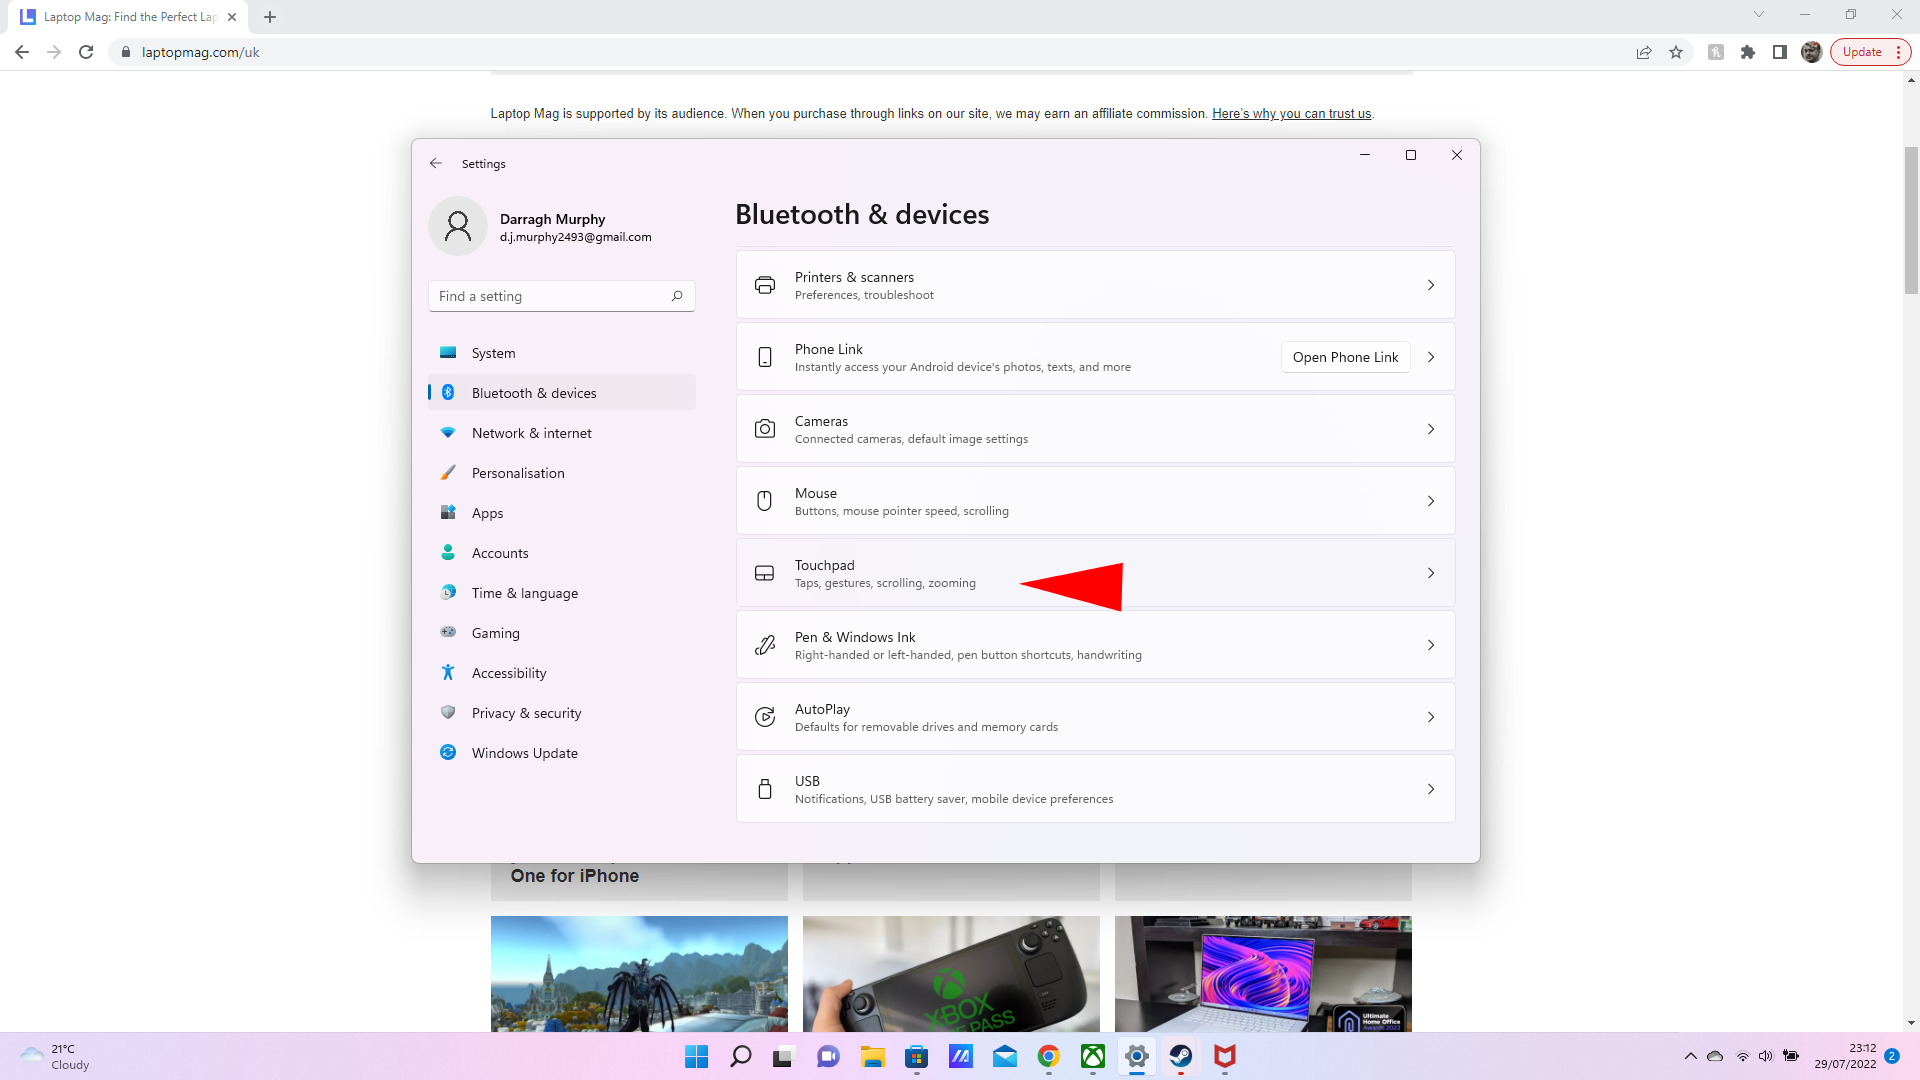
2. On the left-hand sidebar, click on Bluetooth & devices.
3. Scroll down and tap on Touchpad.
4. Navigate to Advanced gestures under Related settings.
5. Next to the gesture you want to customize, click on the drop-down menu and select that action you want.
2. Manage the volume of individual apps
Ever wanted to listen to your own mix of tunes while still hearing the bombastic sounds of the games you play? I know I have, and it can be annoying to mess around with the in-game sound settings to perfectly match what you’re jamming to. Luckily, Windows 11’s Volume mixer lets you control the volume of individual apps.
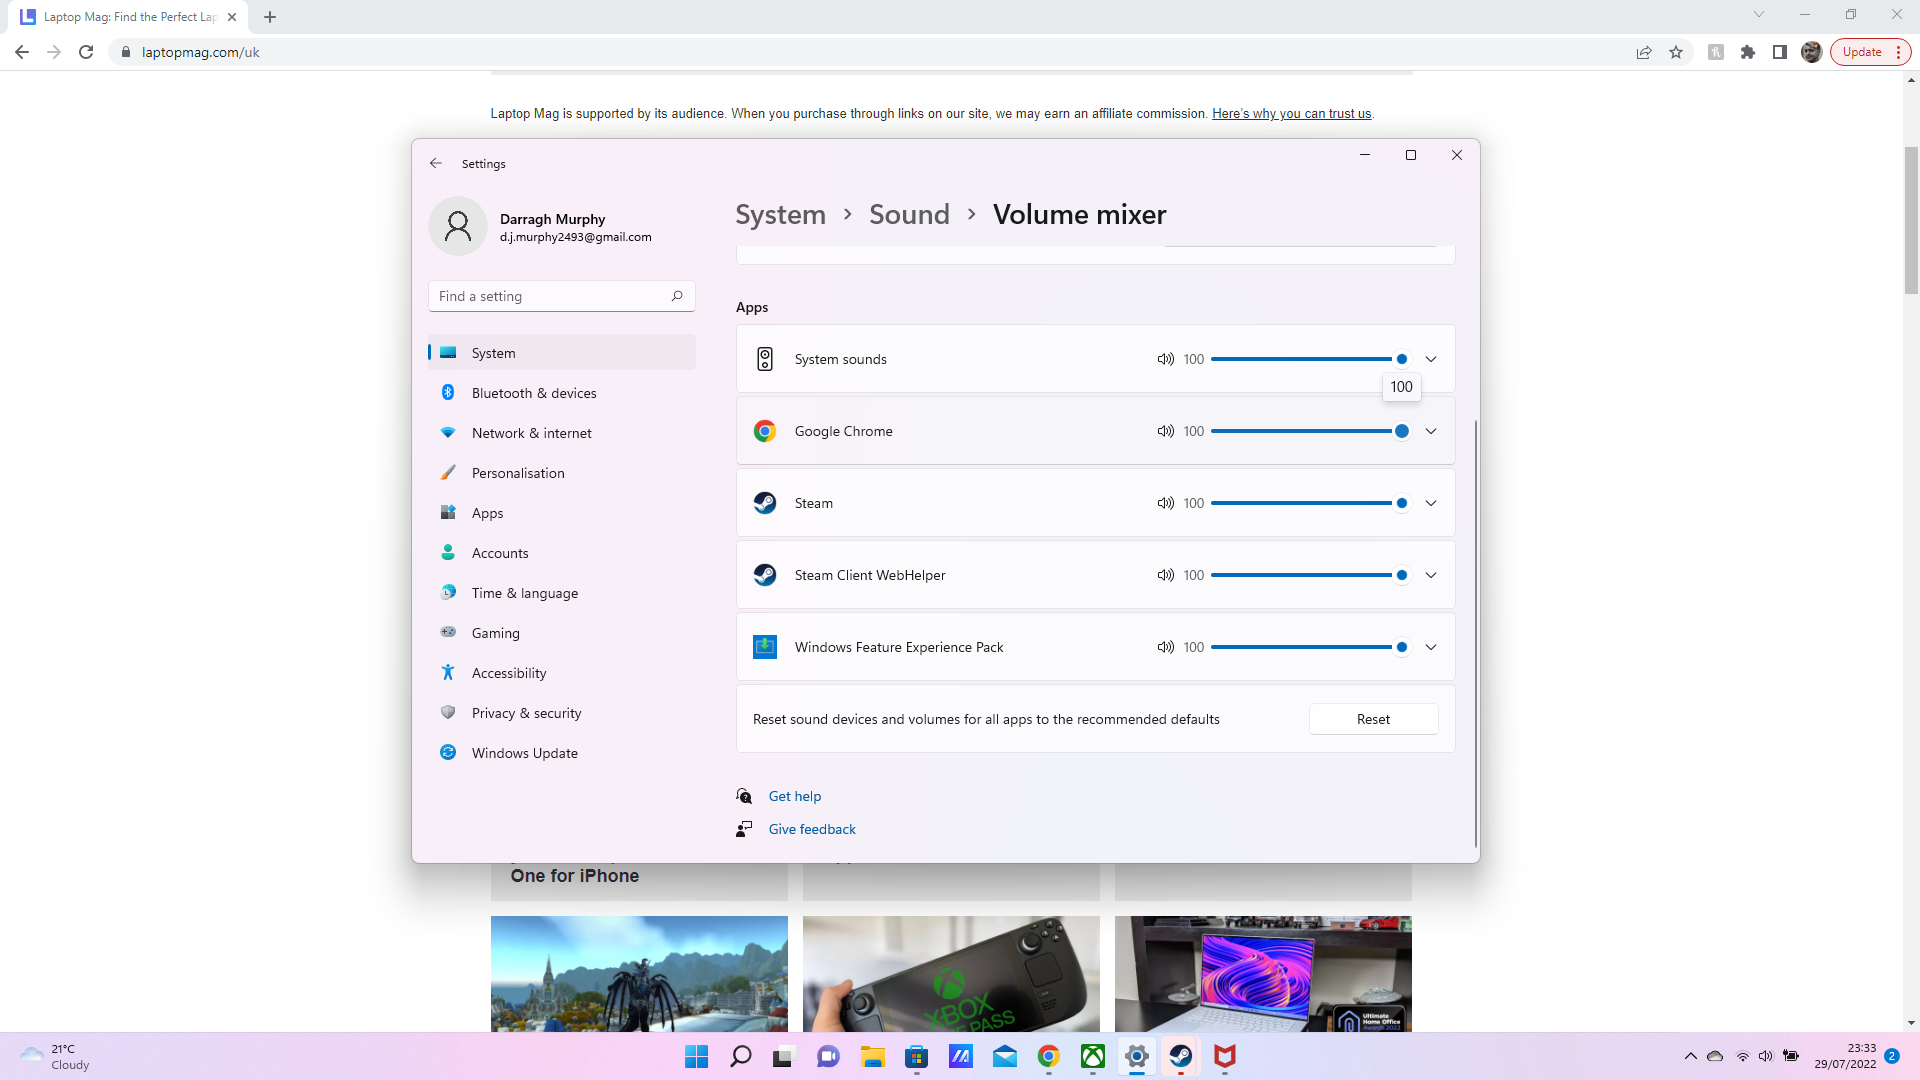
By simply heading into the Sound settings, you can increase or decrease the volume of Google Chrome with a YouTube video playing in a tab, a Microsoft Teams call, the PC games you play, and many more.
1. Open Settings.
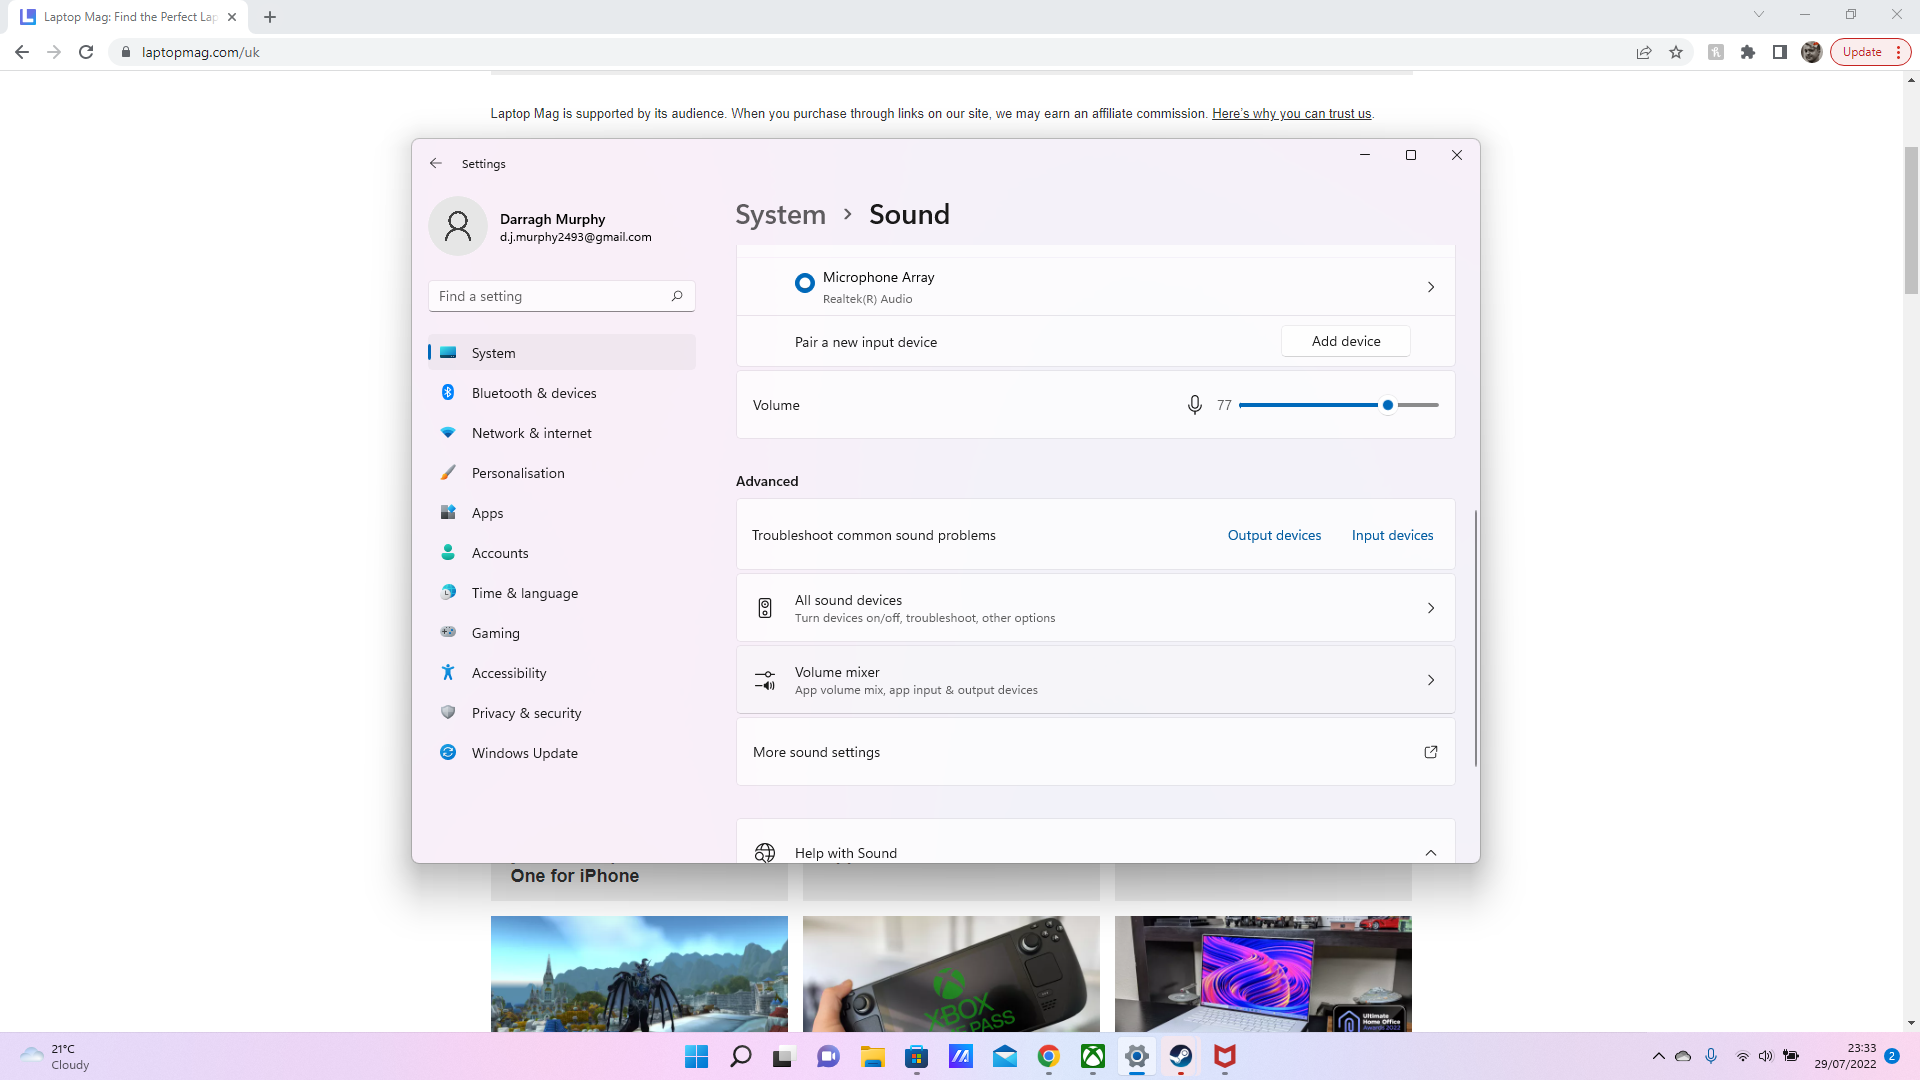
2. In the Systems tab, click on Sound.
3. Under Advanced, click on Volume mixer.
4. Under Apps, drag the volume slider to set the volume to your liking.
3. Enjoy hands-free typing thanks to voice typing (with punctuation support)
You know those days when you just wish everything you had in your head would miraculously end up on a document so you don’t have to type it all out? Well, as a journalist I can certainly sympathize and I imagine those days come on a weekly basis for students or any kind of writer. If there was only some kind of feature that could do just that…
Okay, voice-to-text isn’t anything new, but that doesn’t take away from Windows 11’s Microsoft Speech Service that turns your voice into text — with the added bonus of punctuation support. Better yet, it only takes a simple keyboard shortcut to get it started.
1. Press Windows + H.
2. A small microphone bar will pop up. Press Windows + H again or tap on the microphone icon and start speaking.
Sign up to receive The Snapshot, a free special dispatch from Laptop Mag, in your inbox.
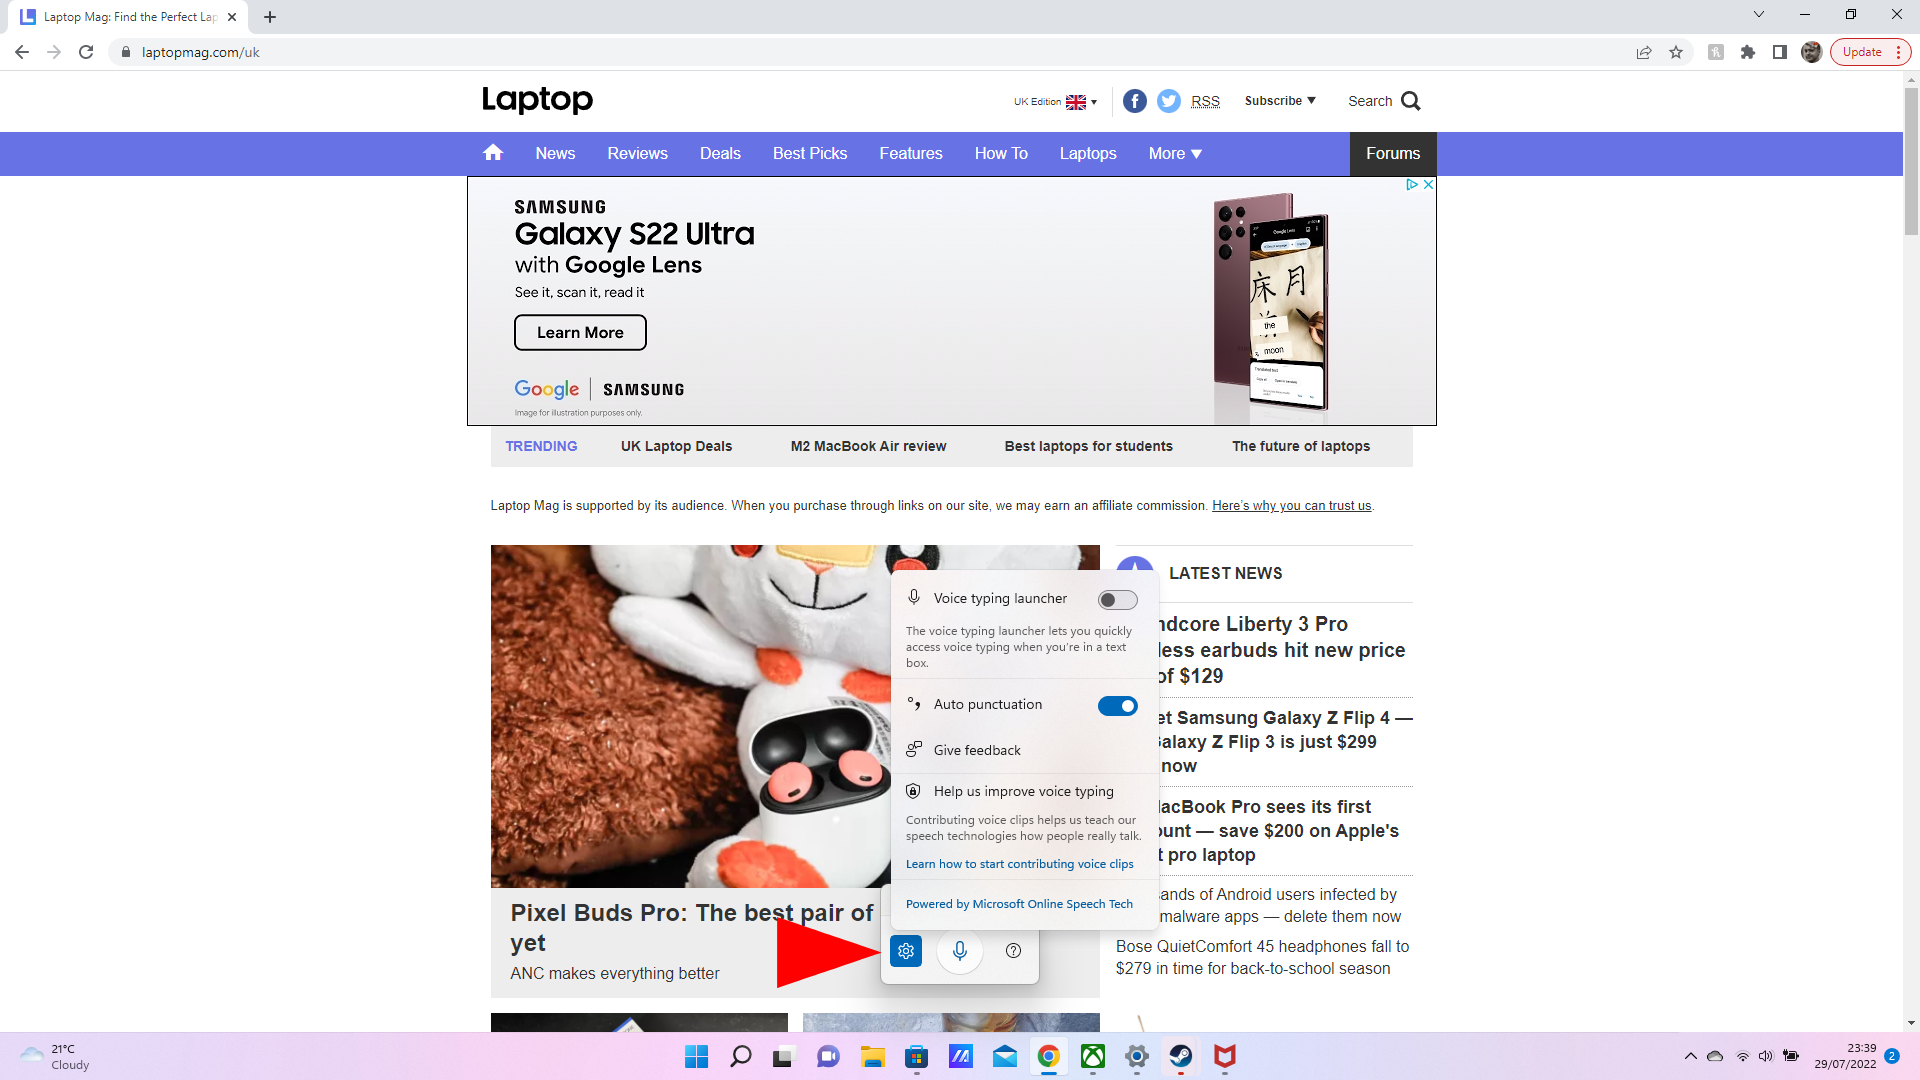
That’s it. Your PC will start typing what you say in any text box. Make sure you have your microphone turned on, too. You can slightly tweak its settings to enable auto punctuation and launch the Voice typing tool when you’re in a text box.
1. Press Windows + H.
2. Click on the gear icon.
3. Enable the Voice typing launcher and Auto punctuation toggles.
4. Make navigating around Windows 11 a smoother experience by selecting a refresh rate
Some monitors and laptop displays offer refresh rates well above the standard 60Hz, especially if you have a gaming laptop or gaming monitor. But who says they only need to be used for buttery smooth frame rates in games?
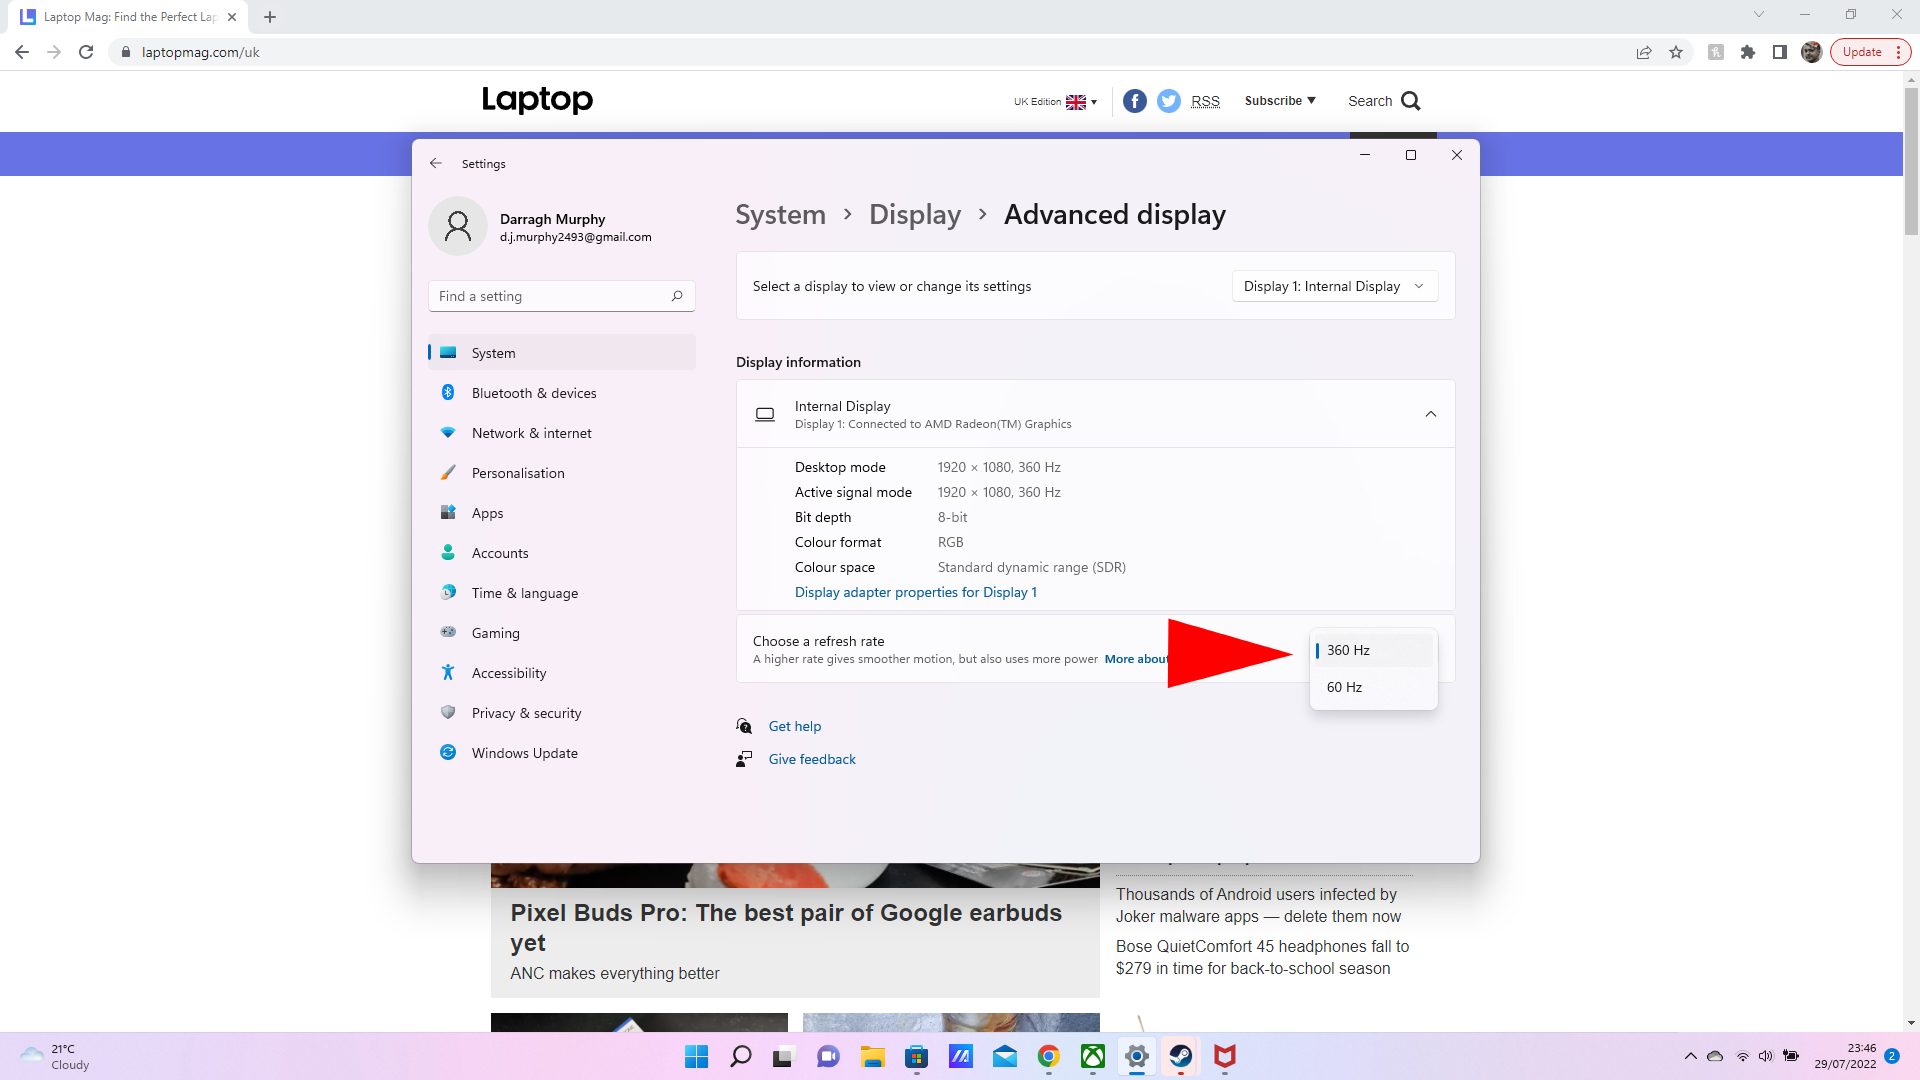
To experience smooth transitions while navigating around Windows 11 and moving around apps, all you have to do is head into the advanced display settings and pick the refresh rate you’re keen on. Without a doubt, the higher you can make it, the better it will be.
1. Open Settings.
2. In the Systems tab, click on Display.
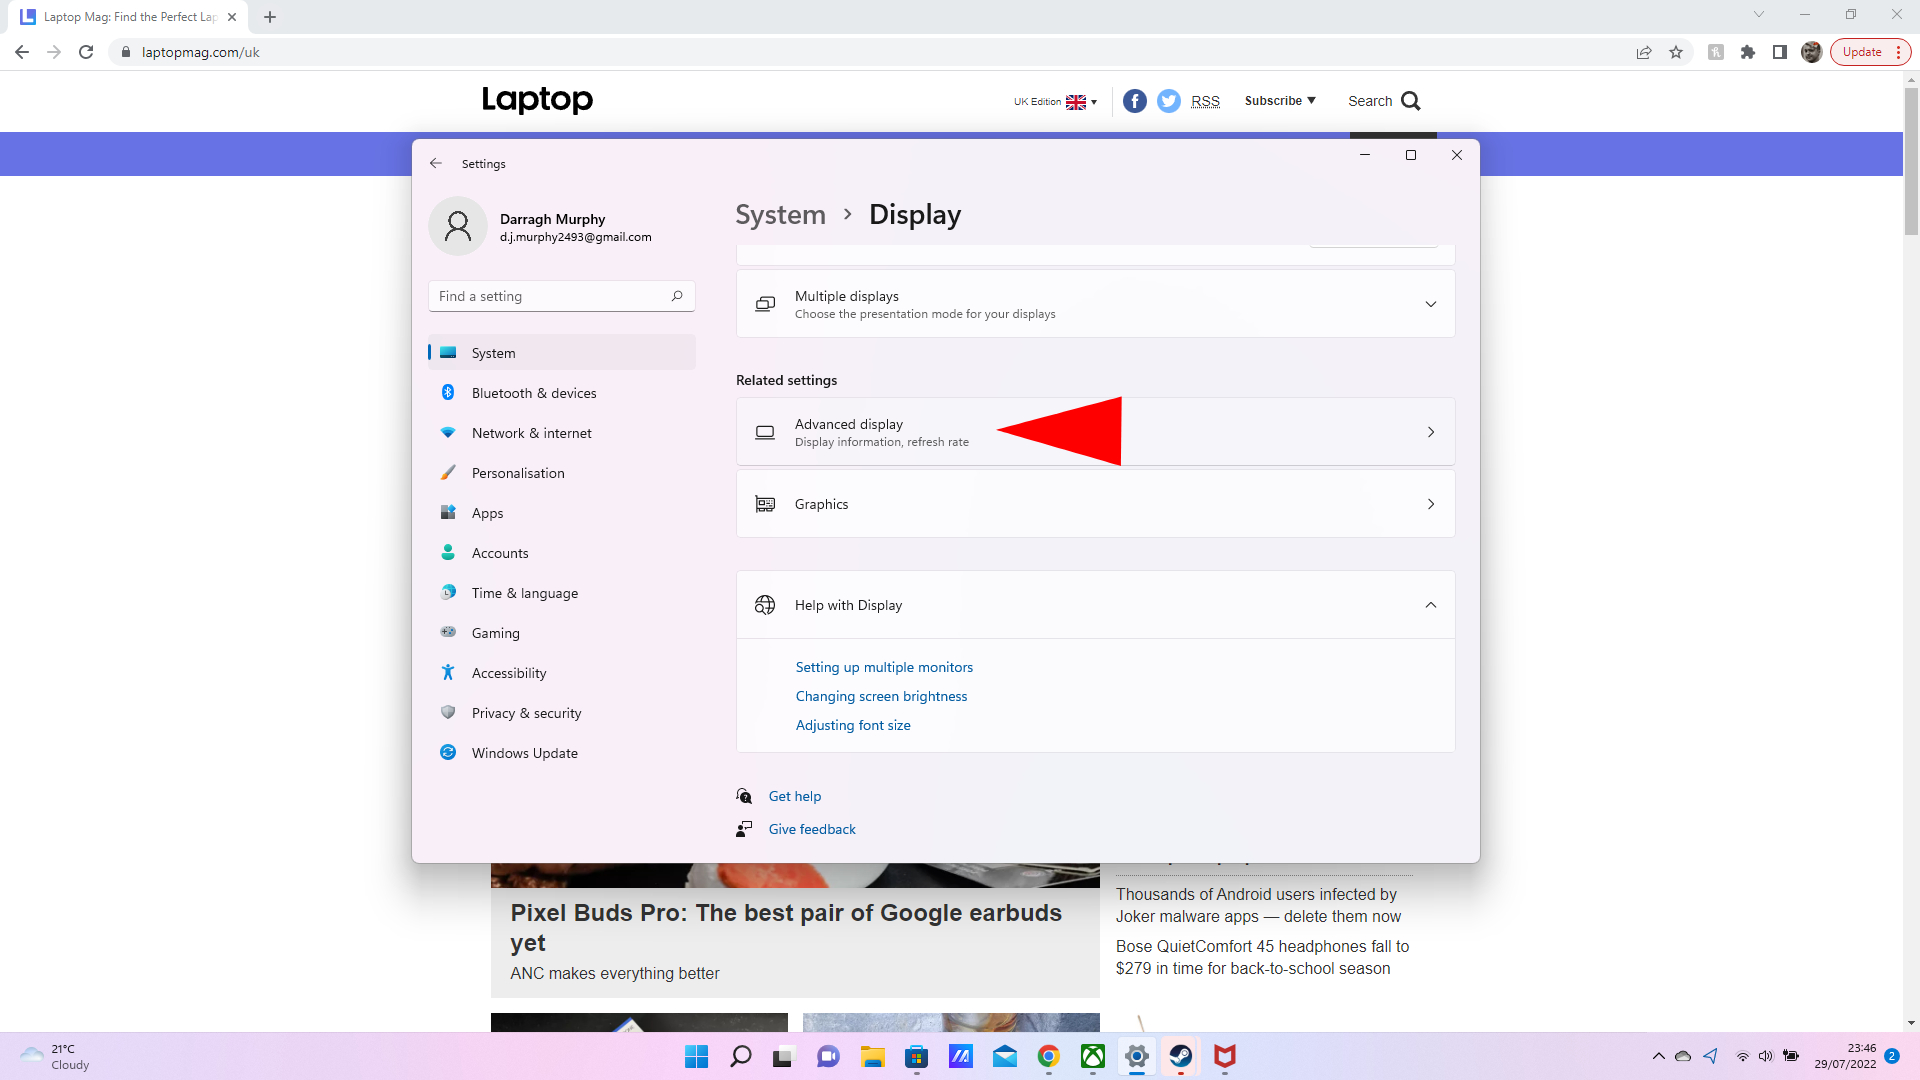
3. Scroll down and under Related settings, click Advanced settings.
4. Under Display information, you’ll find Choose a refresh rate. In the drop-down menu, select the refresh rate you want.
If you have an external monitor, you can also select it in the drop-down menu at the top and choose the refresh rate from there to make the most out of your setup. Just be aware that there are battery life repercussions if you are doing this on your laptop when it isn’t plugged in.
5. Take screenshots the way you want to with the Snipping tool
Ah, the Snipping tool. My favorite feature to precisely capture a screenshot anywhere on a PC just the way I want it. Of course, you can simply press the Print Screen button to capture everything on screen, but sometimes you don’t need the taskbar photobombing an otherwise perfect shot.
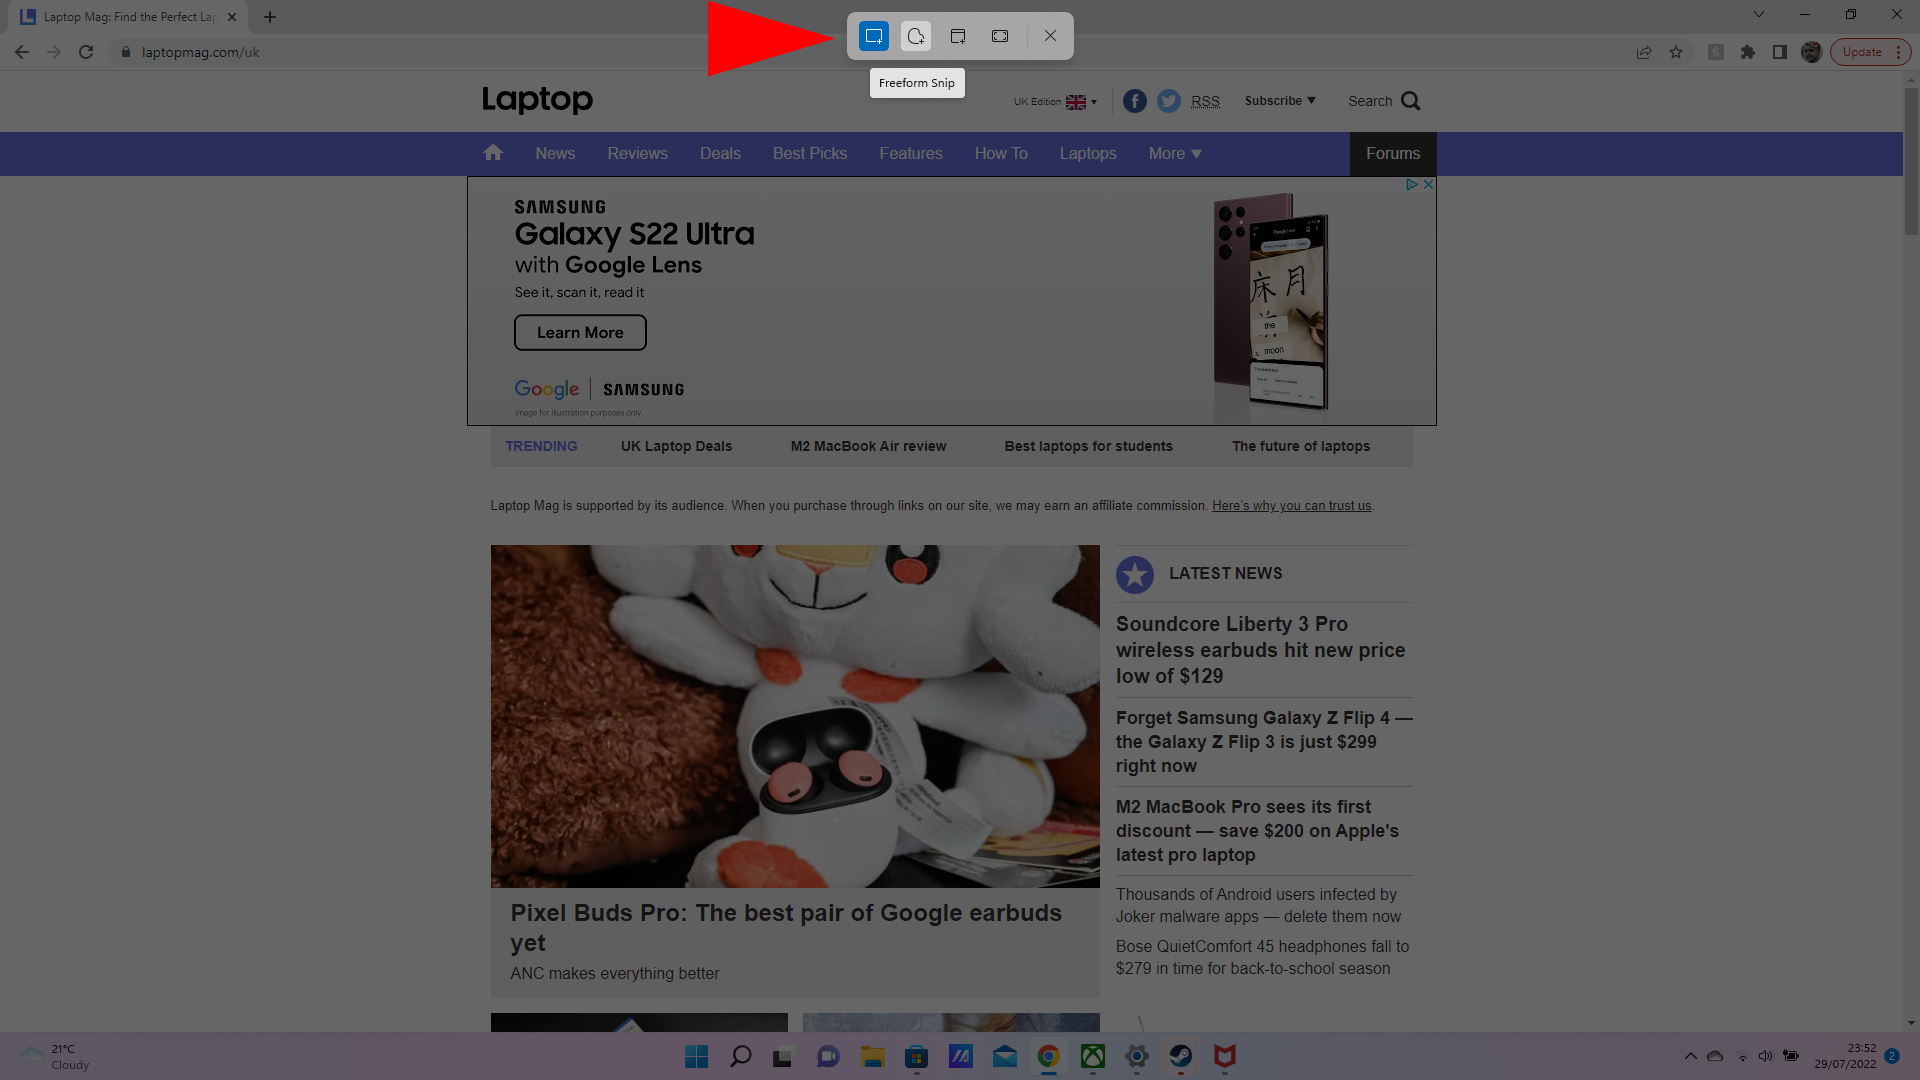
Just as easily, you can enter a keyboard shortcut to open Windows 11’s snipping tool, which allows you to drag the cursor over what you want in the screenshot in different ways. Whether you want a simple rectangular snip, a specific freeform screenshot, or just a snip of a window, the Snipping tool is here to offer a helping hand.
1. Press Windows + Shift + S.
2. Select the type of snip you need by clicking on the options in the top bar.
3. Drag the cursor or click on the window you want to screenshot.
Voilà! The screenshot will be saved to your clipboard to edit, save, or share.
6. Disabling startup apps will boost your PC’s performance
Regardless of how powerful your PC is, it can still suffer from slow startup speeds due to apps running in the background. The good news is there's a simple solution to stop apps from starting up automatically as soon as you log in to your PC or laptop.
Right under your nose, Microsoft allows a number of apps to automatically run at startup on Windows 11, along with other programs you may download such as gaming clients or VPN services. To prevent these apps from hindering your system’s performance, follow the steps below.
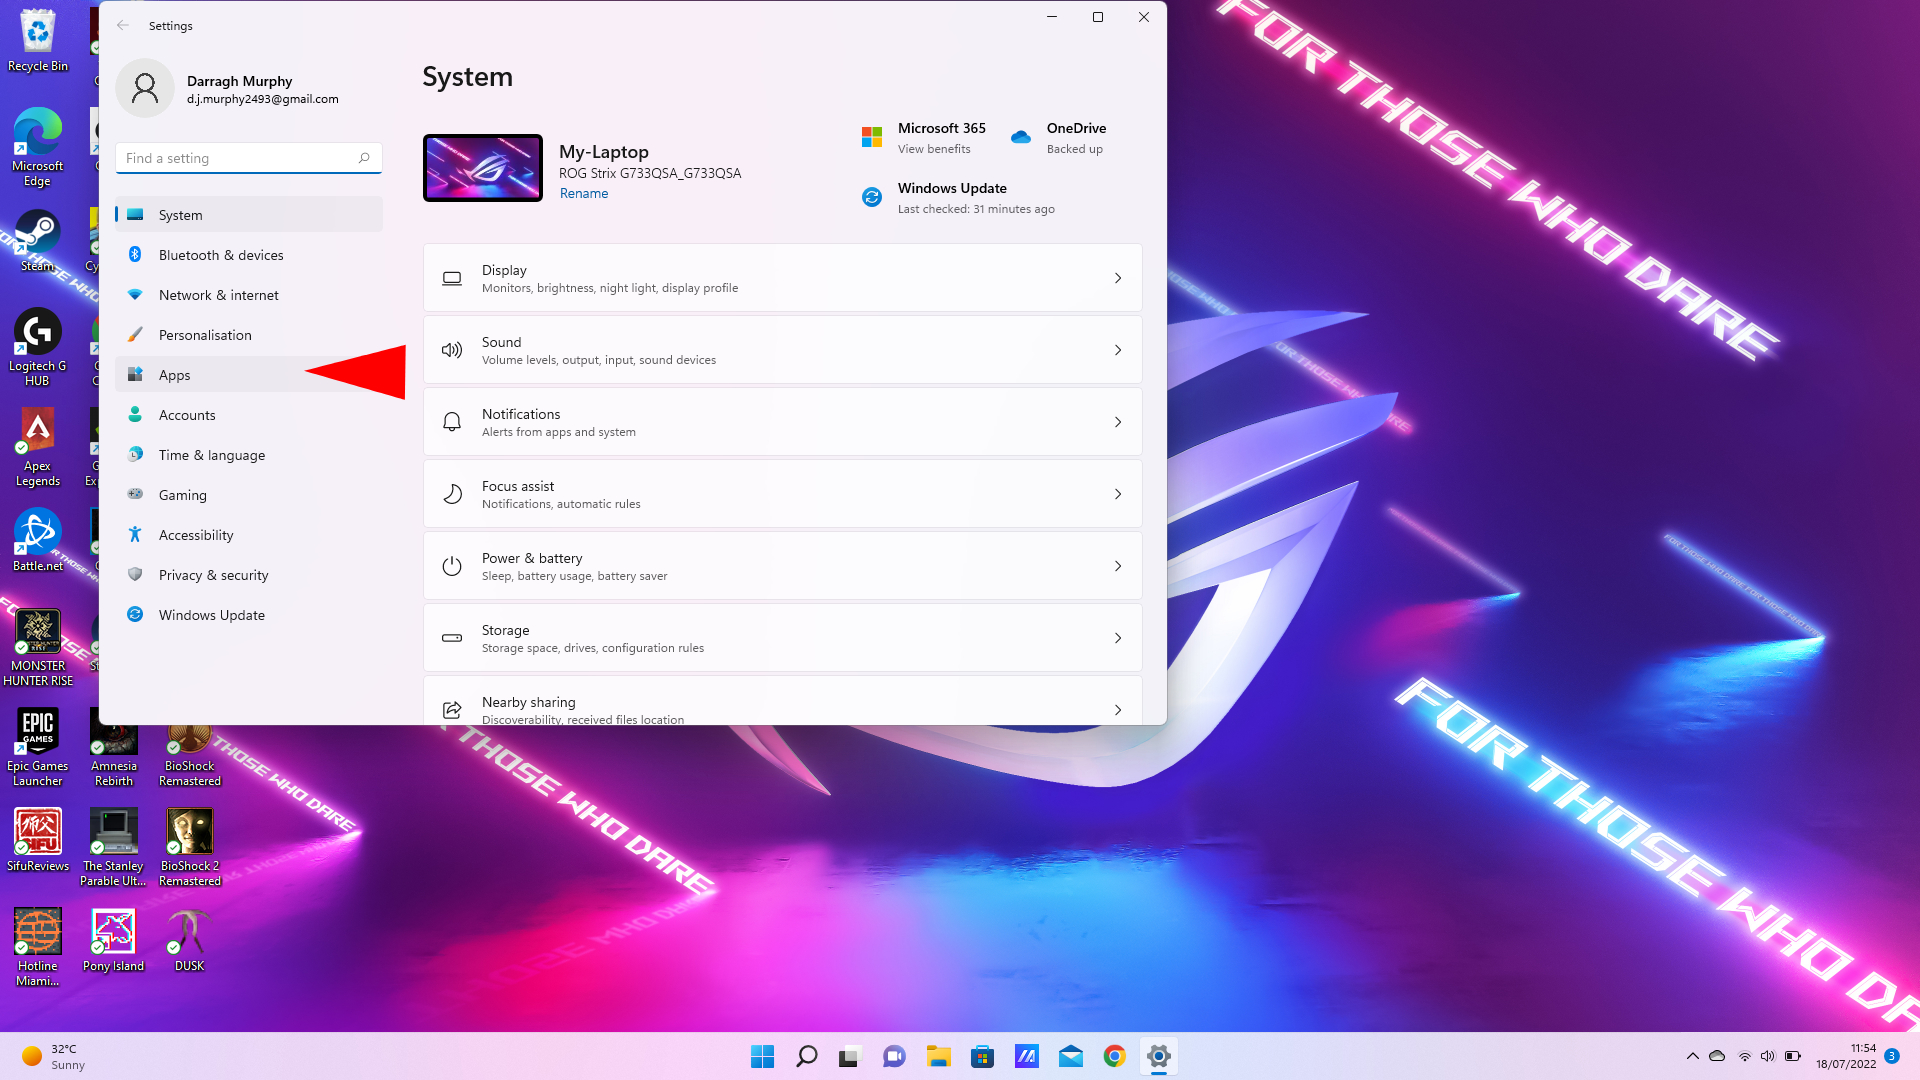
1. Right-click the Start Menu icon on your taskbar and select Settings. A menu will appear where you choose from common apps native to Windows.
2. On the left-hand sidebar, click on Apps.
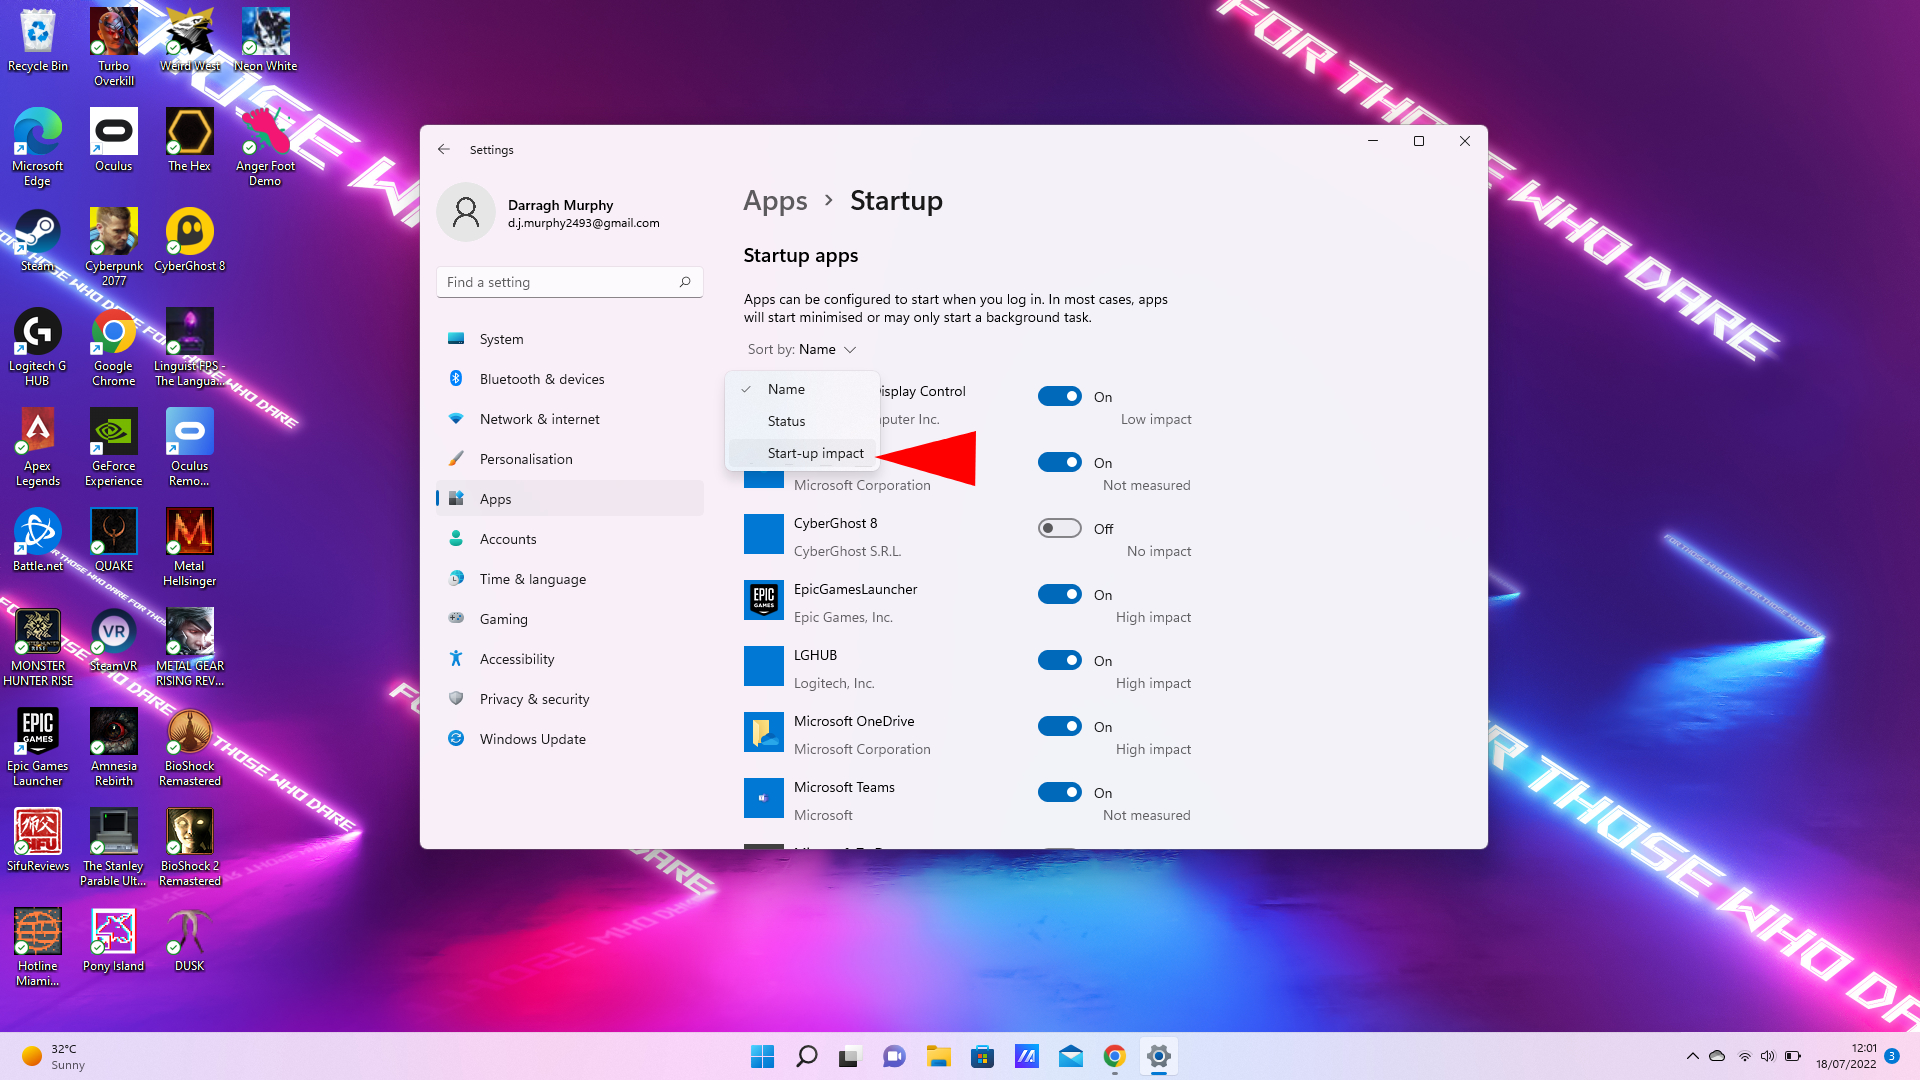
3. Navigate to Startup at the bottom of the menu.
4. Turn off the toggle switch next to the apps you want to disable.
5. Windows lets you know the impact level of each app. To make it easier to see which apps have "High impact," click on Sort by and select "Start-up impact."

Darragh Murphy is fascinated by all things bizarre, which usually leads to assorted coverage varying from washing machines designed for AirPods to the mischievous world of cyberattacks. Whether it's connecting Scar from The Lion King to two-factor authentication or turning his love for gadgets into a fabricated rap battle from 8 Mile, he believes there’s always a quirky spin to be made. With a Master’s degree in Magazine Journalism from The University of Sheffield, along with short stints at Kerrang! and Exposed Magazine, Darragh started his career writing about the tech industry at Time Out Dubai and ShortList Dubai, covering everything from the latest iPhone models and Huawei laptops to massive Esports events in the Middle East. Now, he can be found proudly diving into gaming, gadgets, and letting readers know the joys of docking stations for Laptop Mag.
