10 secret Mac features that make your life easier — are you using them?
Power up your Mac game with these tricks
Sign up to receive The Snapshot, a free special dispatch from Laptop Mag, in your inbox.
You are now subscribed
Your newsletter sign-up was successful
It's time to step up your game and unlock your Mac’s full potential. Apple’s macOS has a myriad of features that are sure to make your digital life easier, if only you knew they existed. And while power users might scoff at some of these tips, chances are there are a handful your average macOS user never knew existed. From customizable keyboard shortcuts to built-in screen recording, Mac always has secret features up its sleeve.
Mac computers are known for their sleek design and user-friendly interface. However, many users may not be aware of the hidden features and functions that can enhance their Mac experience. Here are 10 secret Mac features you should be using.
Advanced Keyboard Shortcuts
Did you know you can use keyboard shortcuts to access specific features and functions on your Mac quickly? For example, pressing "Shift + Command + 3" will take a screenshot of your entire screen. This can save you time and effort when trying to capture something on your screen. You should also check out the following Mac shortcuts:
- Command + Comma (,): opens the application’s Preferences.
- Command + Left/Right Arrows: lets you go back (left arrow) or forward (right arrow) on your browser history.
- Command + Backtick: helps you move between open windows of your active application.
- Control + Command + Space: lets you select an emoji to write on a text field.
- Command + Control + Q: immediately locks your Mac to keep it safe from unauthorized access.
Hidden Apps
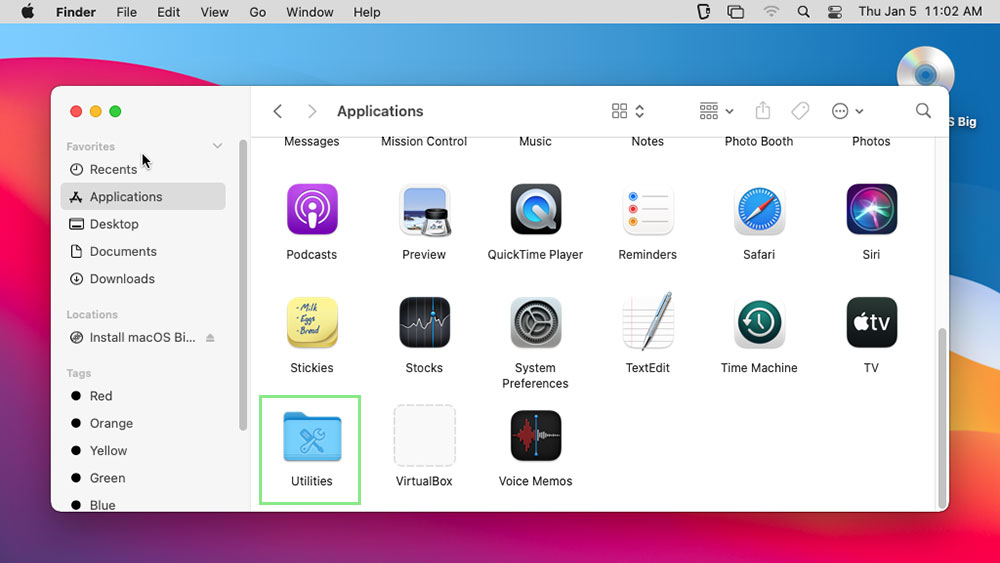
Your Mac comes with a number of hidden apps and utilities that you might not know about. To access these apps, simply go to the "Applications" folder in Finder, and then open the "Utilities" folder.
Here you'll find a wealth of useful tools, including the System Information app, which can provide detailed information about your Mac's hardware and software.
Stacks
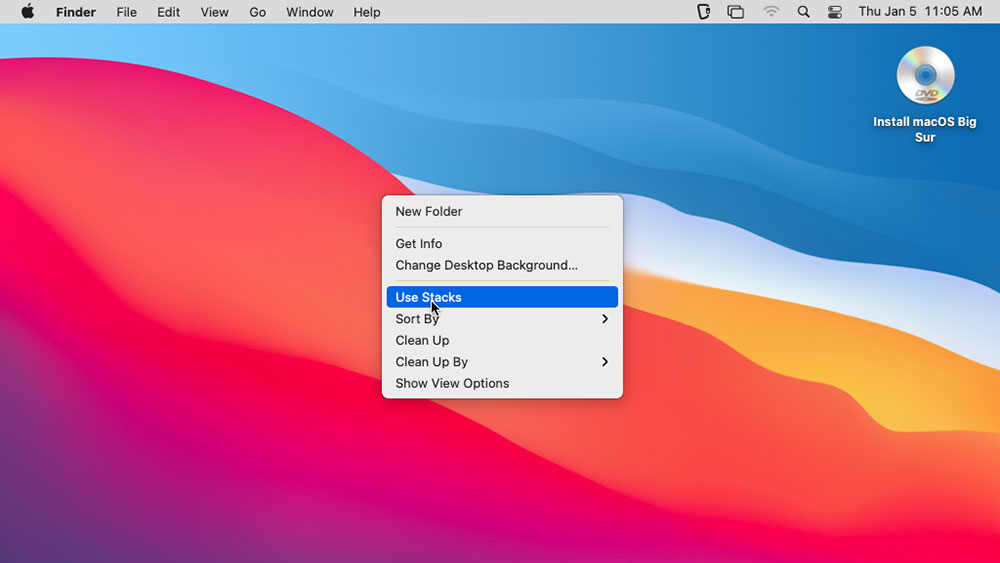
If you have a lot of files and folders on your Mac's desktop, it can quickly become cluttered and hard to navigate. That's where Stacks comes in. This feature automatically organizes your files and folders into neat piles, based on their type.
To use Stacks, simply right-click on your desktop, go to View and select “Use Stacks” from the context menu. You can also change how your Stacks are grouped by clicking your desktop, going to View, and selecting “Use Stacks”.
Sign up to receive The Snapshot, a free special dispatch from Laptop Mag, in your inbox.
Do Not Disturb
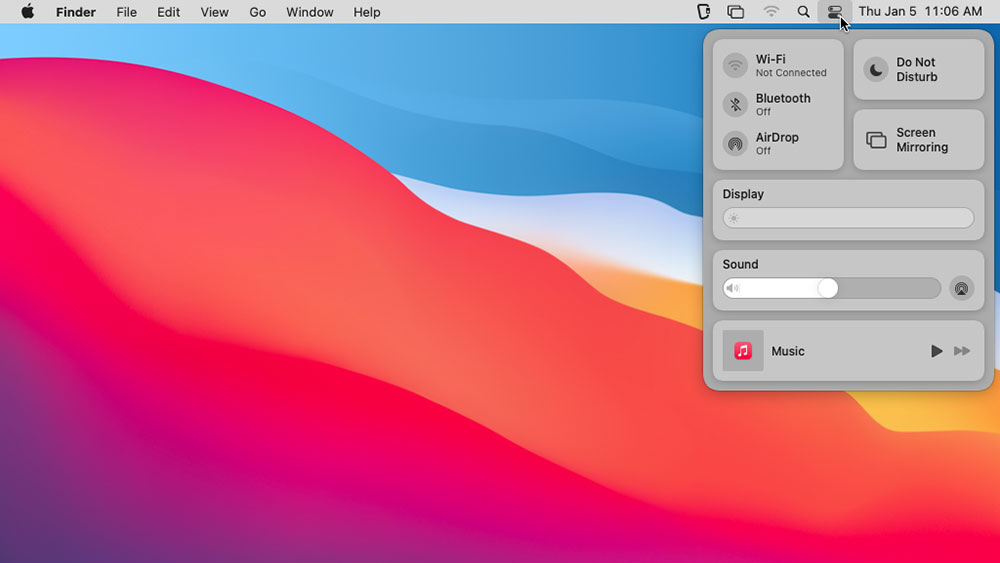
Do you get tired of notifications popping up on your screen all the time? The Do Not Disturb feature can help. When enabled, this feature will silence all notifications and alerts on your Mac, allowing you to focus on your work without interruptions.
To enable Do Not Disturb, press the Option key on your keyboard and click the Notification Center icon. Follow the same steps to disable it.
Screenshots
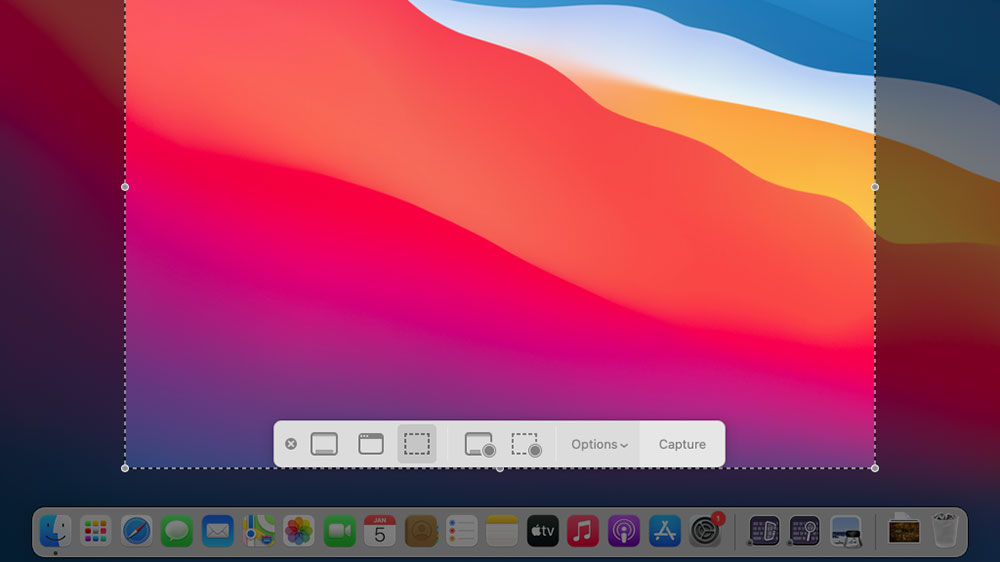
Taking screenshots on your Mac is easy with the built-in Grab app. This app allows you to capture a specific area of your screen, a window, or your entire screen. To access Grab, go to the "Applications" folder in Finder and open the "Utilities" folder. From here, you can launch the Grab app and use its various tools to capture and save your screenshots.
For Mac computers with macOS Mojave and above, the Screenshot app replaces Grab. This new utility offers additional keyboard shortcuts to make your screenshots much easier. Here are some of the shortcuts you can use:
- CMD+Shift+3: takes a screenshot of the entire screen.
- CMD+Shift+4: lets you choose an area for the shot.
- CMD+Shift+4+Space: keys to toggle the area selection to window selection.
- CMD+Shift+6: on MacBook Pros will help screenshot the Touch Bar.
Split View
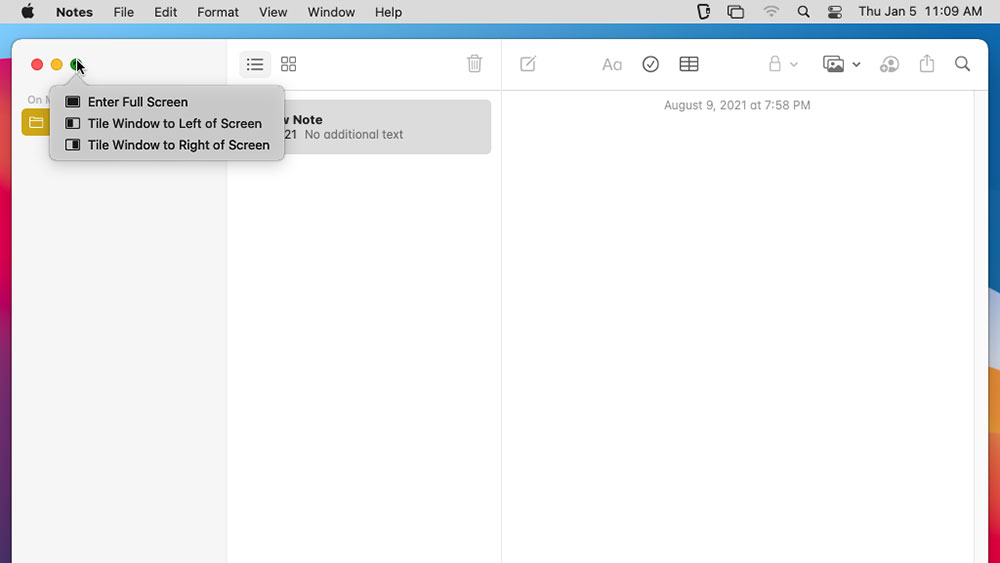
If you often find yourself working with multiple apps and windows at the same time, the Split View feature can be a lifesaver. This feature allows you to split your screen in half, allowing you to view and work with two apps side by side.
To use Split View, simply click and hold on the green "Full Screen" button in the top left corner of any app window, and then select "Tile Window to Left of Screen" or "Tile Window to Right of Screen" from the context menu.
Dictation
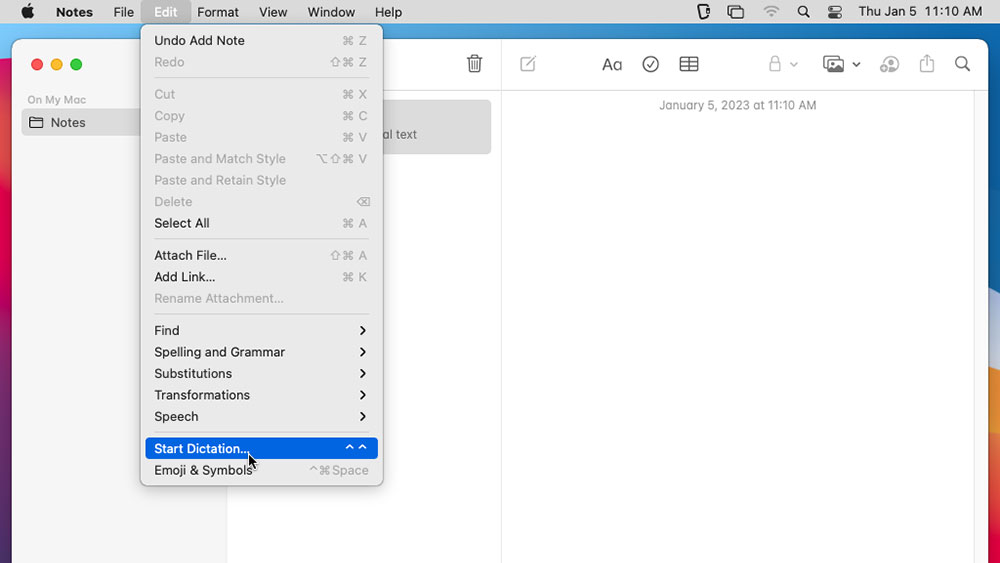
Don't feel like typing? You can use the Dictation feature on your Mac to convert your spoken words into text. Mac's Dictation feature allows users to input text by speaking into their microphone. Follow the steps below to enable the dictation feature.
To use Dictation, click on Edit > Start Dictation. Click the microphone icon to start and pause Dictation.
Customizable keyboard shortcuts
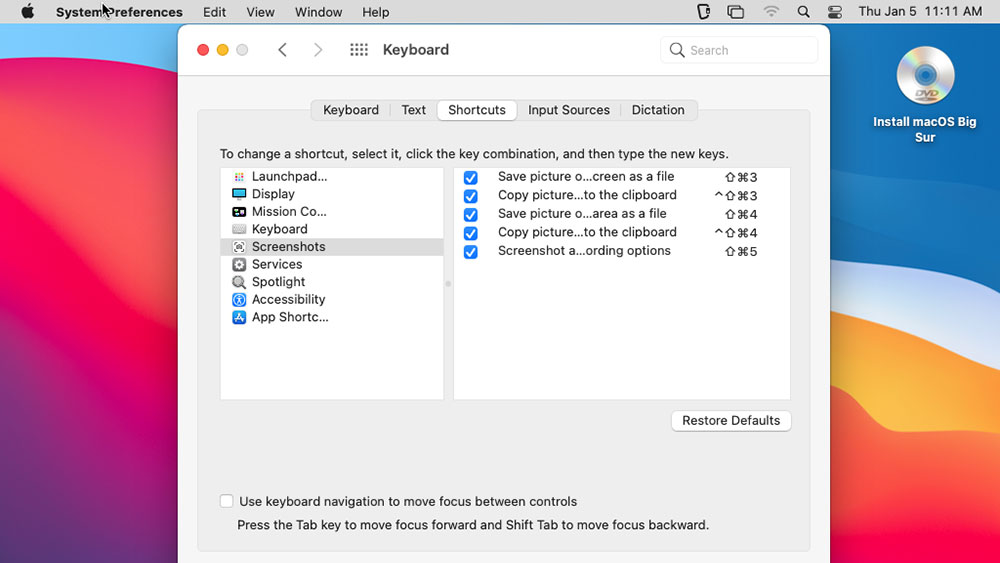
Mac's customizable keyboard shortcuts allow users to assign specific keys or key combinations to perform specific actions or functions. This can be useful for quickly accessing frequently used actions or for improving productivity.
You can set up your keyboard shortcuts in Mac’s System Preferences.
Built-in screen recording
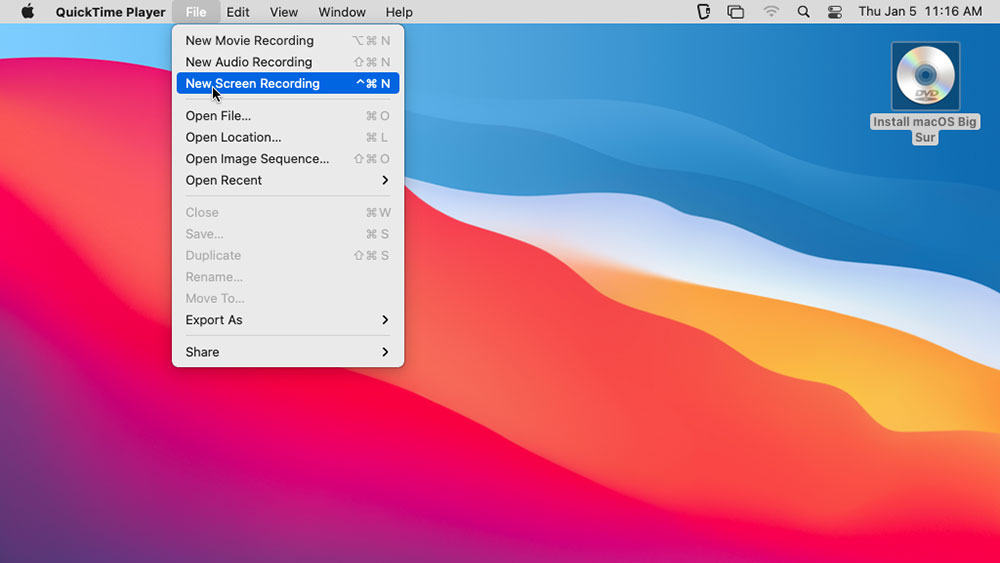
The QuickTime Player app on Mac is a versatile media player that also includes a screen recording feature.
With this feature, you can record video and audio of your screen activity, including any on-screen actions, movements, and audio from your computer's microphone.
Markup tools
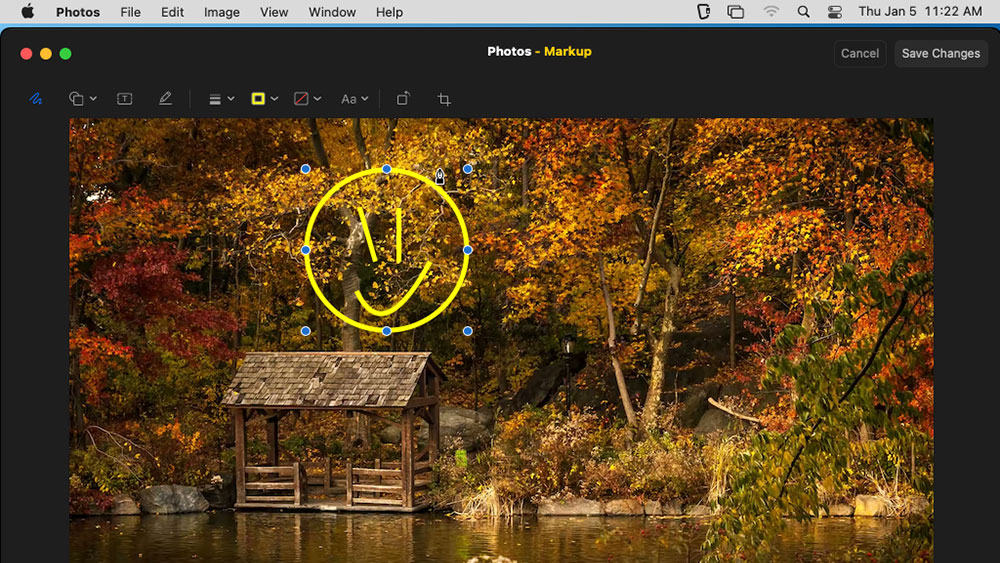
Mac's Markup tools allow users to annotate and edit images and PDF documents by adding text, shapes, and other graphic elements. These tools can be accessed from various apps on Mac, including Preview, Mail, and Photos.
