How to Use the 5-GHz Band on Your Router
Sign up to receive The Snapshot, a free special dispatch from Laptop Mag, in your inbox.
You are now subscribed
Your newsletter sign-up was successful
Channels are a series of sub-bands that operate within the 2.4- or 5-GHz bands. The 2.4-GHz band worked really well when the number of devices operating on the band were few and far between, but with today’s connected world, this band has become crowded, degrading network performance.
The 5-GHz band is much less crowded, resulting in less interference and higher data throughput speeds. If all your devices support it, you can force your router to use only the 5-GHz band. To check your devices for 5-GHz band support, you can check your manual. Or you can change the setting via the steps below on your router and check for devices that no longer work. If all of them work after your router reboots, all of your devices are compatible. The higher frequency band has a smaller range, however, so you’ll want to be sure all your devices will be in range of the router, or you can invest in an extender.
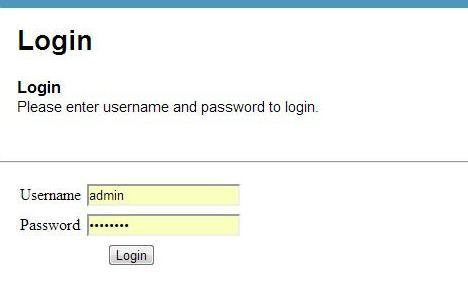
1. Log into your account. Open your browser and enter the manufacturer’s default IP address, typically located on the underside of your router or in the user manual or a custom one that you set. Using your username and password, log into your router settings page.
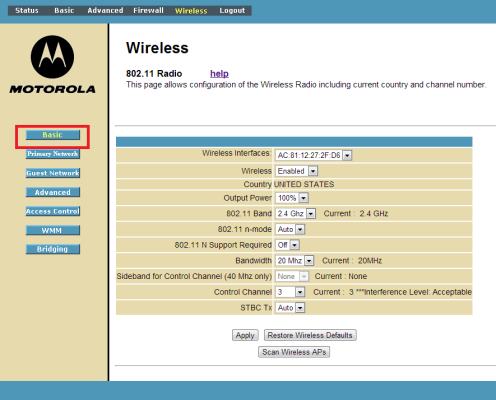
2. Open the Wireless tab to edit your wireless settings. Once there, go to the “Basic” (or equivalent) tab if you’re not already on the correct page.
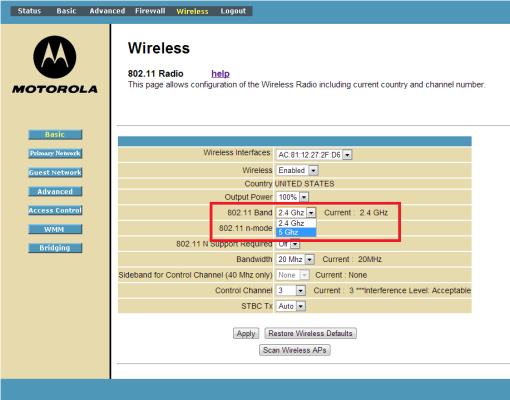
3. Change the 802.11 band from 2.4-GHz to 5-GHz.
4. Click Apply.
Sign up to receive The Snapshot, a free special dispatch from Laptop Mag, in your inbox.


