How to change a theme or customize one on Windows 11
Get the best look for your Windows system
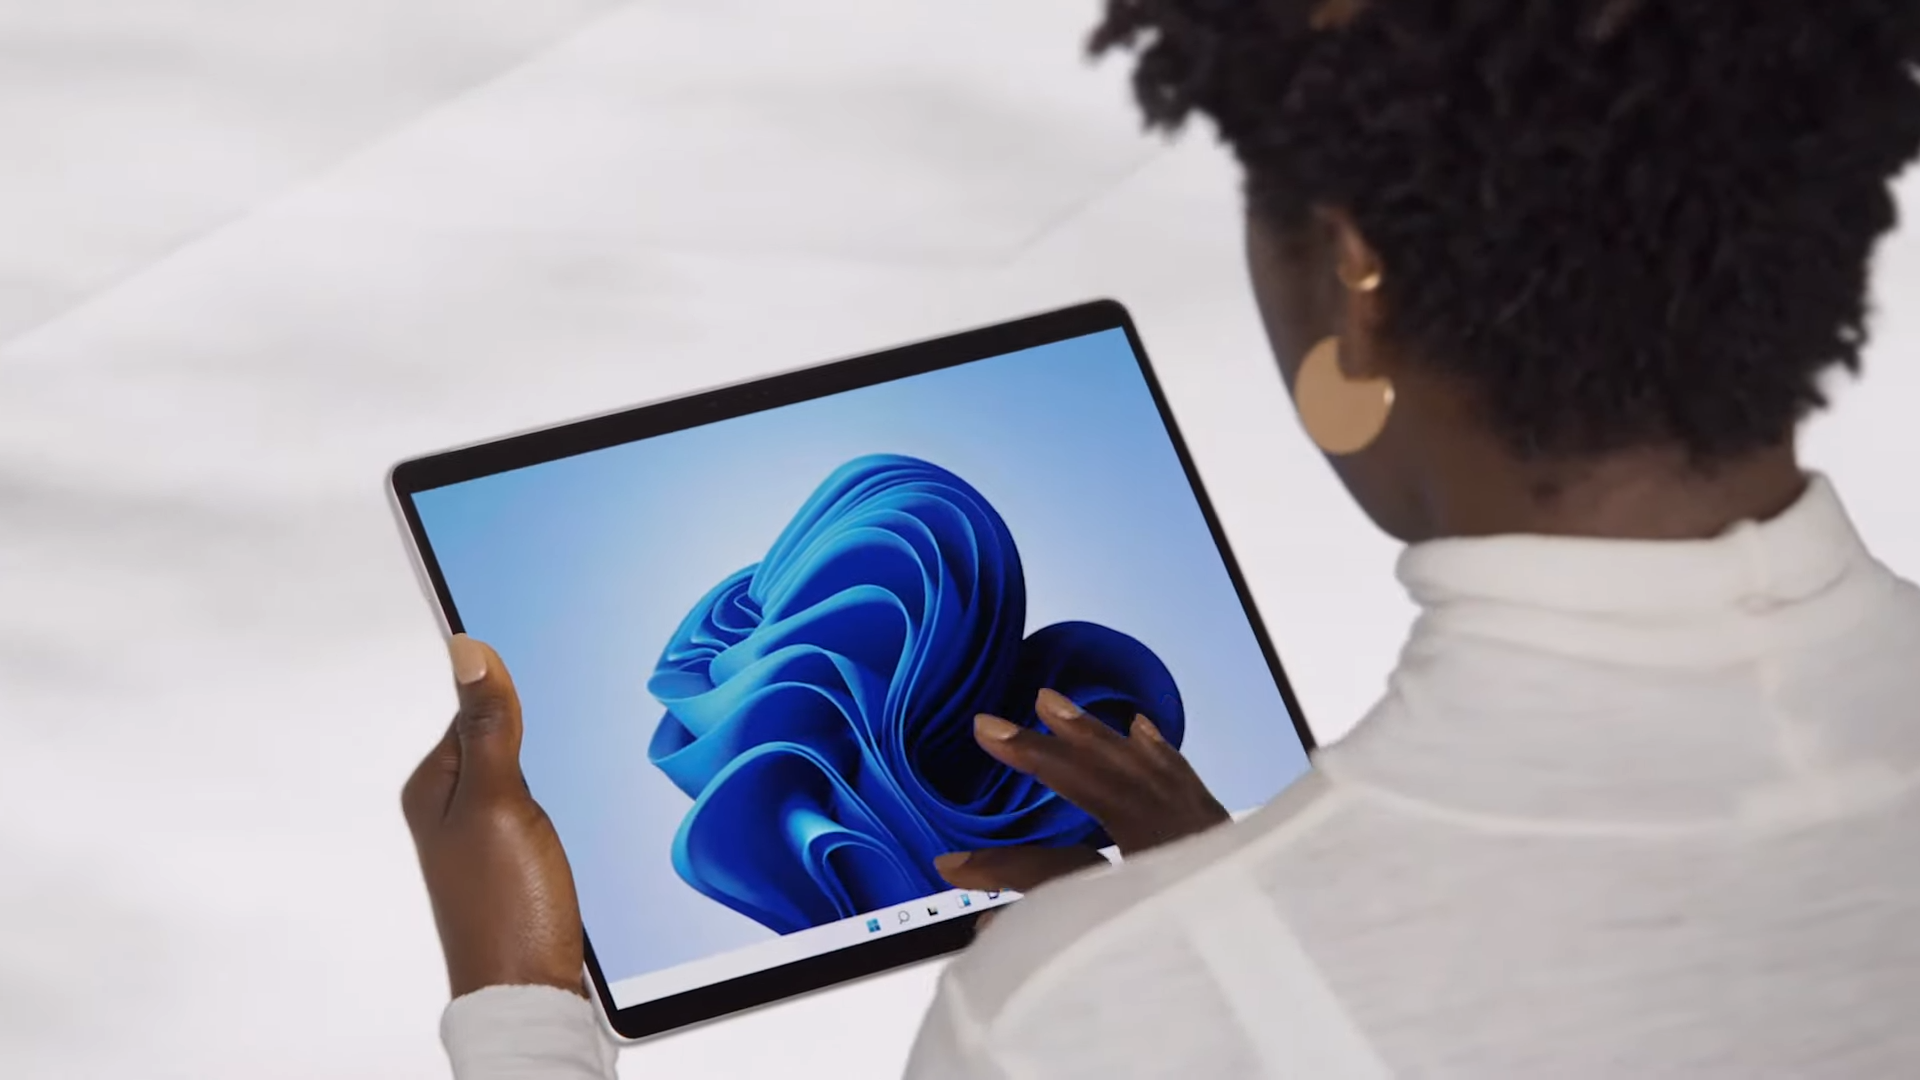
With Windows 11’s theme options, you can choose or design the best visual aesthetic for you. Here, we’ll learn how to change our computer’s theme and add that extra bit of personalization if one of the vanilla themes just isn’t cutting it for you.
Currently, Windows 11 offers eight pre-made themes that you can choose from. The default themes include Windows Dark, Windows Light, Clow, Captured Motion, Sun Rise, and Flow. You can also download more themes on Microsoft Store. Most are free, but there’s also a number of premium themes. Most cost just a few dollars.
When customizing a Windows theme, you can select your own background images, colors, fonts, sounds, mouse cursors, contrasts, and more.
How To Change your Windows Theme
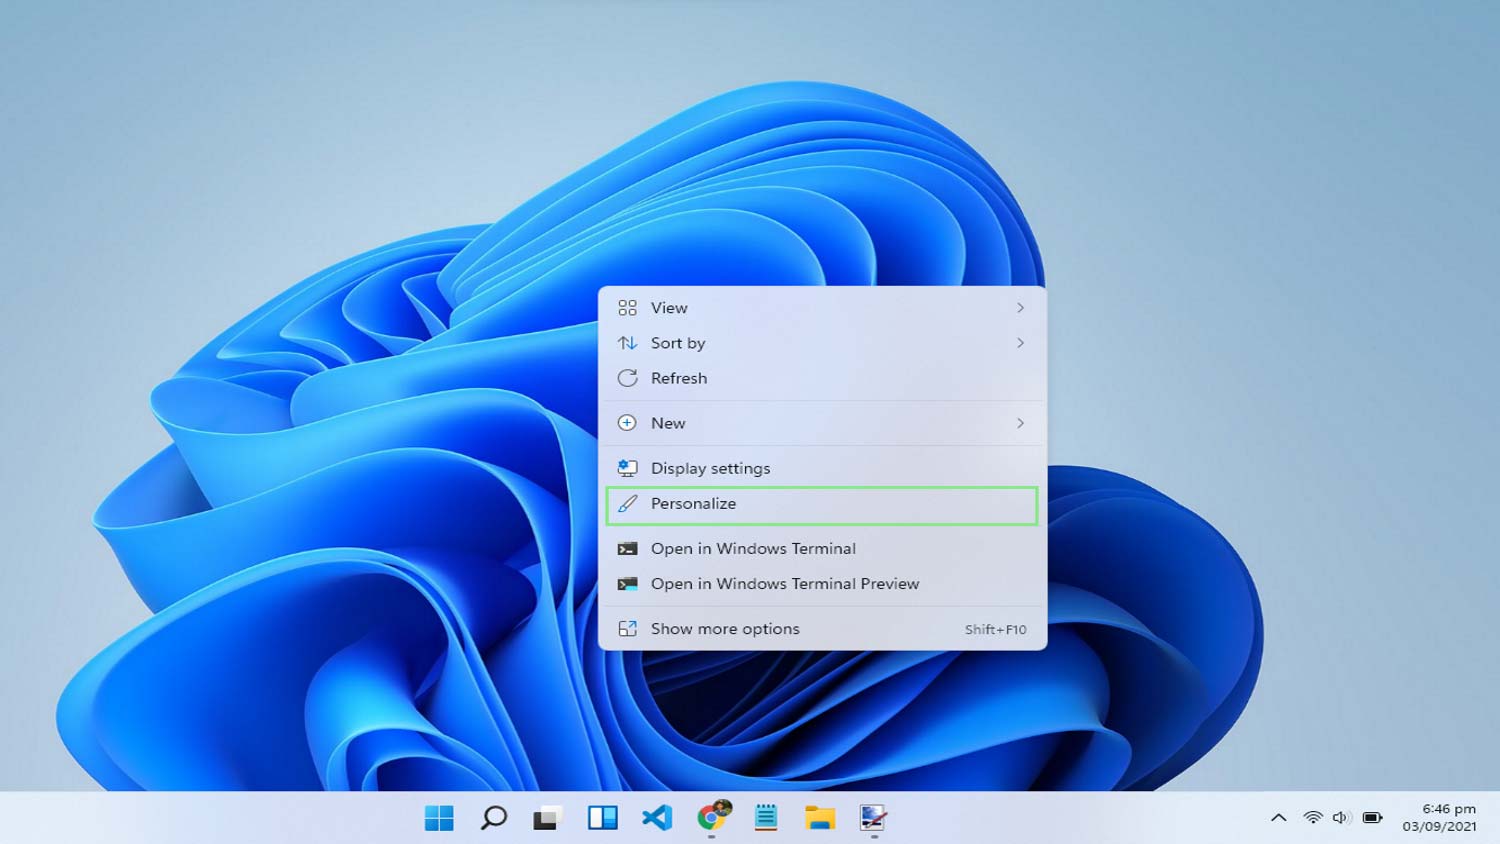
1. Right-click on your desktop to show Windows’ desktop menu.
2. Select Personalize from the menu. This will open the Settings page on the Personalization section.
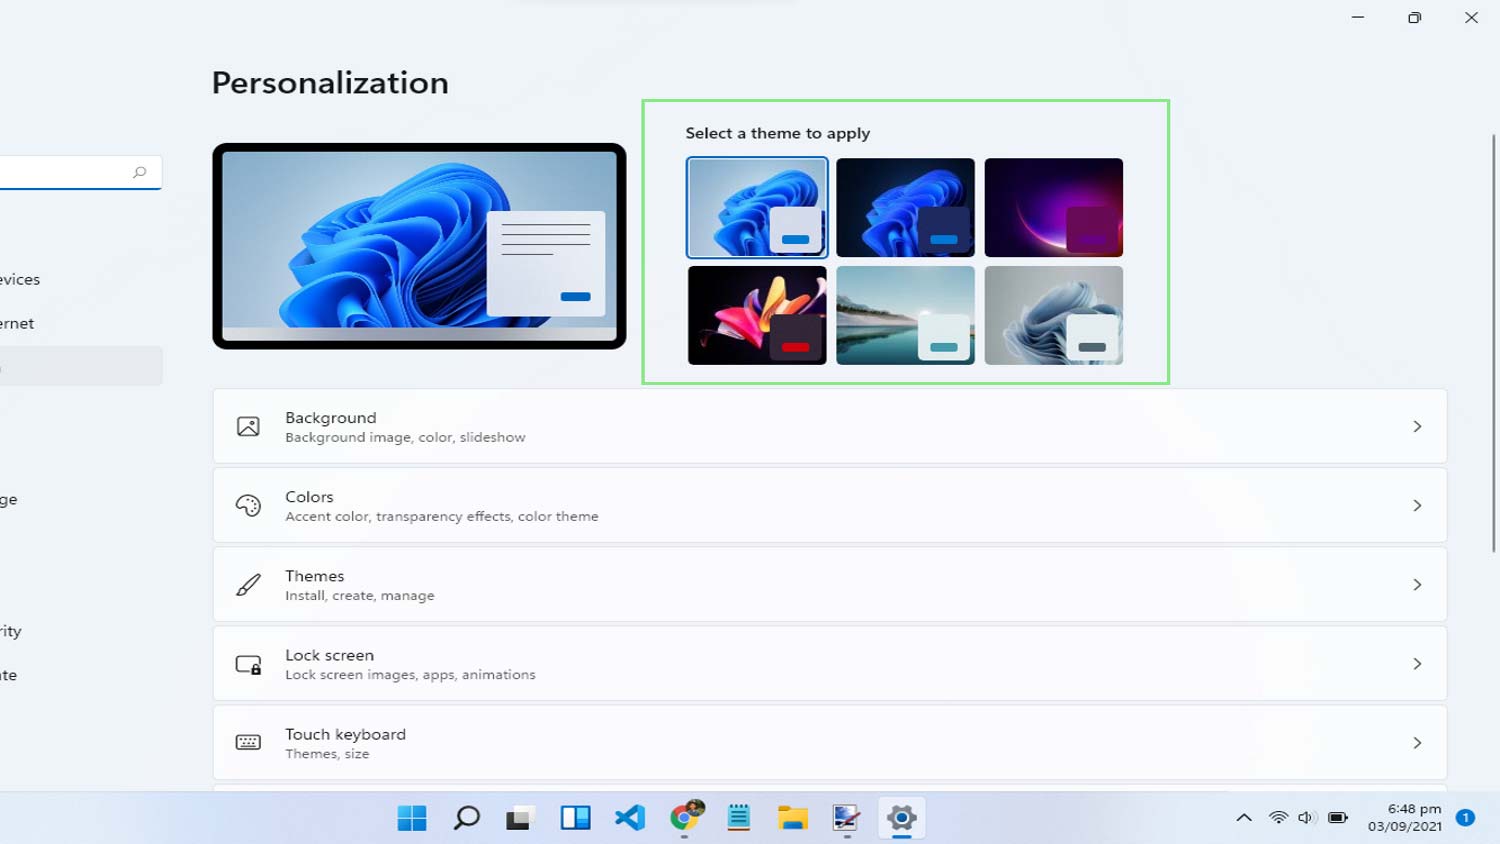
3. From the tops section of the window, you can view some of Windows 11’s available themes. Click on your preferred theme to apply it.
4. Wait for your computer to load for a few seconds. After which, you will notice that your selected theme has now been applied.
Sign up to receive The Snapshot, a free special dispatch from Laptop Mag, in your inbox.
How to Customize Your Windows Theme
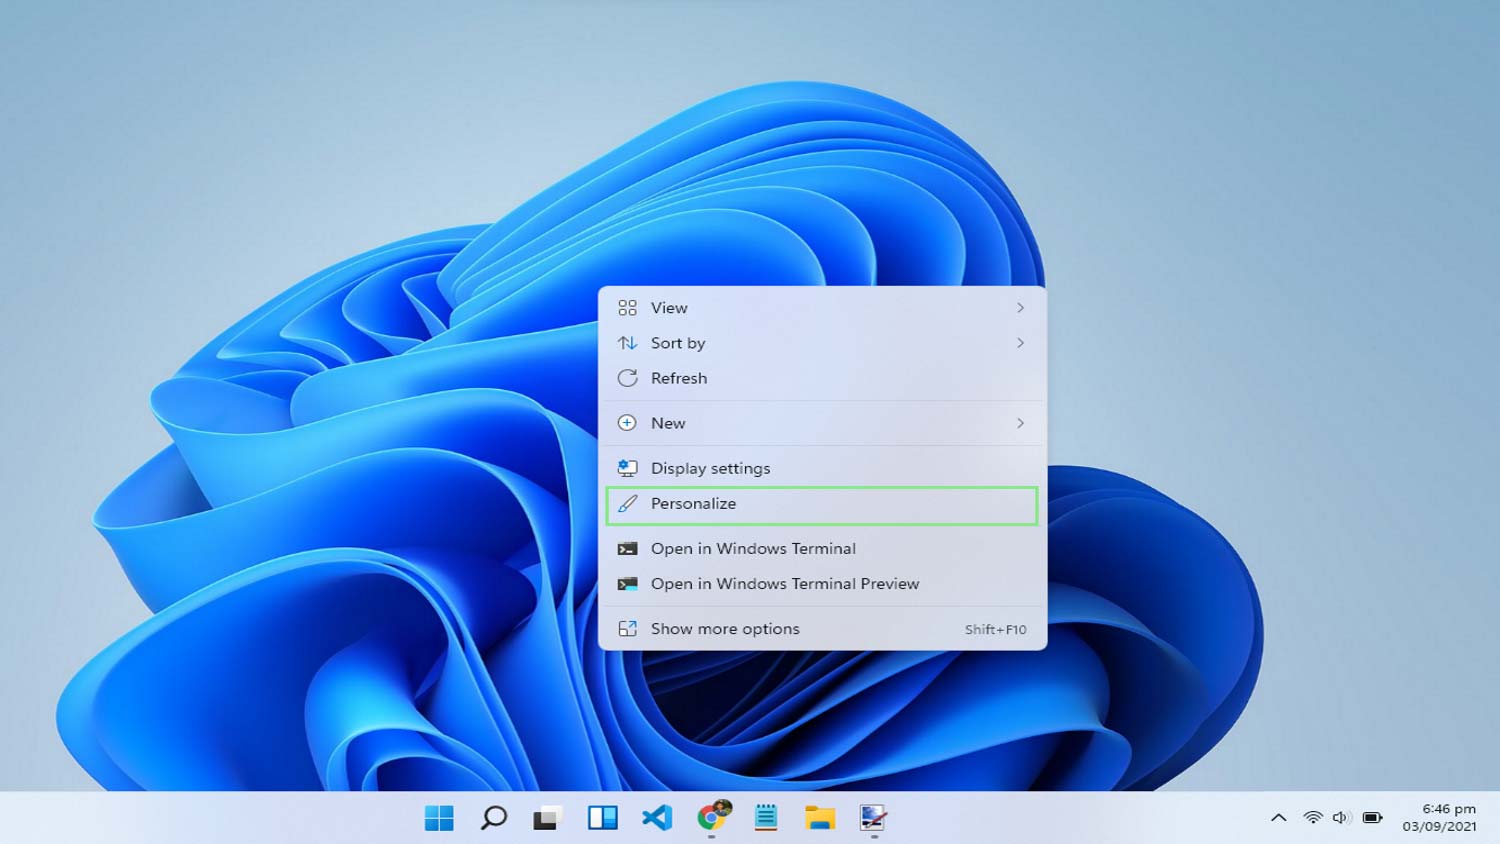
1. Open your Windows computer’s Personalization Settings by right-clicking on your desktop and selecting Personalize from the menu.
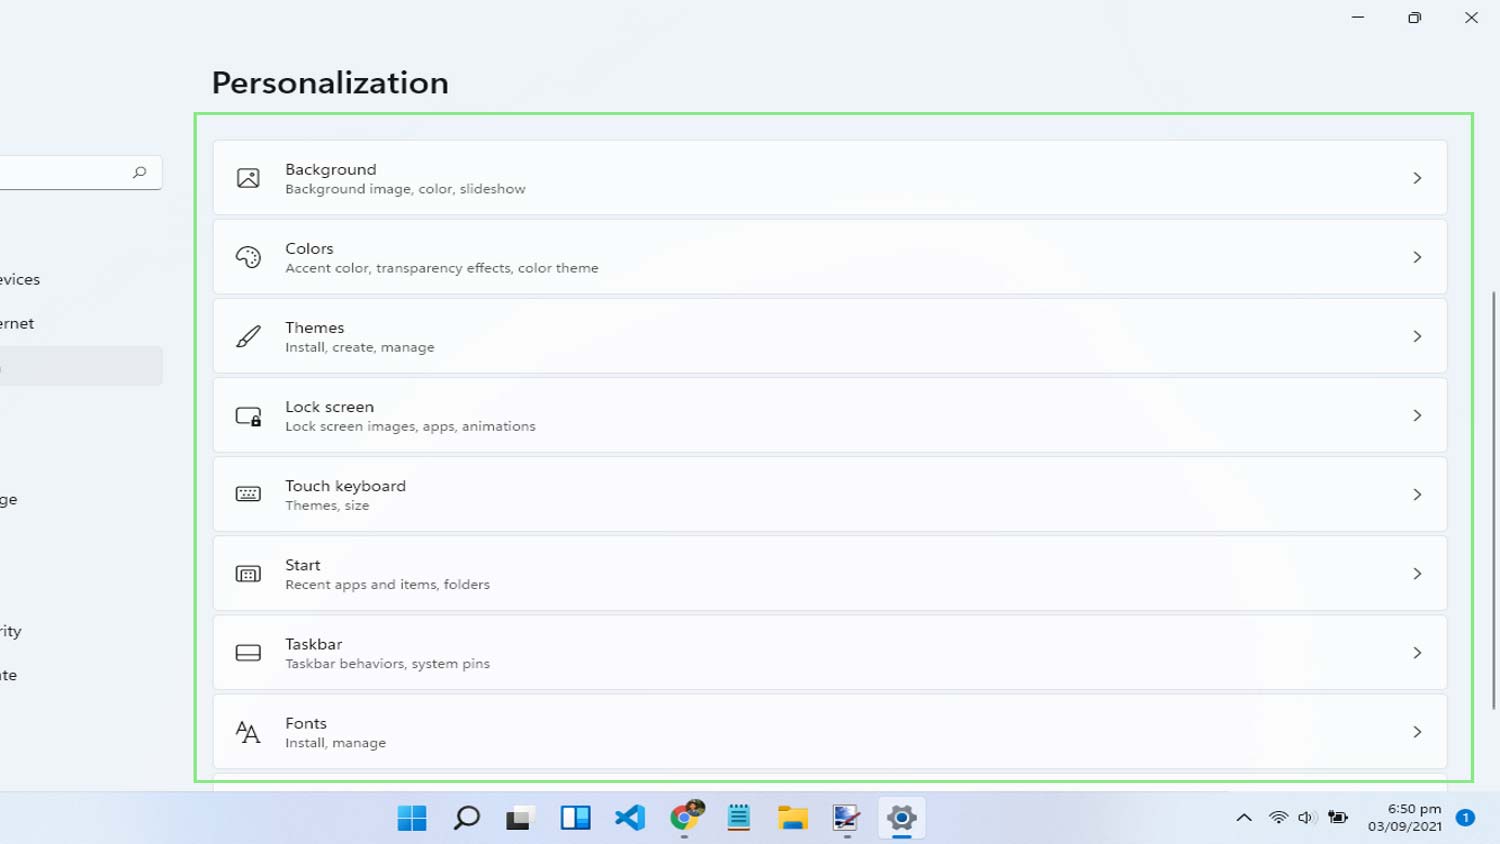
2. Select the aspect of your theme that you wish to customize. Some of your available options include:
3. Your changes will automatically apply to your Windows computer’s appearance.
Bryan covers everything you need to know about Windows, social media, and the internet at large for Laptop Mag. Thanks to his extensive knowledge of operating systems and some of the most popular software out there, Bryan has written hundreds of helpful guides, including tips related to Windows 11 drivers, upgrading to a newer version of the OS, editing in Microsoft Photos, or rearranging pages in Google Docs.
