How to add the Developer Tab to Microsoft Excel
Reach new heights with Excel’s Developer Tab
Anyone who calls themselves an Excel expert should consider adding the Developer Tab to their arsenal of tools. This tab provides an array of programmable and mathematical operations. In addition, it lets users process data more efficiently than standard Excel functions. In this article, you will learn all about this tab and how to equip it.
Excel is arguably one of the most powerful spreadsheet software programs across the globe. A significant portion of businesses are dependent on its hundreds of functions and features. One reason for the program’s widespread reliability is its Developer Tab and the tools it provides.
- How to use Microsoft Excel like a pro
- How to convert Excel spreadsheets to Google Sheets
- How to protect cells, columns, and rows from accidental editing in Excel
One perk of the Developer Tab is that it allows users to create and run Macros, which repeat and automate lengthy actions. In addition, users can create form controls with the Developer Tab. While form controls are helpful, an even more convenient tool is ActiveX control; this control provides more flexibility than typical form controls. Now that you are familiar with some of the uses for Developer Tab tools, read below to discover where to locate them.
How to Add the Developer Tab in Microsoft Excel
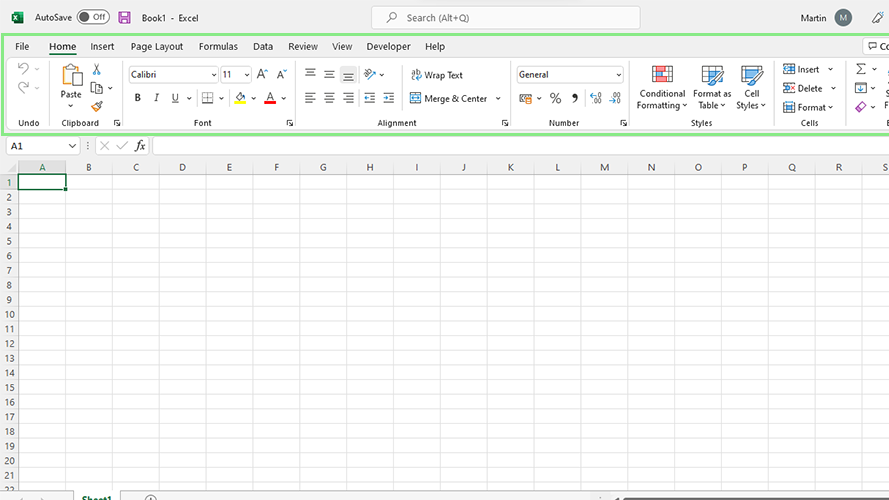
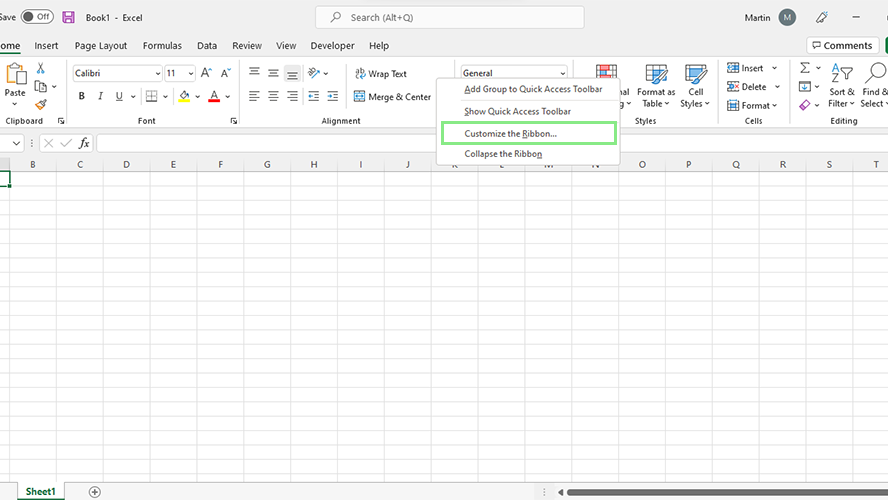
1. First, right-click on your Microsoft Excel Ribbon. The Ribbon is where all your tabs and tools are located. Next, a dropdown menu should appear.
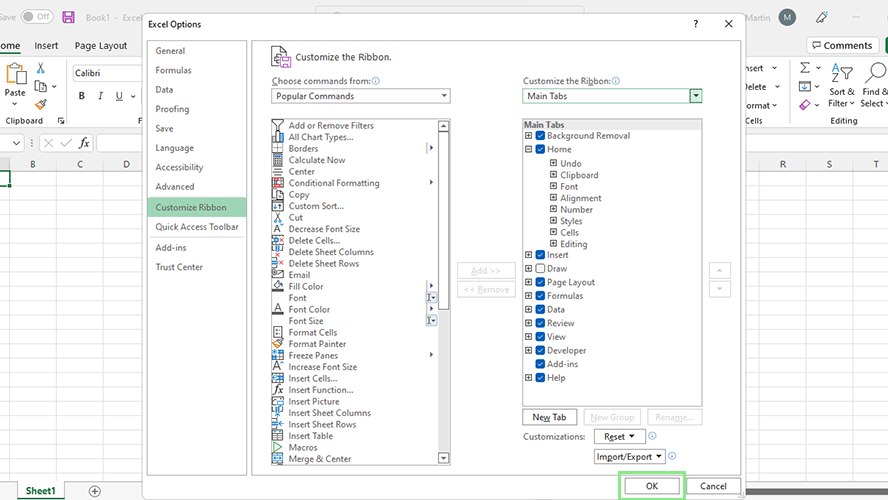
2. Select Customize the Ribbon from the choices available. This action will open the Excel Options window.
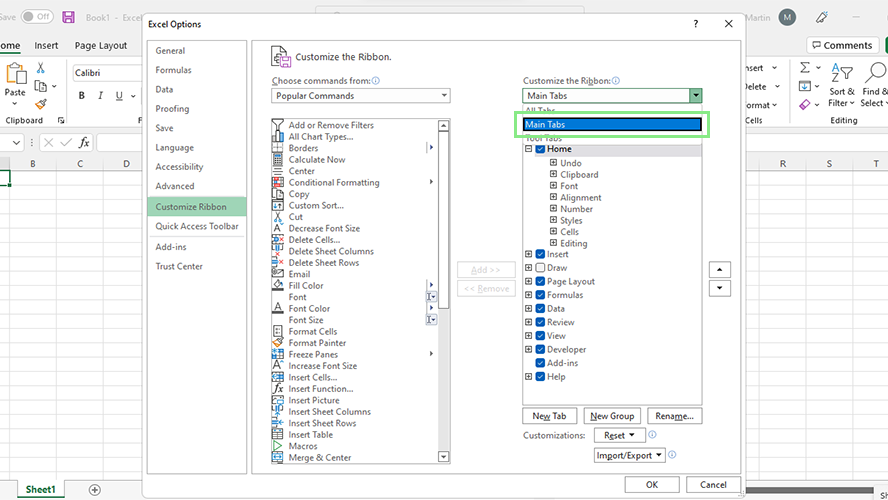
3. Under the Customize the Ribbon dropdown, select Main Tabs.
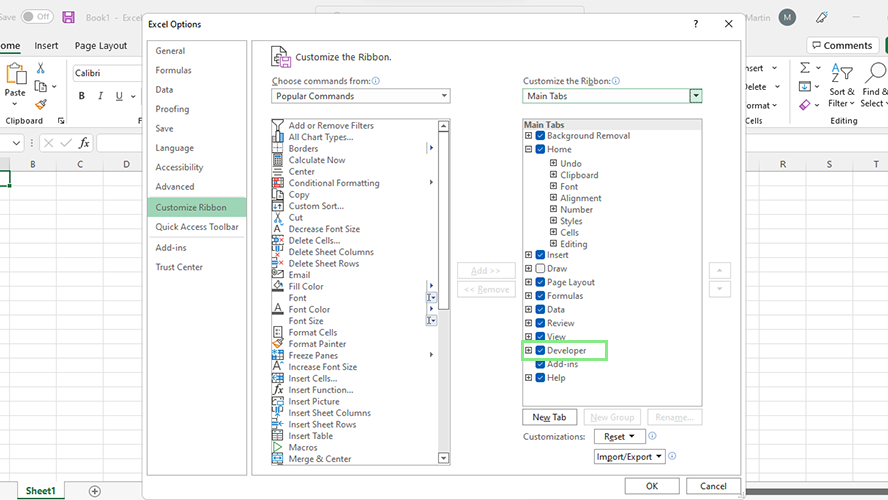
4. Look for Developer under the Customize the Ribbon dropdown. Tick the checkbox beside Developer.
Sign up to receive The Snapshot, a free special dispatch from Laptop Mag, in your inbox.
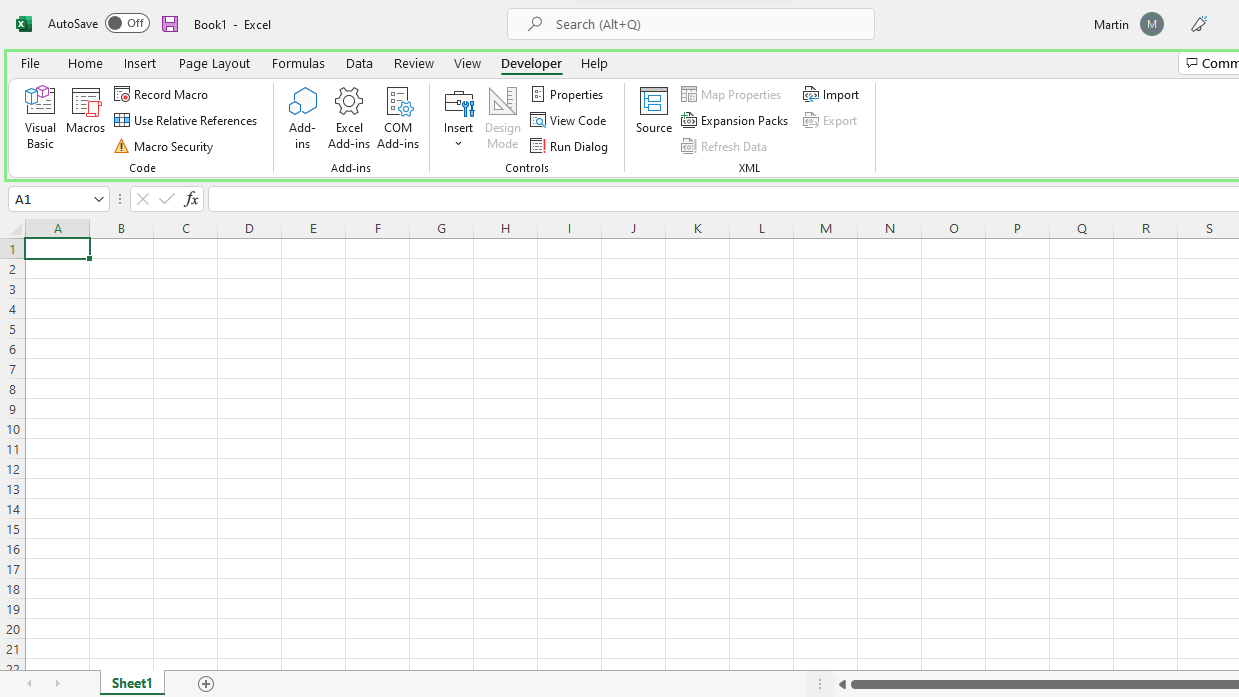
5. Click the OK button at the bottom of the window. The Developer tab should now appear on your Microsoft Excel Ribbon.
Bryan covers everything you need to know about Windows, social media, and the internet at large for Laptop Mag. Thanks to his extensive knowledge of operating systems and some of the most popular software out there, Bryan has written hundreds of helpful guides, including tips related to Windows 11 drivers, upgrading to a newer version of the OS, editing in Microsoft Photos, or rearranging pages in Google Docs.
