How to Increase Battery Life on the Dell XPS 13
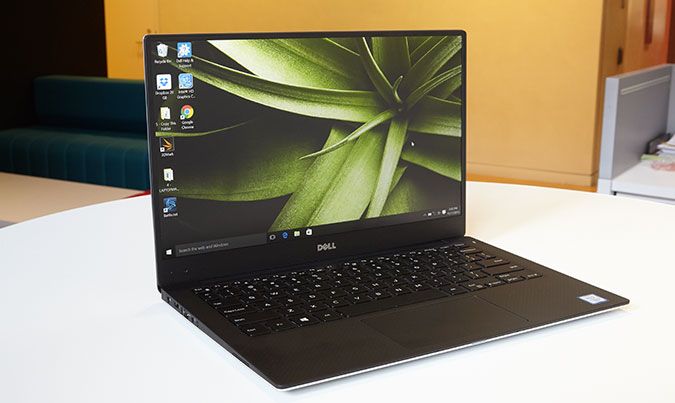
The non-touch version of the Dell XPS 13 lasted for a very strong 11 hours and 54 minutes on the Laptop Battery Test, which involves continuous surfing over Wi-Fi at 100 nits of brightness. However, when you use the laptop, its endurance will vary, based on the screen brightness, the workload and your configuration (the 4K screen gets much lower battery life). Here are some tips to increase your XPS 13's battery life.
Make sure you have the latest BIOS
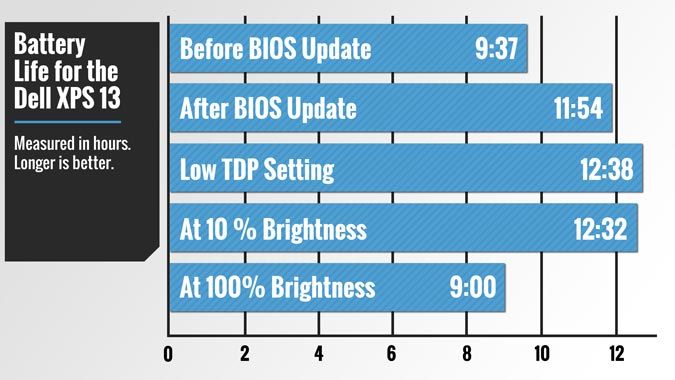
In December 2015, Dell released a BIOS update the improved the XPS 13's battery life by almost 25 percent. Our review unit went from 9 hours and 37 minutes to 11 hours and 54 minutes. Go here to find out if you require a BIOS update and to learn how to install it.
MORE: This Dell XPS 13 Bug Fix Adds 2 Hours of Battery Life
Dim the Screen
The display on the XPS 13 can get quite bright, registering 318 nits on our light meter. The display is one of the largest power drains on any computer, and keeping it at 100 percent brightness is a sure way to burn through your battery.
While the computer lasted an impressive 11:54 at 100 nits, you might want to dim it further if you're in a pinch. We tried dimming it to 10 percent (20 nits), which was dark but still legible, and the laptop ran for ran 38 minutes longer, a total of 12:32.
Some users might max out their brightness, but that won't help your battery usage. When we ran our tests at 100 percent brightness, the laptop ran for 9 hours flat, losing almost three potential hours of use.
Lower Your Performance
The XPS 13's battery settings offer an option to lower your TDP, which stands for Thermal Design Power. This is the highest amount of heat that your CPU will produce when running, and the CPU tends to produce more heat at high performance level. If you lower your TDP, your CPU won't perform as strongly, but it may save some battery life.
Sign up to receive The Snapshot, a free special dispatch from Laptop Mag, in your inbox.
When we ran the Laptop Mag Battery Test at 100 nits of brightness (our standard for the test) but with Low TDP settings, the XPS 13 lasted 12:38, 44 minutes longer than our original test. We ran Geekbench 3 on low TDP settings to see if performance would take a hit, but didn't see any noticeable difference. If you're running intensive programs, you may see some stuttering when utilizing this function.
Here's how to enable Low TDP:
1. Go to Control Panel > Hardware and Sound > Power Options
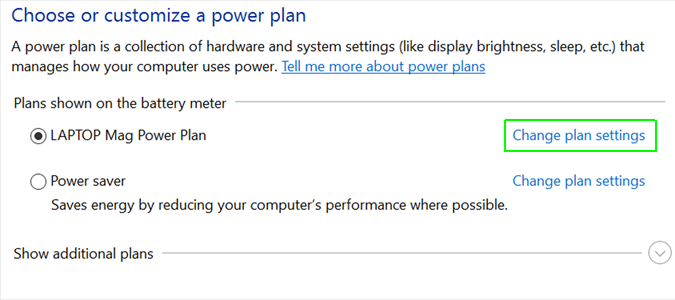
2. Click Change plan settings next to your current plan.
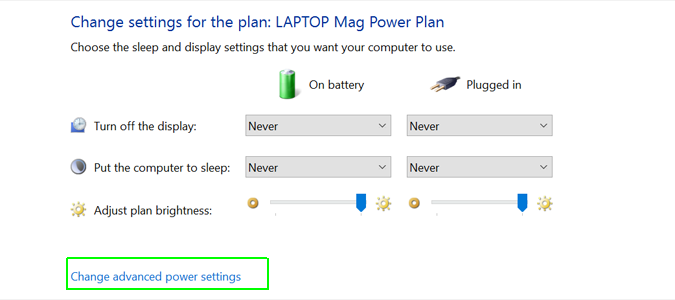
3. Click "Change advanced power settings."
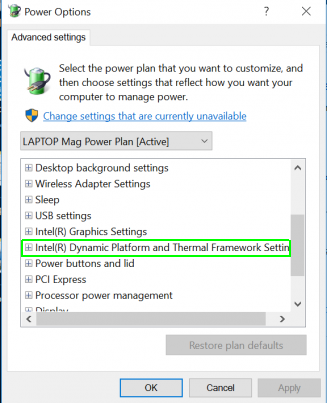
4. Click the + next to"Intel(R) Dynamic Platform and Thermal Framework Settings"
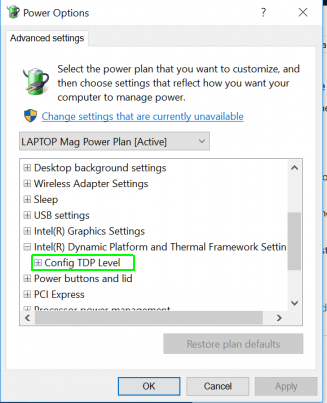
5. Click the + next to Config TDP Level
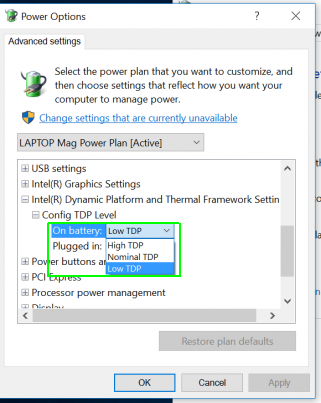
6. Choose Low TDP from the menu next to "on battery."
7. Click Apply, then click OK.
Change Wi-Fi Networks
We run our battery test on a 802.11ac Wi-Fi network, which is the latest version of the wireless standard. Typically, 802.11ac connections require less power than older networks, such as 802.11n. If you have an 802.11ac network, try to keep your XPS 13 (or any laptop that supports it) connected to it for a potential battery bump.
Dell XPS 13 User Guide
Andrew is a contributing writer at Laptop Mag. His main focus lies in helpful how-to guides and laptop reviews, including Asus, Microsoft Surface, Samsung Chromebook, and Dell. He has also dabbled in peripherals, including webcams and docking stations. His work has also appeared in Tom's Hardware, Tom's Guide, PCMag, Kotaku, and Complex. He fondly remembers his first computer: a Gateway that still lives in a spare room in his parents' home, albeit without an internet connection. When he’s not writing about tech, you can find him playing video games, checking social media and waiting for the next Marvel movie.
