How to Replace Your MacBook Pro's Hard Drive with an SSD
Want to squeeze even more performance out of your MacBook Pro? As our resident Geek's Geek would say, then get an SSD, you putz! Adding an SSD will make your Mac boot faster, copy files in the blink of an eye, and make the system more responsive when multitasking.
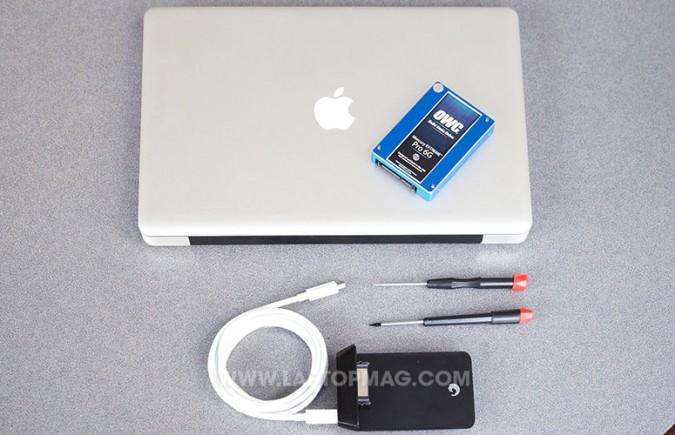
For this how-to, we replaced the hard drive on a 15-inch MacBook Pro (non-Retina) from 2012 with a 480GB Mercury Extreme Pro 6G SSD from OWC, which costs $579. That works out to about $1.21 per GB. By comparison, if you bought the 512GB SSD from Apple's site, that would run you $800, which is $1.56 per GB.
Fortunately, it's fairly easy to replace the hard drive. Here's how.
What You'll Need
- SSD (obviously).
- mSATA enclosure or adapter. We used the Seagate Thunderbolt Adapter ($99), as it was the fastest connection, but you can also use the Seagate USB 3.0/2.0 Upgrade Cable, which costs just $19.99. There are also dozens of other SATA enclosures on the market.
- A small Phillips screwdriver
- Torx T6 screwdriver - OWC provides one with the SSD, which we think is a nice touch.
Cloning Your Hard Drive
The first step is to clone your Mac's hard drive onto the SSD. For this, you can use a utility such as Carbon Copy Cloner, but we're going to show you how to do it with Apple's own Disk Utility program.
1. Connect the SSD to the Mac using the mSATA enclosure or adapter.
Sign up to receive The Snapshot, a free special dispatch from Laptop Mag, in your inbox.
2. Open the Disk Utility in the Applications folder.
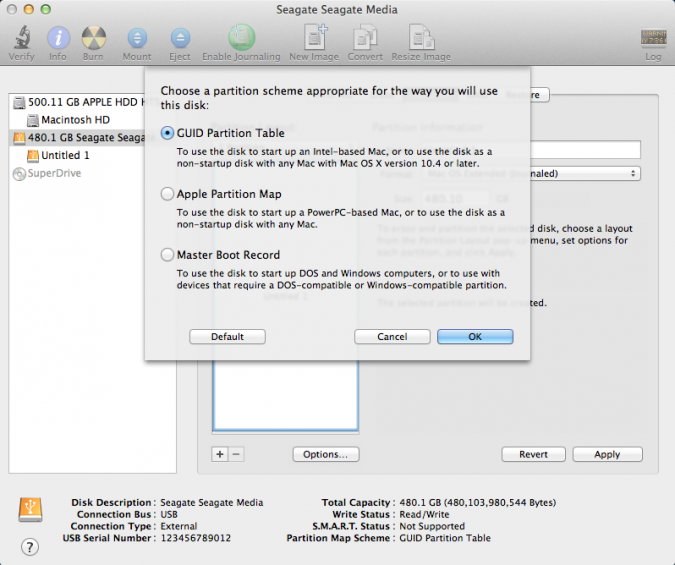
3. Click on the SSD icon, and select the Partition tab. Under where it says Partition Layout, select "1 Partition." At the bottom of the window is a box labeled "Options..." Click on that box, and in the window that opens, select "GUID Partition Table."
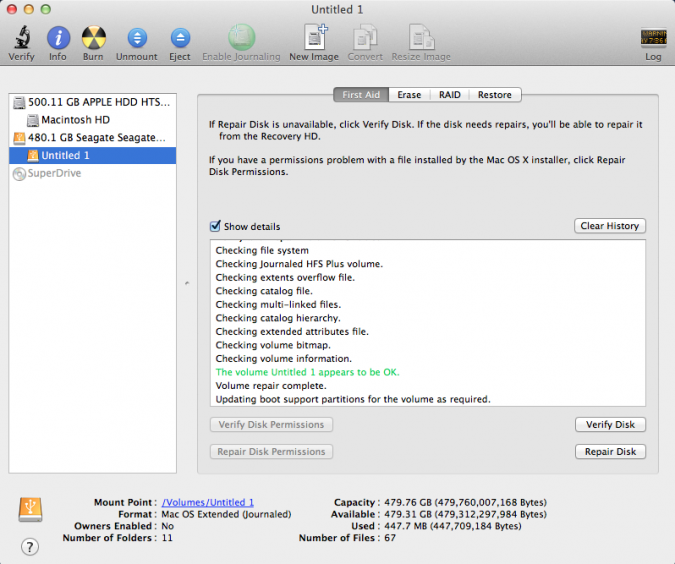
4. Click on the First Aid tab, and select Verify Disk Permissions. After that process has completed, select Repair Disk Permissions. Once that's done, select Verify Disk, then Repair Disk.
5. Shutdown the Mac, and then restart it holding down the Option key. Select the option to boot into the Recovery Disk.
6. Select the option to Reinstall Mac OS X. Select the SSD as the destination disk. This process can take upwards of 30 minutes.
7. Copy your files from the original hard drive. After the OS has installed, the utility will ask you if you'd like to restore files from another disk. Select the original hard drive. Depending on how many files you have, this process could take some time, too.
Installing the SSD
Next, you've got to crack open your notebook. Now comes the fun part.
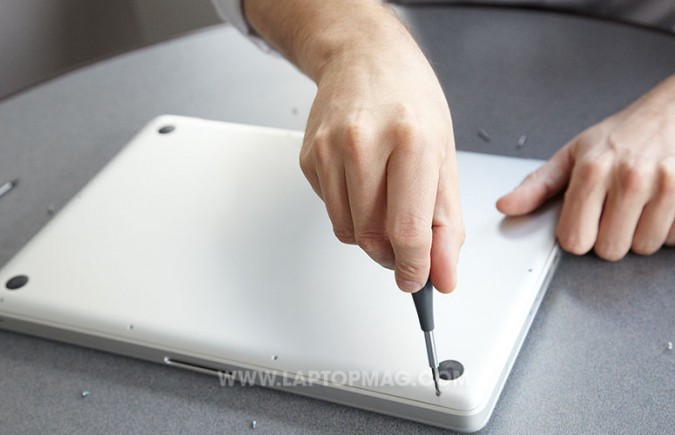
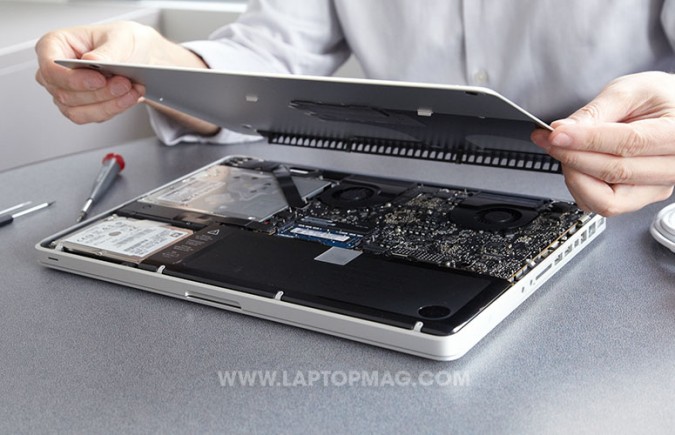
1. Flip your Mac over, and locate the 10 screw holes.
2. Remove the screws using the Phillips' screwdriver. Note: We recommend placing the screws in a small bowl or something to that effect so the screws don't go missing. Yeah, they're scattered all over in this picture; do as we say, not as we do.
3. Pry the bottom off of your MacBook Pro. It should come off fairly easily, without any undue force.
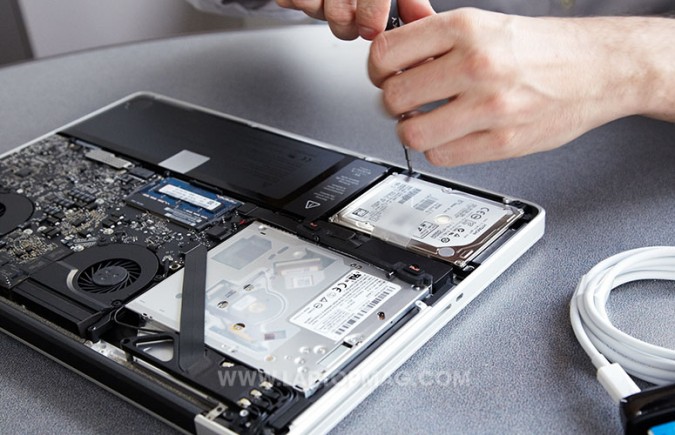
4. Locate the hard drive. It's held in place by a little piece of plastic. Remove the screws holding the plastic piece in place.
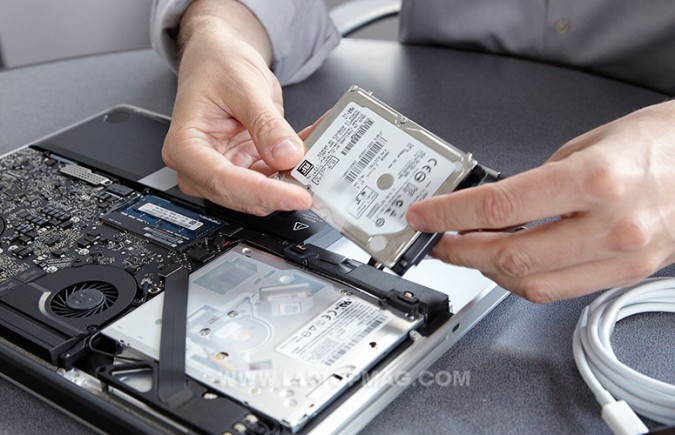
5. Next, gently lift the hard drive out of the chassis, and remove the ribbon connecting it to the notebook.
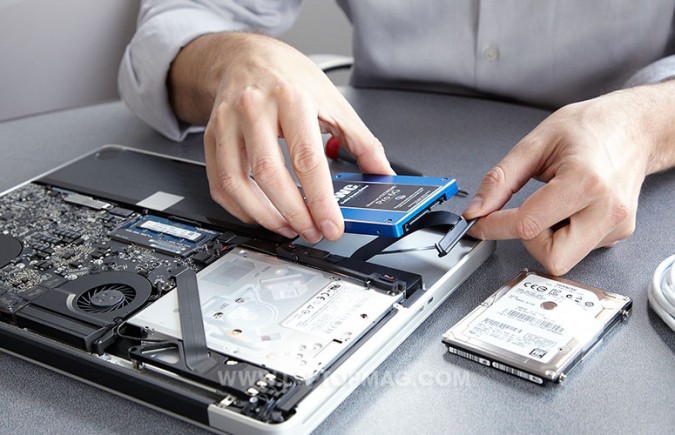
6. On the four sides of the hard drive are four small metal posts (visible in the photo above). Unscrew the posts using the Torx screwdriver. Then, screw the posts into the SSD.
7. Connect the mSATA ribbon to the SSD, and place it back in the notebook. Reattach the plastic piece holding the drive in place, and then screw the bottom back on.
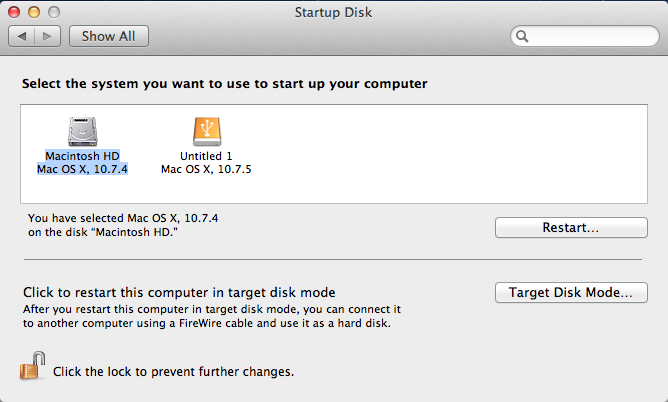
8. Turn the notebook back on. Open System Preferences, then Startup Disk. Select the SSD (it should be the only one listed), and restart your notebook. You're all done!
Michael was the Reviews Editor at Laptop Mag. During his tenure at Laptop Mag, Michael reviewed some of the best laptops at the time, including notebooks from brands like Acer, Apple, Dell, Lenovo, and Asus. He wrote in-depth, hands-on guides about laptops that defined the world of tech, but he also stepped outside of the laptop world to talk about phones and wearables. He is now the U.S. Editor-in-Chief at our sister site Tom's Guide, where he oversees all evergreen content and the Homes, Smart Home, and Fitness/Wearables categories for the site..
