How to Add 3D Objects to Powerpoint Presentations
After its latest update -- the Windows 10 Fall Creators Update -- Microsoft announced a great new feature that allowed content creators to access rich visual from its own Remix 3D platform.
Of all the Microsoft Office applications that can now make use of 3D objects, Powerpoint perhaps makes the most sense. A visually-rich platform anyway, the addition of improved visual elements -- elements you don’t have to create yourself -- are always welcome.
1. Open Powerpoint.
2. Open a Blank Presentation, or an existing project.
3. click Insert to switch tabs.
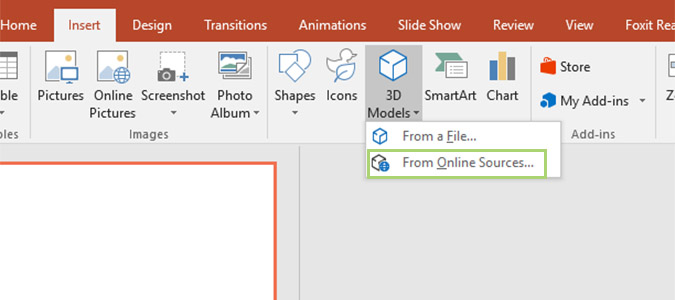
4. Under Illustrations, click 3D Models to open the dropdown menu.
5. Select From an Online Source. Alternatively, you can select to import your own artwork by choosing From a File.
Sign up to receive The Snapshot, a free special dispatch from Laptop Mag, in your inbox.
6. Choose a category, or search for the item you’d like in the search bar at the top.
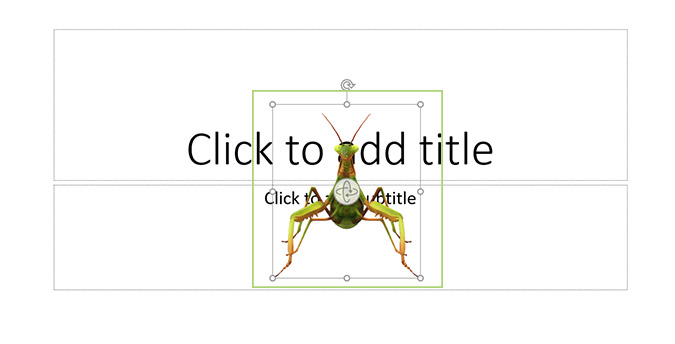
7. Double-click the item you want to insert into Powerpoint.
8. Edit the size, orientation, or position by clicking the object and moving or dragging the handles.
Bryan covers everything you need to know about Windows, social media, and the internet at large for Laptop Mag. Thanks to his extensive knowledge of operating systems and some of the most popular software out there, Bryan has written hundreds of helpful guides, including tips related to Windows 11 drivers, upgrading to a newer version of the OS, editing in Microsoft Photos, or rearranging pages in Google Docs.


