How to Patch Dell's Dangerous Certificate Flaw
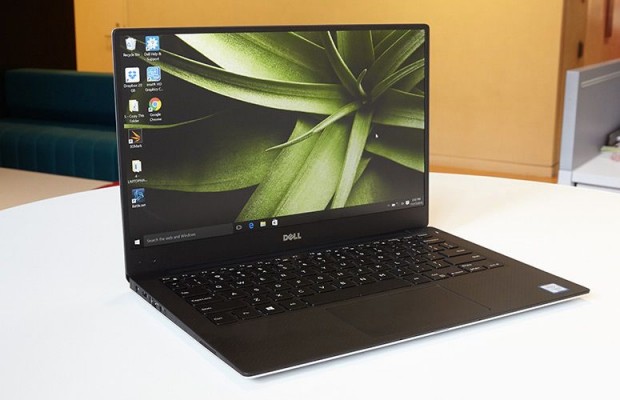
As we reported yesterday (Nov. 23), Dell is selling computers with at least one dangerous security flaw that makes it easy for hackers to access your system. We have found two such vulnerabilities in a Dell XPS 13; other reports indicate that XPS 15 and Inspiron 5000 notebooks are also at risk; and the problem may affect up to 36 Dell laptops and desktops. Last night, Dell admitted it made a mistake and offered a solution to patch the more commonplace flaw.
The affected Dell machines come preloaded with at least one self-signed digital certificate, called eDellRoot, that lets anyone impersonate Dell. The upshot is that malicious websites or software would automatically be trusted by Dell's security software. Hackers lurking on public Wi-Fi networks could perform "man-in-the-middle" attacks on other users' secure Internet connections, and phishing websites could masquerading as part of Dell's network.
MORE: 100+ Tech Gift Ideas for Men, Women and Kids
Examining a Dell XPS 13 yesterday, we found a second self-signed Dell certificate called DSDTestProvider. Like eDellRoot, it also contains a private key, which can be extracted using commonplace hacker tools. It's not clear how widespread the use of eDellRoot is, but a Dell webpage explaining the associated software lists 36 compatible systems.
To test whether a recently purchased Dell computer contains eDellRoot, visit https://bogus.lessonslearned.org/, a website that uses the private key to authenticate itself as Dell, using the Internet Explorer, Edge, Google Chrome or Opera browser. (Mozilla Firefox uses its own certificated and may not be affected.) If you see an image of a ninja dog, you're vulnerable.
Dell has released its own instructions (Word doc) for how to remove the eDellRoot certificates, and said last night that a software patch issued today would remove the certificate. Dell does not mention the DSDTestProvider certificate, and we have asked Dell for clarification, but the below steps seem to have removed that certificate as well.
How to Remove Dell's Self-Signed Certificates
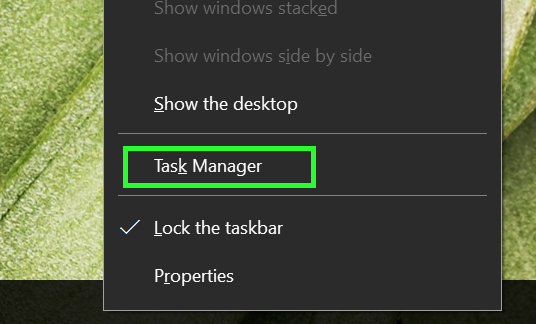
1. Right-click on the Taskbar, and select Task Manager or Start Task Manager.
Sign up to receive The Snapshot, a free special dispatch from Laptop Mag, in your inbox.
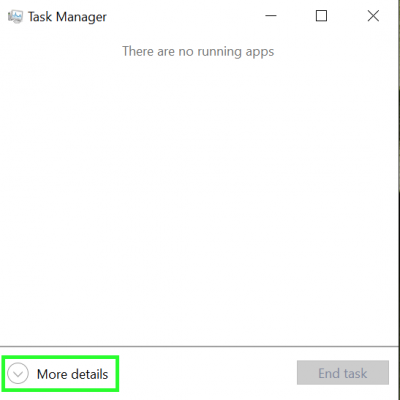
2. Tap More Details in Windows 10. (Windows 7 users can skip this step.)
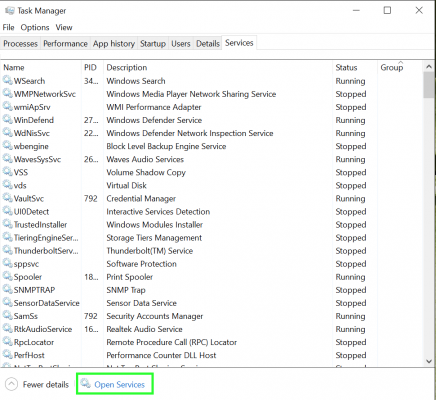
3. Select Services from the row of tabs.
4. Tap Open Services on the bottom of the window. (In Windows 7, the button is simply Services.)
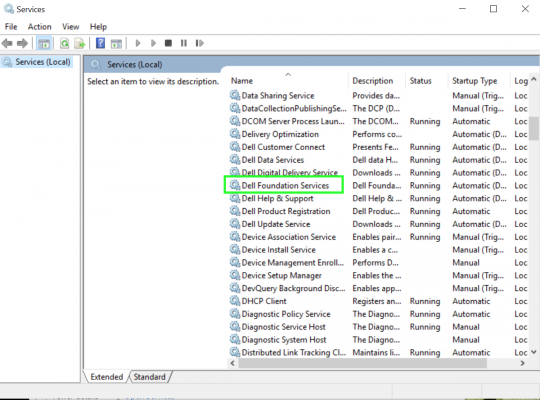
5. Select Dell Foundation Services.
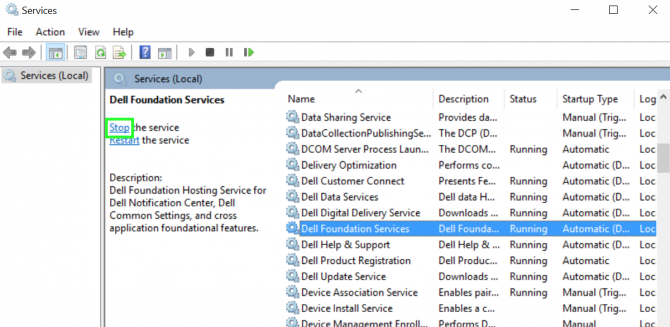
6. Select Stop the service on the left side of the window.
7. Open File Explorer.
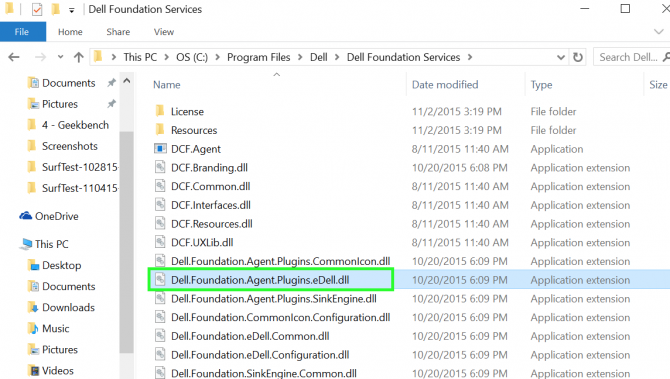
8. Tap on the path field, type "c:\Program Files\Dell\Dell Foundation Services" and click Return.
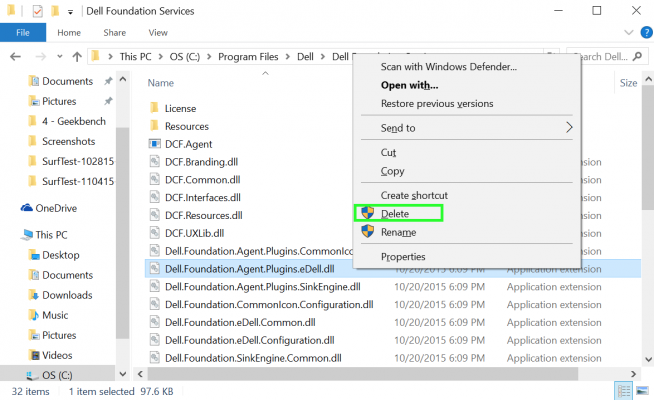
9. Right-click "Dell.Foundation.Agent.Plugins.eDell.dll"
10. Select Delete.
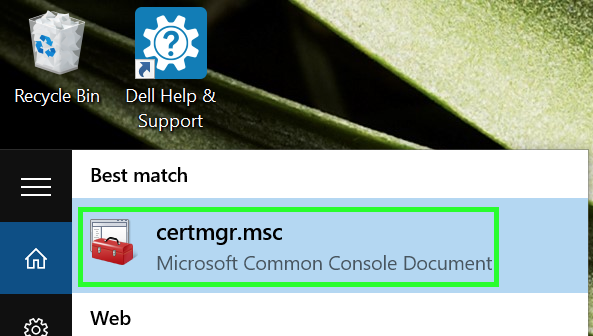
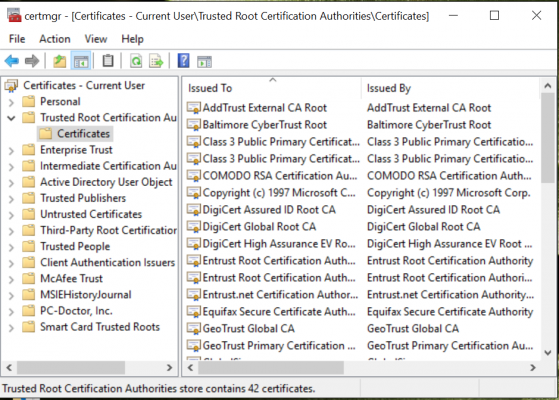
11. Type "certmgr.msc" into the start menu field. (Windows 8.1 users should click on the magnifying-glass icon in the upper right of the tiled desktop, then type in "certmgr.msc.")
12. Tap on certmgr.msc from the top of the Start menu's search results.
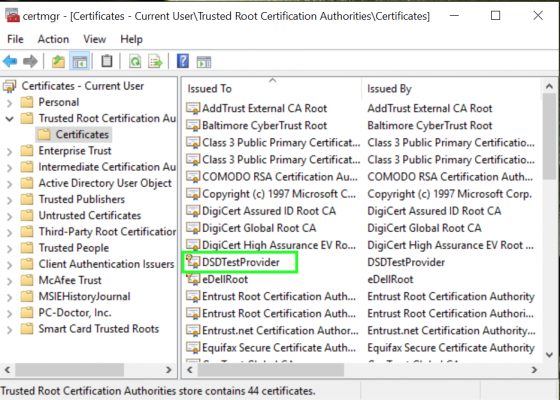
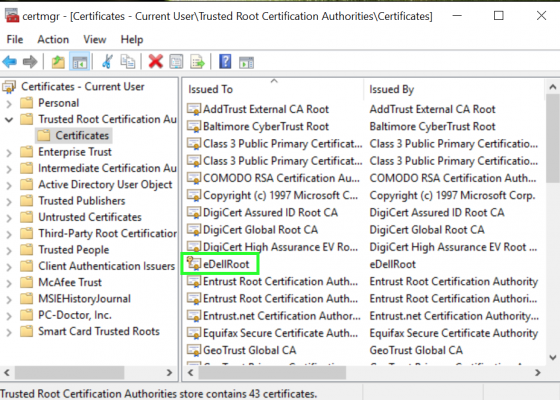
13. Select Trusted Root Certificate Authorities from the menu on the left side of the window.
14. Tap on Certificates from the menu on the right side the window.
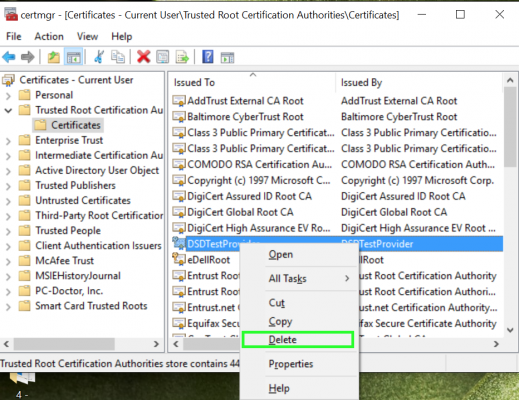
15. Right-click on DSDTestProvider if you see it on the right side of the window.
16. Select Delete.
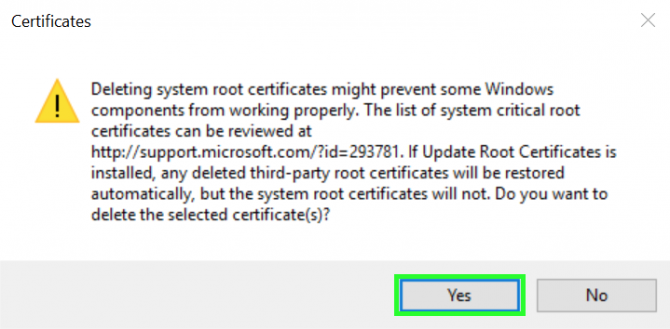
17. Tap Yes to confirm.
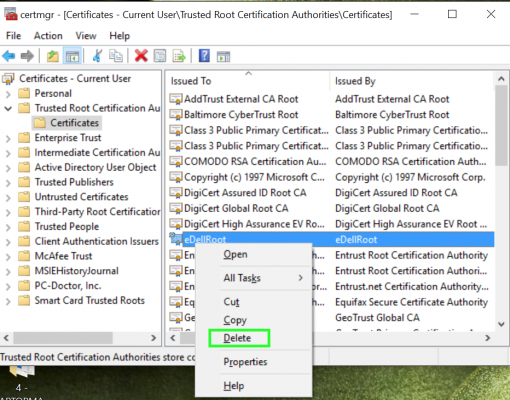
18. Right-click on eDellRoot on the right side of the window.
19. Select Delete.
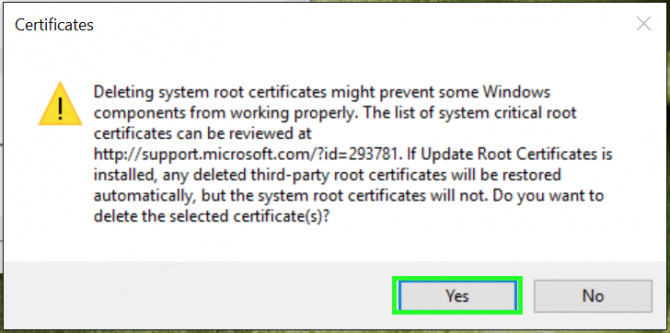
20. Tap Yes to confirm.
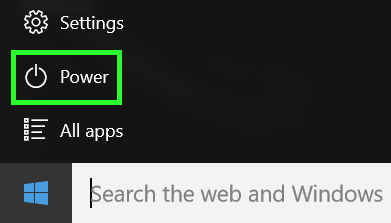
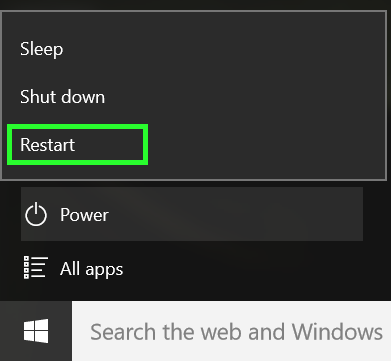
21. Tap on the Start button.
22. Select Power. (In Windows 8.1, the power icon will be on the upper right of the tiled desktop . In Windows 7, click the arrow next to Shut down.)
23. Tap on Restart.
Repeat steps 11–14 to view your Trusted Root Certificate files. The DSDTestProvider and eDellRoot certificates should now be gone. If they're not, repeat the steps above.
Henry was a contributing writer at Laptop Mag. He penned hundreds of articles, including helpful how-tos for Windows, Mac, and Gmail. Henry has also written about some of the best Chromebooks, and he has reviewed many Apple devices, including various MacBook Air laptops. He is now a managing editor at our sister site Tom's Guide, covering streaming media, laptops, and all things Apple.
