Google Docs provides hundreds of features to make creating documents easier. One of these features is the “Find and Replace” tool. With this feature, users can easily edit or update their documents — no need to spend precious time rummaging through the copy searching for certain words or phrases.. This article provides insight into how to make the most out of this feature.
The Find and Replace tool works similarly in other word processors, such as Microsoft Word and Pages. Its main feature is explained in its name: find specific words and phrases and replace them with new text. Although this part of the tool is fairly common, there are some tricks that can make it even more effective.
This feature is available both in Google Docs’s browser and mobile app. The steps below will focus on using the feature using the browser app. Nevertheless, the steps to use the feature on the mobile app are fairly similar. Below are the steps on how to use the Find and Replace tool.
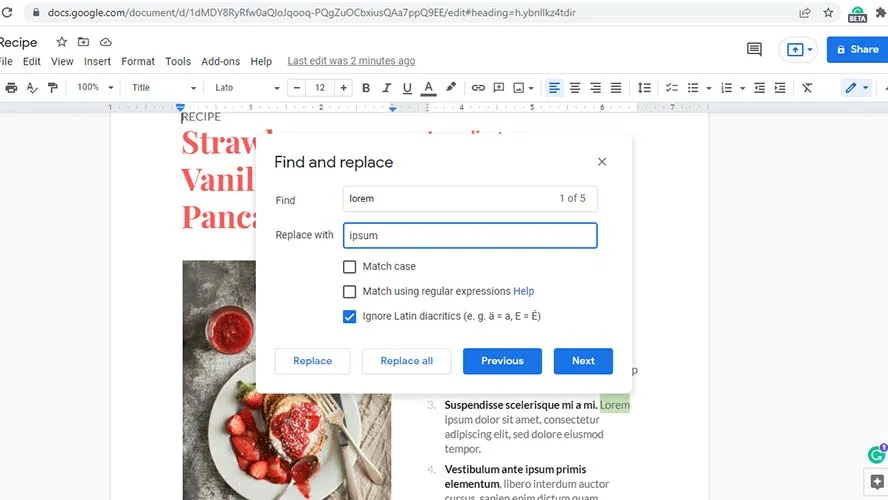
Google Docs’s Find and Replace tool
1. Open the Find and Replace window by going to Edit > Find and replace on your main menu bar. Alternatively, you can press Ctrl + H on your keyboard.

2. On the Find and replace window, enter the text that you wish to replace into the Find field.

3. Next, enter the new text that will replace the old text on the Replace with field.

4. Tweak the search and replacement as needed by selecting among the three additional options provided below the “Replace with” field.

5. Lastly, click “Replace” to change the first result found with the new text. If you wish to replace all text all at the same time, click Replace all.

