How to tidy up your inbox using Gmail filters
Not everything is deserving of a spot in your Gmail inbox
Sign up to receive The Snapshot, a free special dispatch from Laptop Mag, in your inbox.
You are now subscribed
Your newsletter sign-up was successful
Most of us are guilty of complaining about unwanted emails or cluttered inboxes from time to time, yet few of us do anything about it. Gmail has powerful filtering options, options that are criminally underutilized. When honed in, and with a little bit of creativity, you too can tame your inbox. And it's not as difficult as you may think.
The key is to apply filters as they make sense. You can start with a handful, like those mentioned below, but you should always be willing to adapt your filtering strategy as new methods make sense, or new emails flood your inbox that don't trigger any of your existing filters. This is a game of incremental improvement, and each filter should make your life just a little easier.
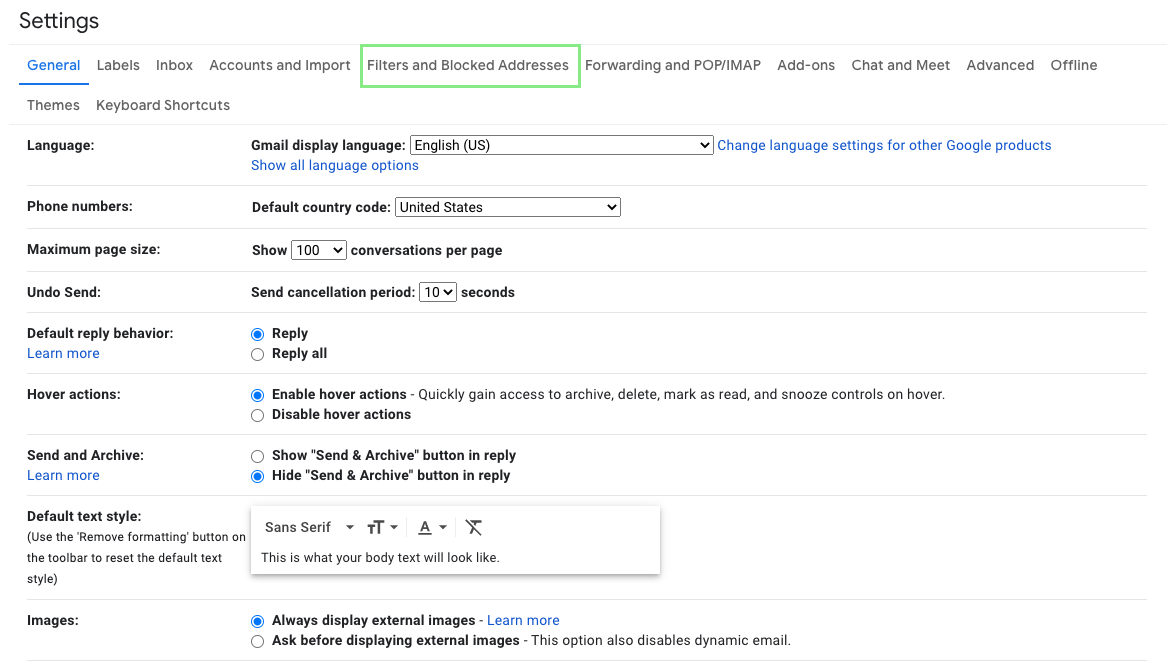
Let's get started. For all the tips below, you'll start by clicking the gear icon near your account image in the upper right, clicking the "See all settings" button at the top, and choosing the "Filters and Blocked Addresses" tab. From there, just click "Create a new filter" toward the bottom and you're ready to go.
Spam
Gmail already has great spam filters and you can mark messages as spam to help train the AI to spot new patterns. But there's always that one company that manages to slip by undetected. You've tried unsubscribing from the list. You've tried marking it as spam, and somehow, without fail, it still manages to hit your inbox with each new mailing.
Here's how to fix it.
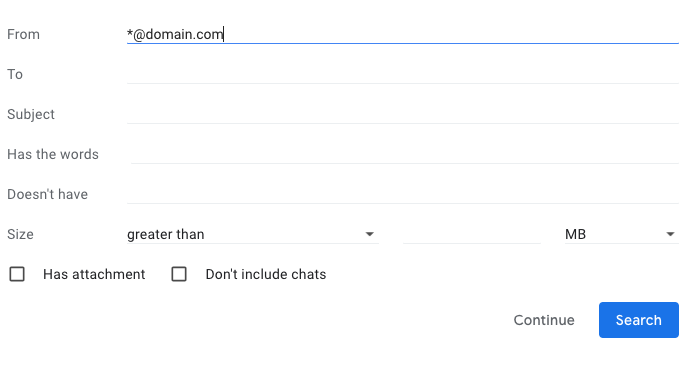
1) In the "From" section, type in the email address you want to block. You can also add a wildcard by typing in an asterisk (*) before the @ symbol to filter all emails from that domain.
2) Click the Create filter button.
Sign up to receive The Snapshot, a free special dispatch from Laptop Mag, in your inbox.
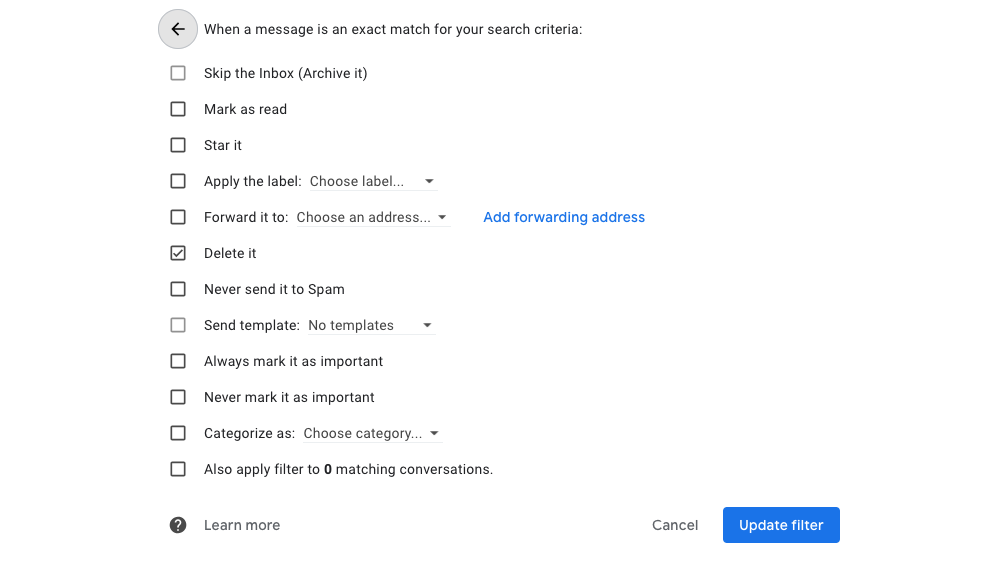
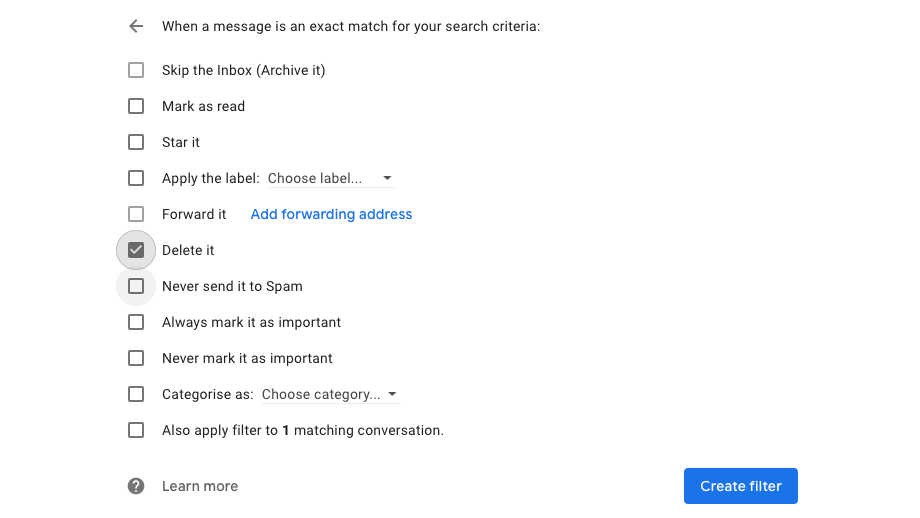
3) Choose Delete it and click the Create filter button.
Make sure you see important emails
On the opposite end of the spectrum, there are the emails that you want to make sure you see, but are commonly buried beneath countless emails you don't. You can fix this with filters too.
1) Type the email address in the From section and click the Create filter button.
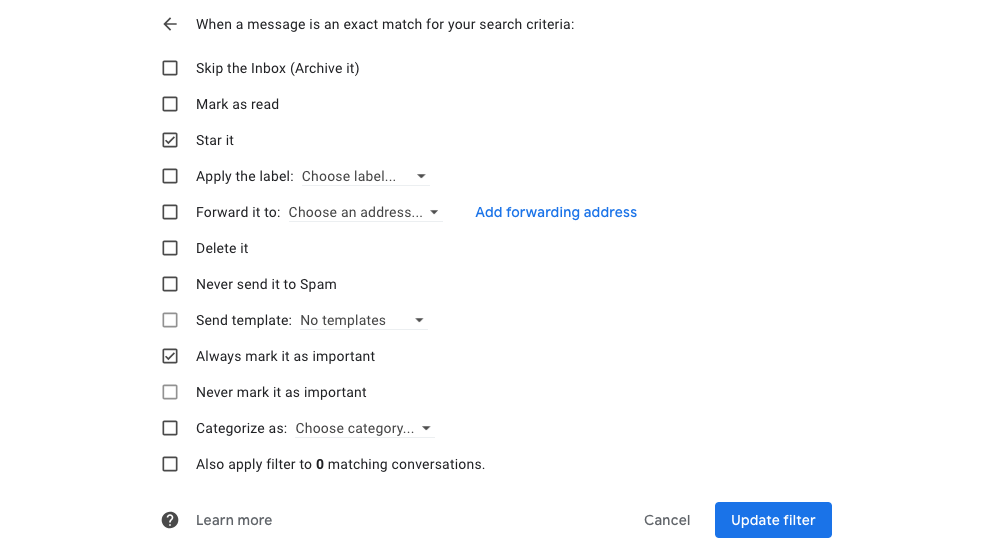
2) Choose "Star it" and "Always mark it as important" and then click the Create filter button.
These emails will now have a star and the "Important" label, making them much harder to miss. But if you still have doubts, check the next tip.
Create a new inbox with folders and labels
If you want to skip the inbox entirely, you can filter important emails to their own folder, automatically, giving you a de facto second (or third, fourth, etc.) inbox. This is handy for filtering work-related emails into their own folder, or perhaps you can use it for coupons, travel details and itineraries, or emails about school, family, or newsletters you subscribe to.
1) Add the email address in the From section and click the Create filter button. You can add multiple email addresses to the same filter by departing each with a comma and a space after the email address.
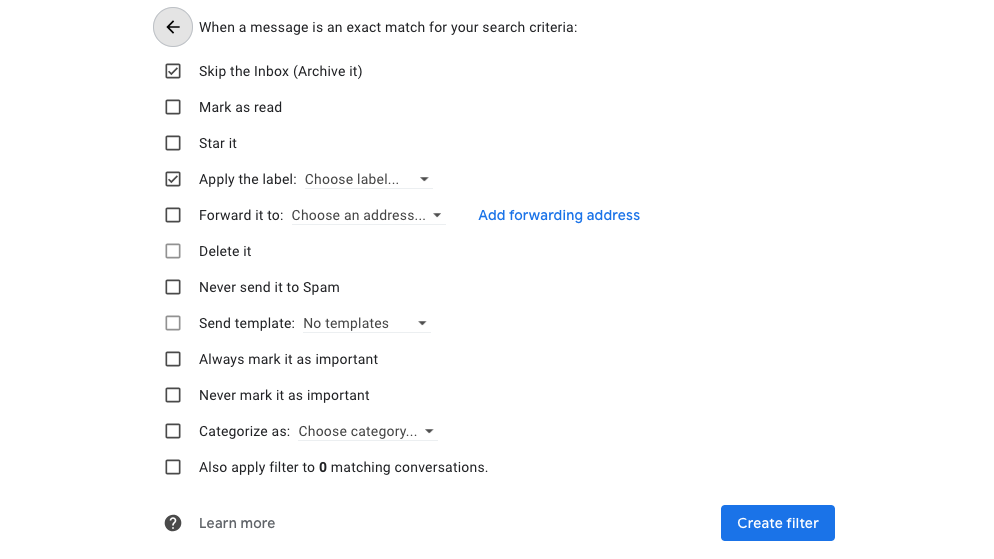
2) Choose "Skip the Inbox (Archive it)" and "Apply the label."
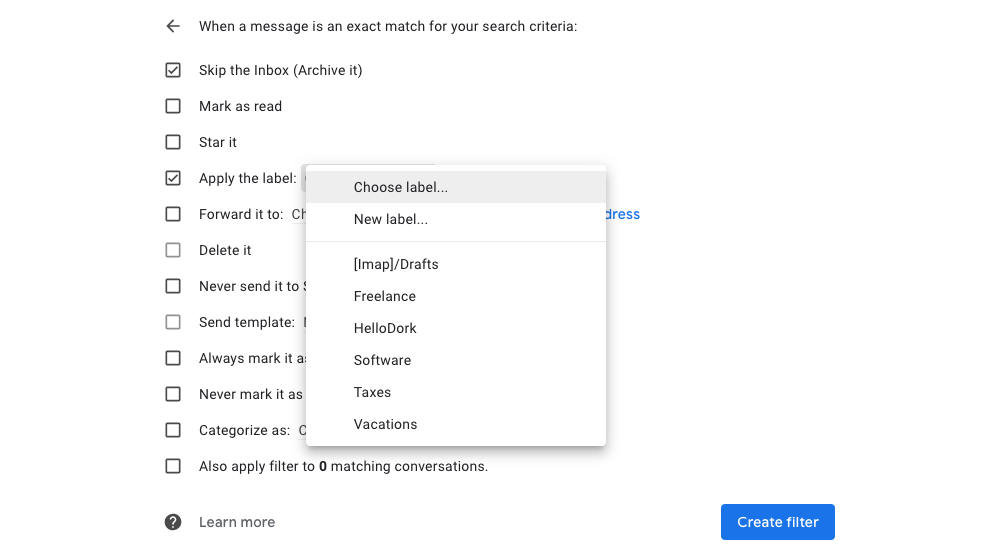
3) Select a label, or create a new one and keep the name as specific as possible.
4) Click Create filter.
Now, all emails from these addresses will skip the inbox and appear only in the folder you selected. Clicking the folder in your Gmail sidebar will bring up an entirely new inbox with only these messages.
Categorize your spam
A little-known feature of Gmail is that it works even if you modify your email address. Try adding a period or a plus sign anywhere within your email address (before the @gmail.com suffix) and watch as these emails still manage to find your inbox.
Now, the cool thing here is that you can filter these email addresses separately from your main one. I use it to filter email newsletters, automatically, without the need to set up new filters.
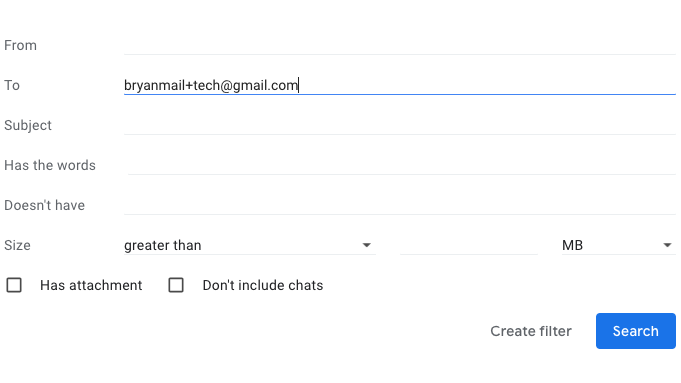
1) Subscribe to a newsletter using your newly modified address. Mine looks something like this: bryanmail+tech@gmail.com. Adding the "+tech" suffix after my normal email address tells me that anything with "+tech" is an email newsletter I subscribed to. I can then filter for that modification.
2) In the "To" section, add your modified email address and click the Create filter button.
3) Click "Apply the label" and then choose your preferred label. I send anything with "+tech" to my "tech newsletters" label, meaning I can use this email when I subscribe to new newsletters and I don't need to manually filter all of them into the appropriate label.
Kill calendar notification emails
My inbox is flooded every day with notifications that so and so has accepted my calendar invite for a meeting. You can filter these too, which is especially useful if you are using a calendar app and you get these notifications on your phone anyway.
1) In the "Subject" section, add "Accepted:" and make sure to use the colon after, and without the space. We don't want to trigger the event when someone is talking about an accepted contract, or some other work-related thing we'd want to see.
2) Click the Create filter button.
3) Check Delete it and click the Create filter button.
These five should get you started with a cleaner inbox, but as we said previously, feel free to experiment and add new filters as they make sense. This is a powerful tool, limited only by your imagination when using it.
Bryan covers everything you need to know about Windows, social media, and the internet at large for Laptop Mag. Thanks to his extensive knowledge of operating systems and some of the most popular software out there, Bryan has written hundreds of helpful guides, including tips related to Windows 11 drivers, upgrading to a newer version of the OS, editing in Microsoft Photos, or rearranging pages in Google Docs.
