How to Create Table Templates in Microsoft Word
Microsoft Word's table templates are great timesavers. With them, you can quickly apply your own custom formatting to any table in Word. Here's how to create your own table style and save it as a template.
The easiest way to create your own table template is to start with one of Word's built-in table styles and then tweak it to your preferences.
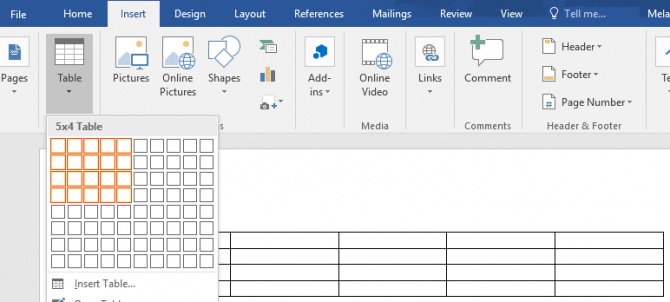
1. Go to the Insert tab and click Table.
2. Mouse over the squares in the table grid to select the number of columns and rows you want in the table.
3. Click on the last square to insert the table. Word will now switch you to the Design tab for formatting the table.
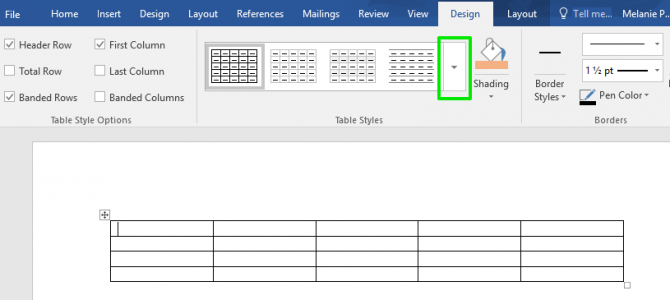
4. Click inside the table.
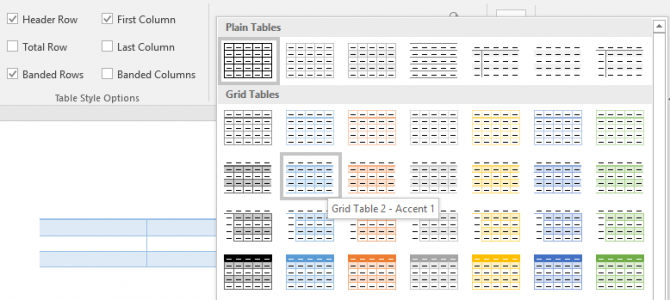
5. Select a style from the Table Styles gallery and take note of the style name. You'll need the name in the steps below.
Sign up to receive The Snapshot, a free special dispatch from Laptop Mag, in your inbox.
6. Click the down arrow next to the Table Styles and select New Table Style.
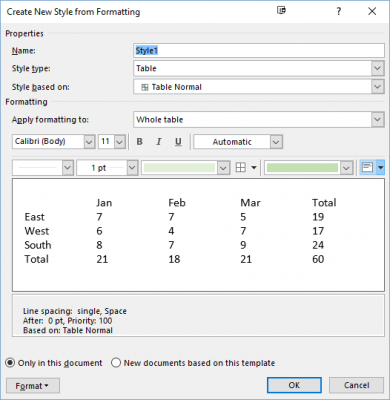
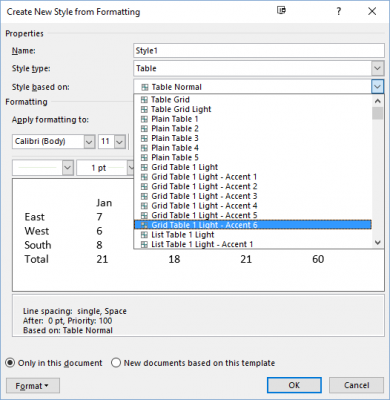
7. Give this table style a new name.
8. Select the table style you want to base yours on in the dropdown box next to "Style based on" option.
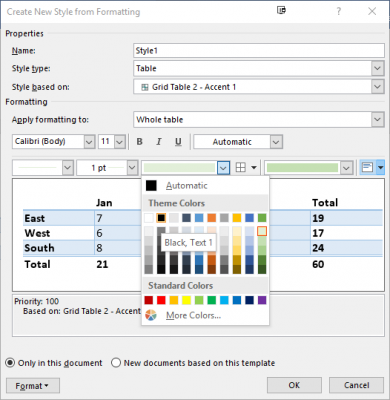
9. Select your formatting options. For example, you can change the font and font style, change the border and cell colors, and change the text alignment.
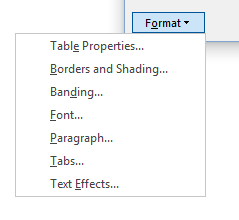
For additional formatting options, click the Format button at the bottom left of the window.
10. Select "New documents based on this template" so the table style will be available in future Word docs.
11. Click OK.
You'll now see your new table style in the gallery and can select that to format any future tables in one click.
Melanie was a writer at Laptop Mag. She wrote dozens of helpful how-to guides, covering both the software and the hardware side of things. Her work included topics like SSDs, RAM, Apple, Excel, OneDrive, and detailed guides for Windows users. Outside of all her useful advice, Melanie also penned a few reviews for Laptop Mag, including Android emulators that help you run apps on your PC.
