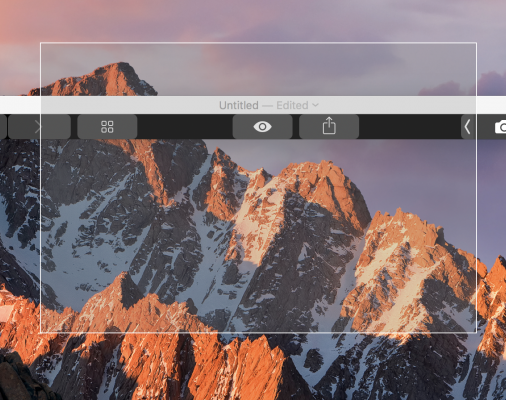
How to Take Screenshots With the MacBook Pro Touch Bar
Normally, it takes three fingers to activate the macOS keyboard shortcuts, but there's an easier way if you own a Touch Bar MacBook Pro. Once you add the Screenshot button to the Touch Bar, all you'll need is two taps to start capturing your screen.
Also, the Touch Bar tool lets you pick the kind of screenshot you want to take, as well as where you save them to. Here's how to take screenshots with the MacBook Pro Touch Bar.
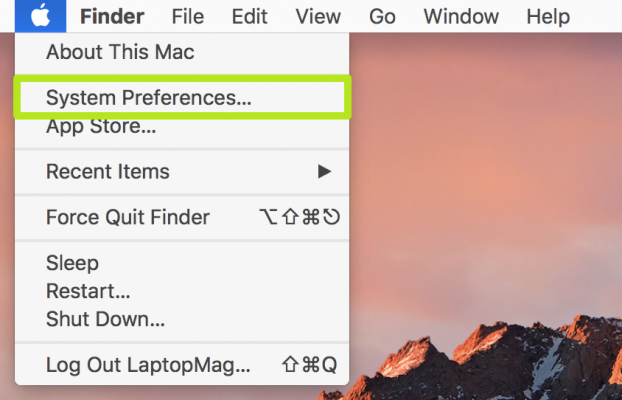
1. Click the Apple logo.
2. Select System Preferences.
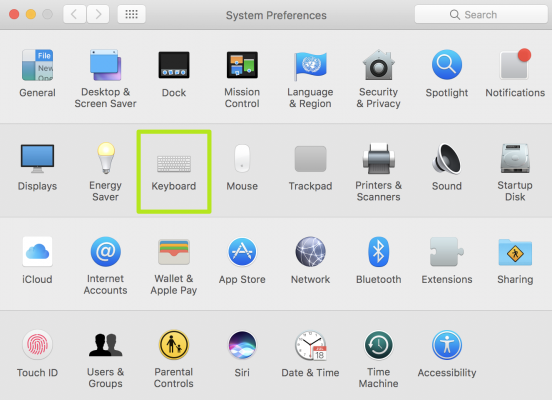
3. Click Keyboard.
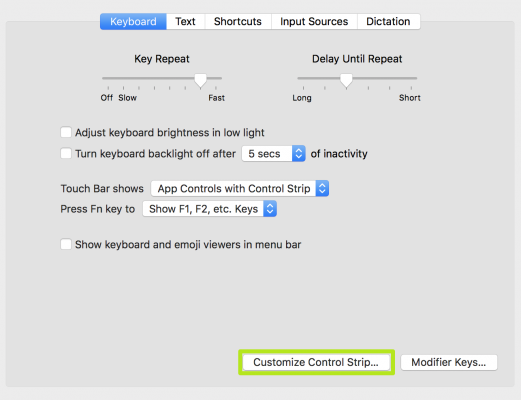
4. Click Customize Control Strip.
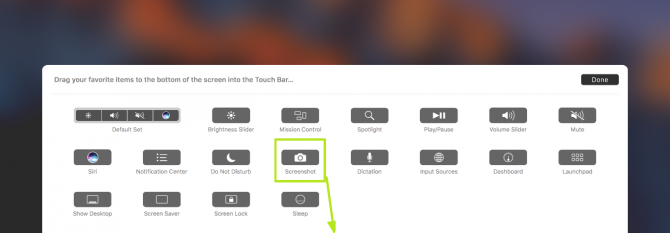
5. Click and drag Screenshot down, off the screen to the Touch Bar.
Sign up to receive The Snapshot, a free special dispatch from Laptop Mag, in your inbox.
6. Release the Screenshot icon in the Touch Bar.
7. Tap Done.
8. Tap the Screenshot icon.
9. Tap Entire Screen to create a screenshot of your full screen. Tap Desktop to change the directory files are saved to.
10. Tapping Selected Portion allows you to click, drag and draw a box to capture a portion of your screen.
11. Tapping Select Window allows you to capture a window by hovering over it and clicking.
Congrats, you're making screenshots with the Touch Bar!
macOS High Sierra Tips
- How to Download and Install macOS High Sierra
- How to Use Picture-in-Picture on a Mac
- How to Use Siri on Your Mac
- How to Use Optimized Storage in macOS Sierra
- How to Use Memories in the Photos App on Mac
- How to Use Messages in macOS Sierra
- How to Use Apple Pay in macOS Sierra
- How to Unlock a MacBook with Your Apple Watch
Henry was a contributing writer at Laptop Mag. He penned hundreds of articles, including helpful how-tos for Windows, Mac, and Gmail. Henry has also written about some of the best Chromebooks, and he has reviewed many Apple devices, including various MacBook Air laptops. He is now a managing editor at our sister site Tom's Guide, covering streaming media, laptops, and all things Apple.


