How to use guides to position images in Google Slides
Align your images perfectly by using Google Slides guides

Google Slides is one of the easiest platforms to create slideshows. One of its many helpful features is the guide function, which allows users to position images properly. This article will explain the benefits of this tool and demonstrate how to use it.
Guides are a simple yet necessary tool — they help users to align items on their Google Slides presentations. Not only can guides align images, but they can also be used for text boxes, shapes, and more. There are two types of guides available in Google Slides: vertical and horizontal.
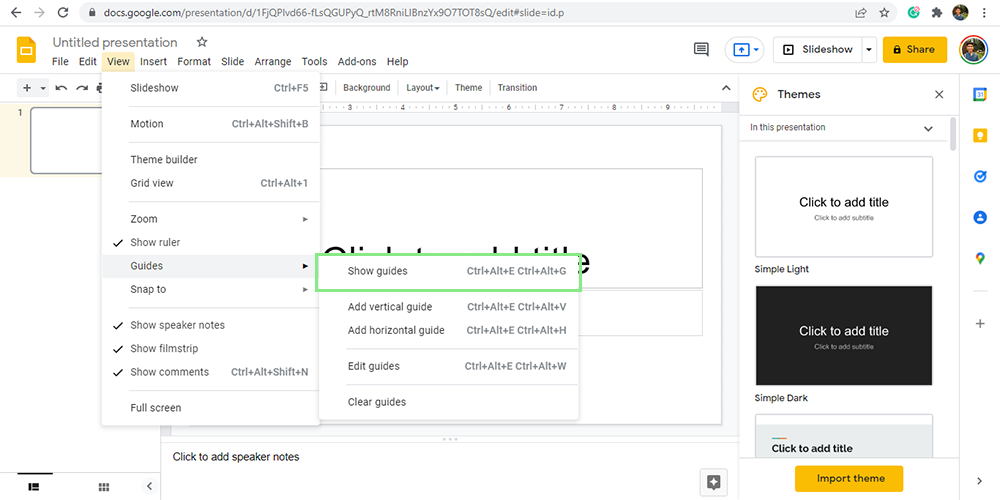
Before using guides, users need to activate this feature. Fortunately, this is extremely easy to do. Simply go to View > Guides > Show Guides on Google Slides’s main menu. Once this is completed, follow the steps below to start using guides.
How to use Google Slides’s guides for your images
1. To move an image using a Guide, you need to plan your preferred position for your image. Keep in mind the horizontal and vertical positions that you plan for it. Additionally, take note of the axis point of your image or its corner (this will act as its reference point).

2. Add a horizontal guide and vertical guide by going to View > Guides > Add horizontal guide and View > Guides > Add vertical guide.

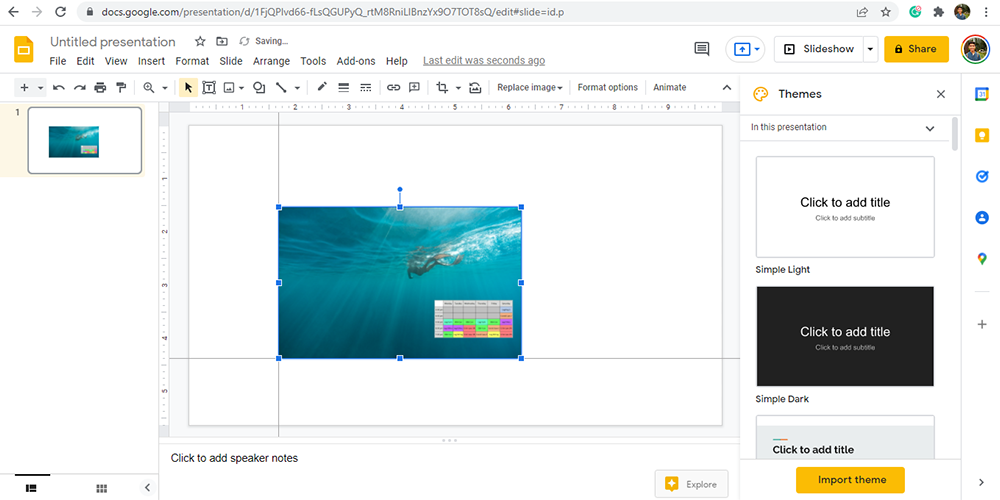
3. Drag the guides so that their intersection will be located on the point where you want your image’s reference point to move to. <dragguides.png>

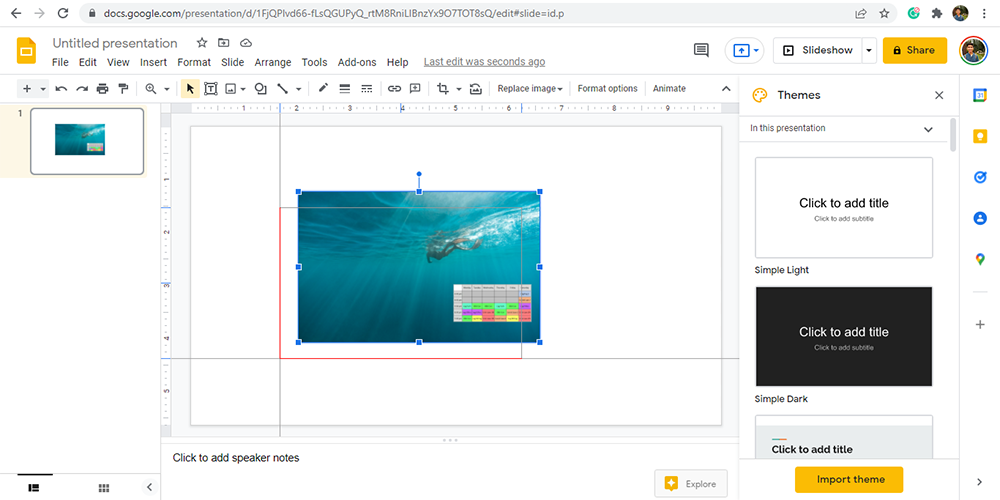
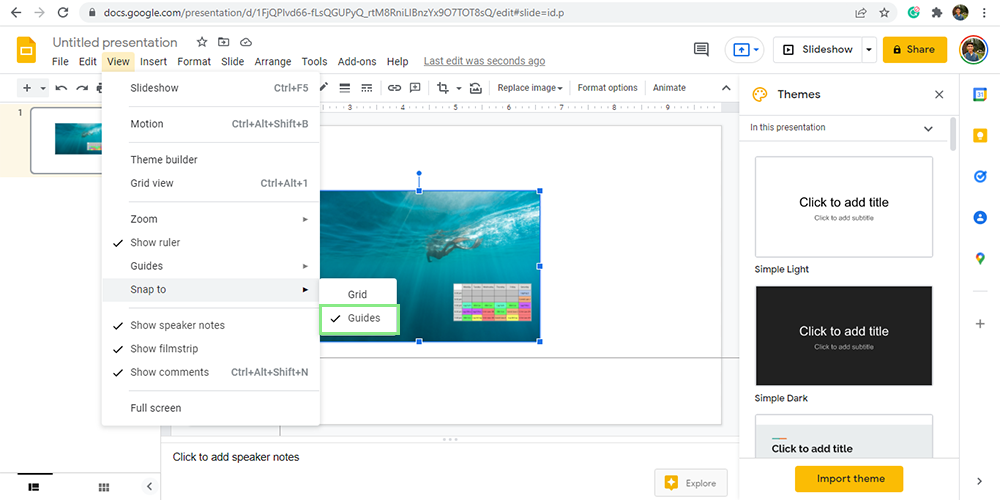
4. Drag your image until its reference point is located at the intersection of your two guides. To have a more accurate placement, activate the Snap To feature by going to View > Snap To > Guides. <dragimage.png> <snaptoguides.png>
Sign up to receive The Snapshot, a free special dispatch from Laptop Mag, in your inbox.

