How to share a folder with all users on a Windows 10 PC
Control who sees what on Windows 10
Windows 10 hands out a log-in for each user on a device. Generally, this means creating multiple profiles for each person who handles a specific PC. And each of these profiles has access to only a specific set of folders and apps made available by the system administrator.
If you want to change that, and you have administrator access, you can choose to share individual files and folders with anyone, or turn on sharing by default. Copies of birth certificates and passports, for example, are handy when accessible among family members. To get to this point, we need to give each family member access to the shared folder.
As an administrator, you can do this, while still maintaining granular control over what other users can do once inside the folder. You can allow them to view the files, to copy the files, or to edit the files. It’s really up to you.
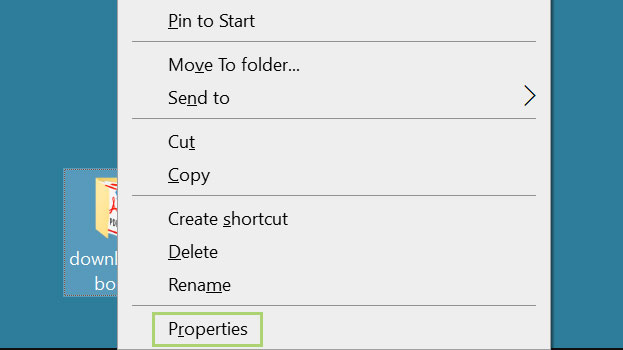
1) Right-click on the folder you want to share, to open the context menu.
2) Select Properties from the context menu.
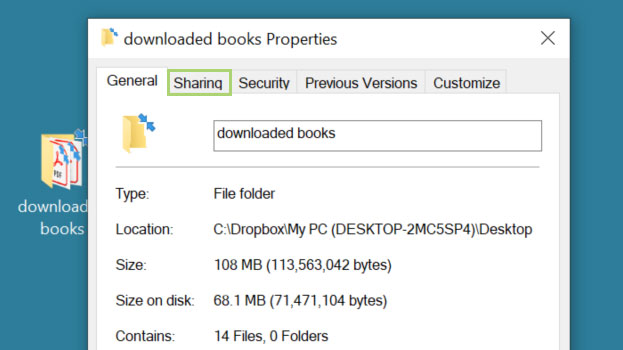
3) In the Properties dialogue box, go to the Sharing tab.
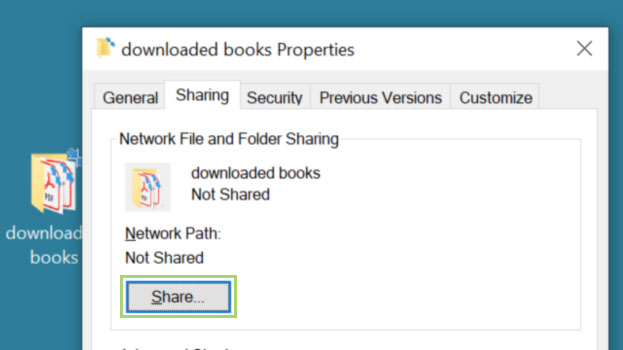
4) On the Sharing tab, click Share.
Sign up to receive The Snapshot, a free special dispatch from Laptop Mag, in your inbox.
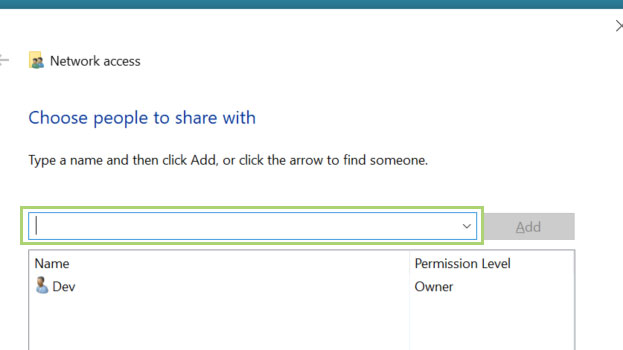
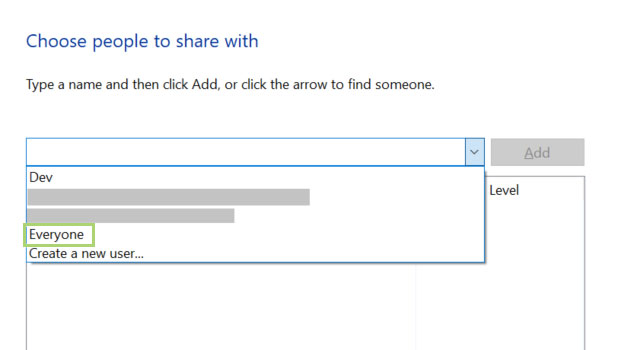
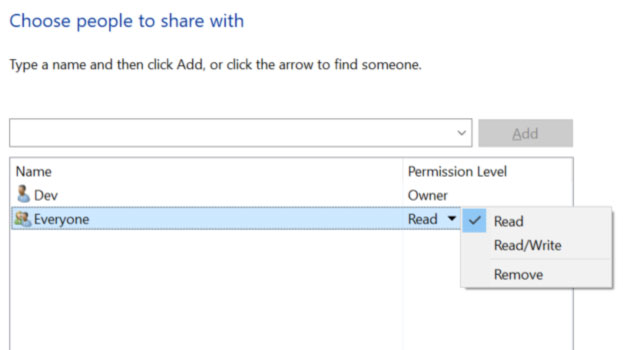
5) Under the Choose people to share with option, click to open the drop-down menu.
6) From the menu that opens, select Everyone.
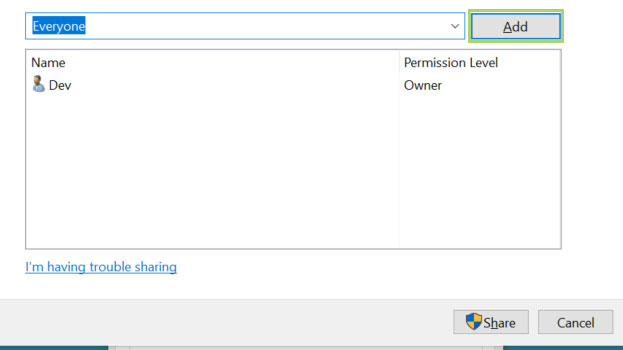
7) With Everyone selected, click Add.
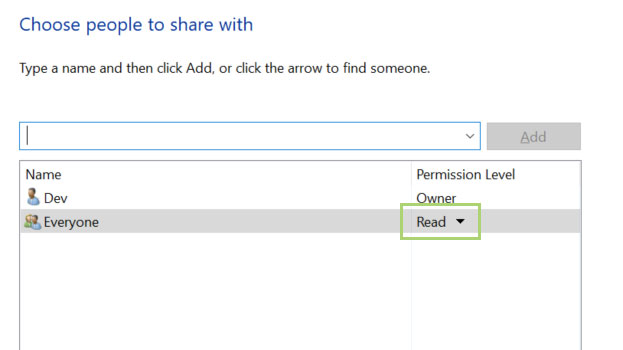
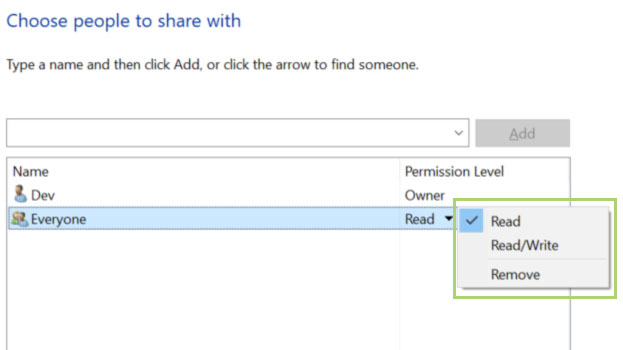
8) To change the permission level, click to open the drop-down menu.
9) Choose the appropriate permission level from the drop-down menu.
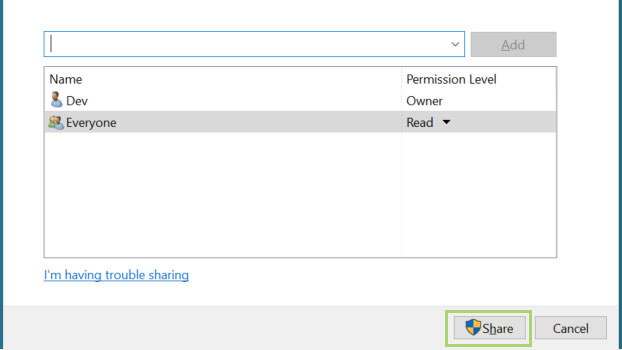
10) Click Share at the bottom right corner to complete the process.
Bryan covers everything you need to know about Windows, social media, and the internet at large for Laptop Mag. Thanks to his extensive knowledge of operating systems and some of the most popular software out there, Bryan has written hundreds of helpful guides, including tips related to Windows 11 drivers, upgrading to a newer version of the OS, editing in Microsoft Photos, or rearranging pages in Google Docs.

