How to enable low power mode on a Mac
Just a few tweaks inside the Energy Saver menu could add hours to your battery life

Although newer MacBooks are known for great battery life, you could find yourself in a situation where you need to extend its life, even if only for a few more minutes. Macs don’t have a low power mode like that offered in Windows, but it does have multiple settings that you can tweak to get the same effect.
Different Apple systems offer different options for squeezing the most out of the battery. Desktops, for example, feature fewer options since you really don’t need to conserve battery for something you’d use plugged into a power source. Laptops, on the other hand, have some differences, primarily between the Pro and non-Pro models, as the former packs a lot more power-intensive cores on the Apple Silicon chipset that you can switch on or off to save battery as needed.
Aside from the Energy Saver options, some of the easiest tweaks you can make to extend the life of your battery between charges would be turning off Bluetooth and WiFi. And the biggest effect on your battery is going to come from the screen itself. Lower the brightness as much as you can to make the biggest impact on your battery life.
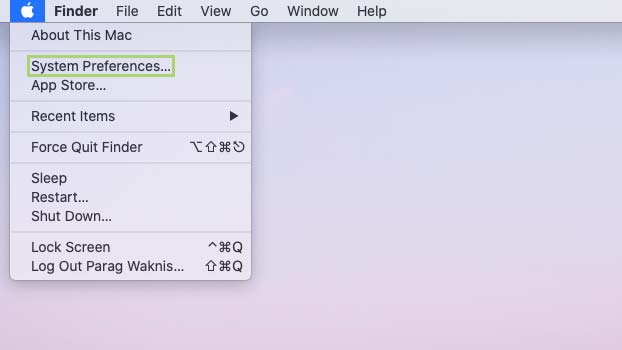
1. Click the apple icon to open the menu.
2. In the menu, select System Preferences.
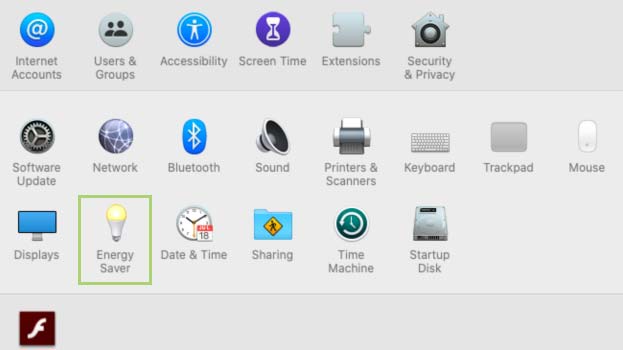
3. In System Preferences, select Energy Saver.
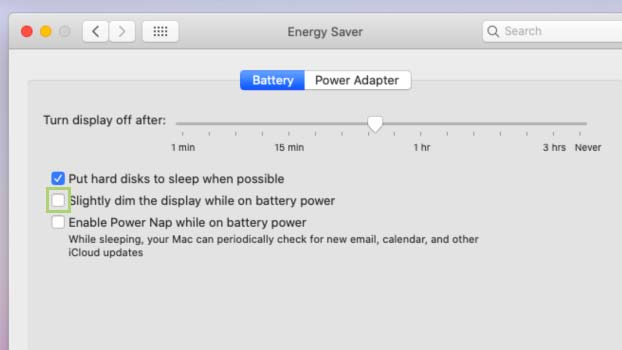
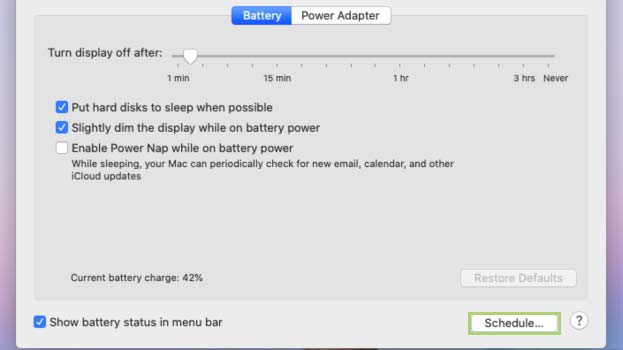
4. In the Energy Saver window, select Slightly dim the display while on battery power.
Sign up to receive The Snapshot, a free special dispatch from Laptop Mag, in your inbox.
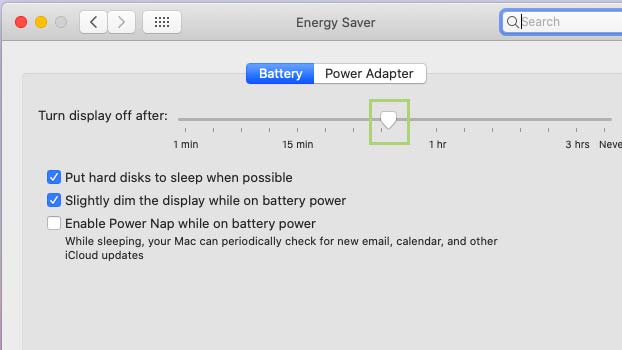
5. Move the slider to adjust the time after which the display would be turned off.
6. Click Schedule at the bottom right corner.
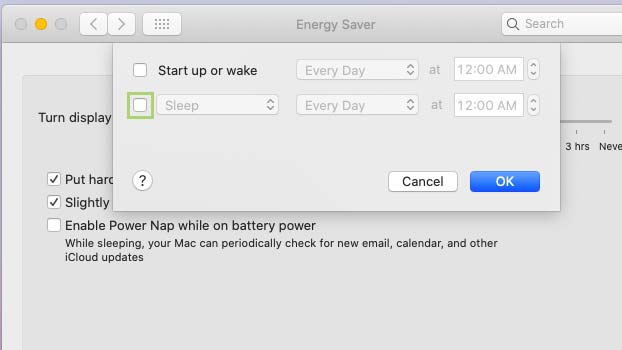
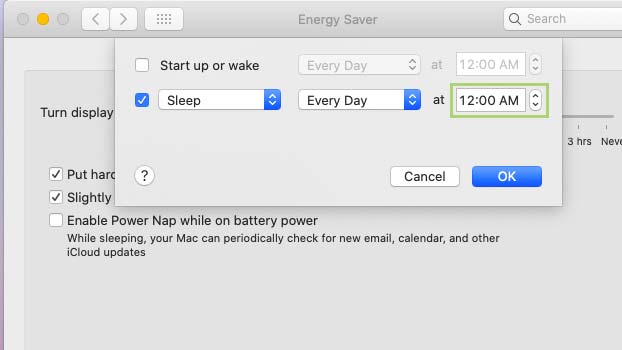
7. In the dialogue box, select the Sleep option.
8. Adjust the time to match your working schedule.
9. Click OK to confirm the changes.

