How to wirelessly transfer files between your phone and PC
Send files from your PC to your phone — and vice versa

Sign up to receive The Snapshot, a free special dispatch from Laptop Mag, in your inbox.
You are now subscribed
Your newsletter sign-up was successful
Apple’s exclusive AirDrop feature lets Mac and iPhone owners wirelessly share files across devices in an instant. If you have a Windows PC, though, don’t feel left out. It’s easy to replicate the AirDrop experience for Windows and Android devices.
There’s a range of third-party options that can facilitate wireless file transfers between Windows computers and phones. Even though these cross-platform utilities are built-in, you don’t have to do much to set them up and begin beaming chunks of files across your devices. Here’s how to get started.
AirDroid: Android, iOS, Windows, Mac, Web
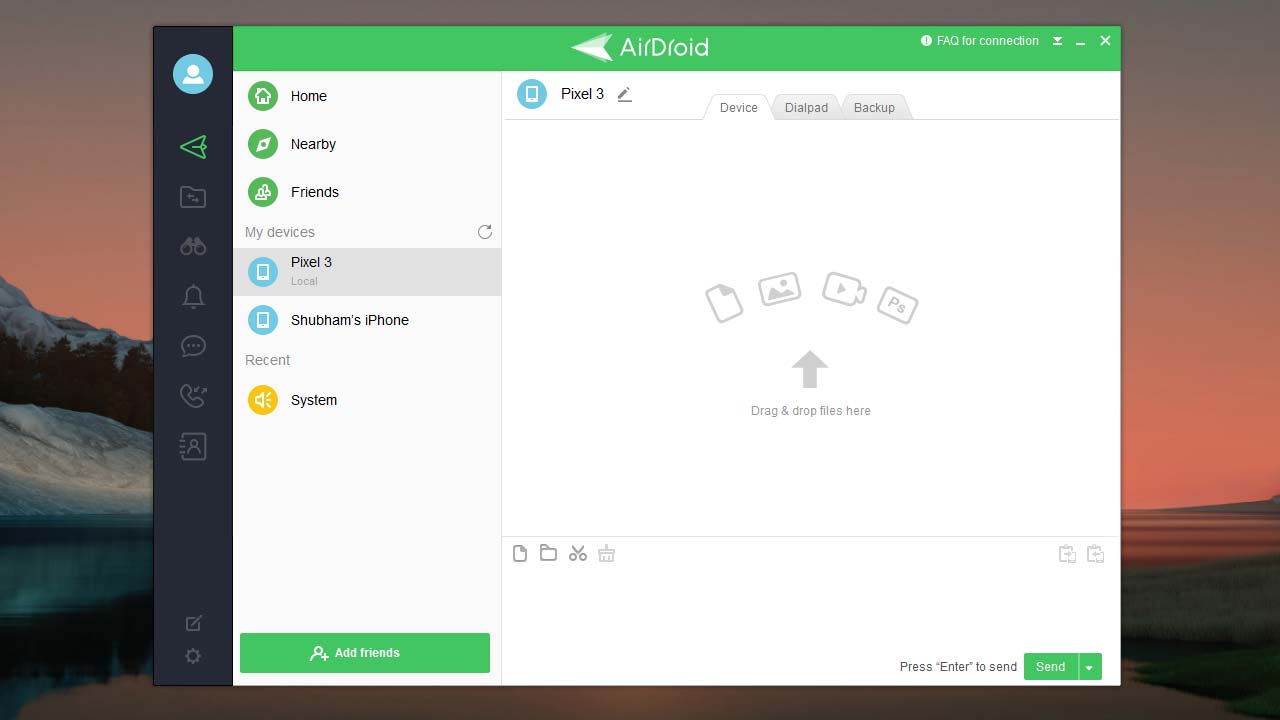
AirDroid is an all-inclusive service to manage your phone from your computer. You can respond to your messages, check your notifications, remotely control your phone’s camera and more.
AirDroid’s highlight is its file management tool. It lets you instantly send files to and from your phone and computer over Wi-Fi, irrespective of the OS they’re running. At a top transfer speed of 20Mbps, it’s also faster than most similar services. If you’re an Android user, you can browse your entire local storage right from your computer without connecting any wires.
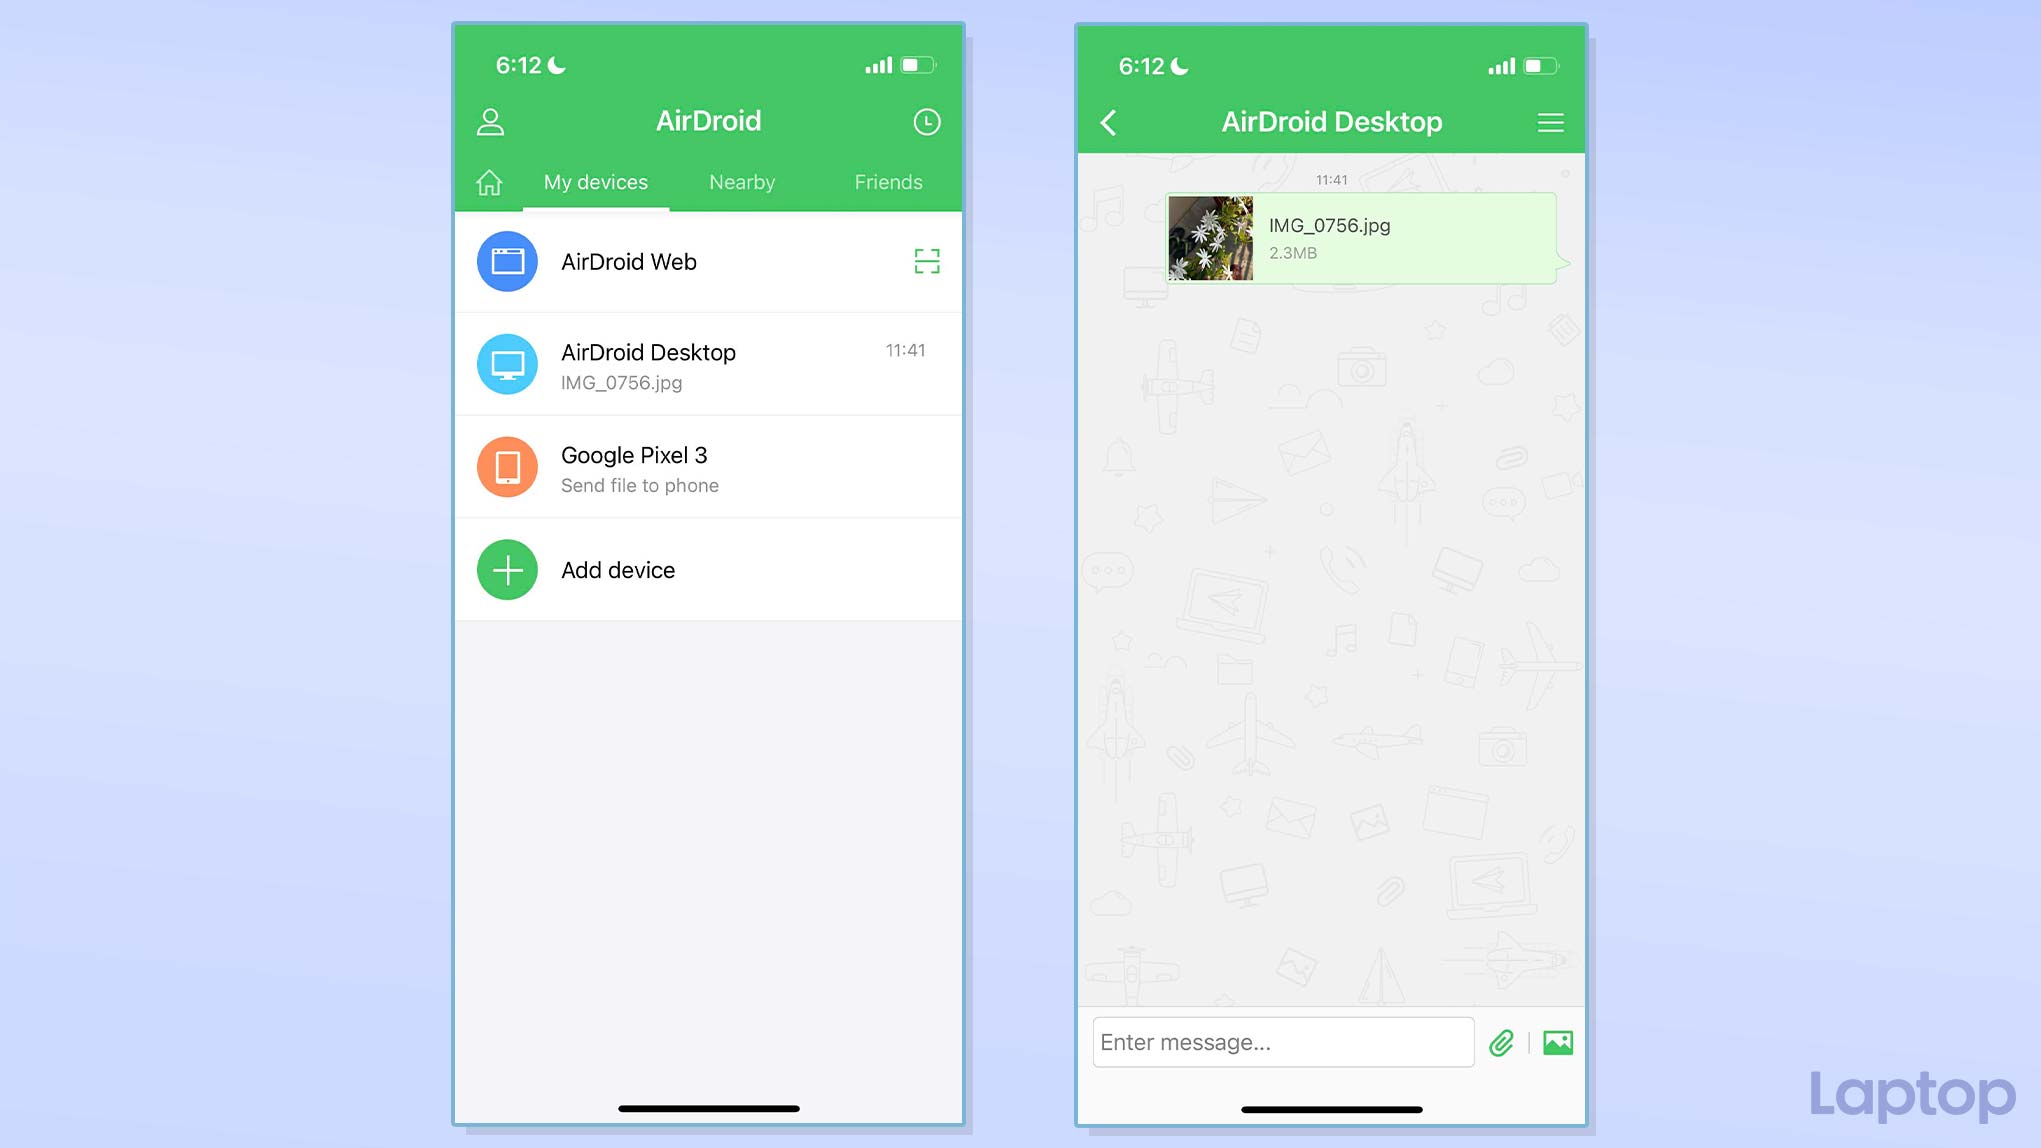
Configuring AirDroid won’t take you more than a few minutes. All you need to do is download the free client on your computer and phone, and sign in with a new account. This automatically links your devices. Now, when you want to transfer anything, just select the AirDroid option in the share menu.
With AirDroid’s free version, the maximum file size you can remotely send is 30MB. For larger transfers, you’ll need to shell out for the premium subscription, which costs at least $2.50 a month.
Send Anywhere: Android, iOS, Windows, macOS, Web, Linux
Although AirDroid works well, it has a lot of extra features you may not need. For a no-frills experience, try Send Anywhere. As its name suggests, Send Anywhere is built for one purpose, and that is to transmit data across all your computers and phones. It supports many file types, and unlike AirDroid, its free plan has no size limit nor the number of items you dispatch in a go.
Sign up to receive The Snapshot, a free special dispatch from Laptop Mag, in your inbox.
On Send Anywhere, you also don’t have to create an account. You can either create a shareable link for your files or connect your devices with a unique code. Once you have installed its apps, you can transfer files by selecting the “Send Anywhere” option in the Share menu. On your PC, you can drag and drop files or folders directly on the Send Anywhere program to send them to your phone.
Access your Windows PC’s drive from Android phone and iPhone
If you don’t mind going through a couple of technical steps, you can transfer files between your phone and Windows PC without any apps. This also ensures your data is safe; no third-party developer can read or compromise its content.
For this method, you will essentially make your Windows computer’s storage accessible on your local Wi-Fi network. When you do this, your phones will be able to wirelessly read your PC’s drive. They can grab data from it to their local storage or move files and folders to it. It sounds a tad complicated, but once you have gone through the initial process, it’s the most direct secure channel of them all.
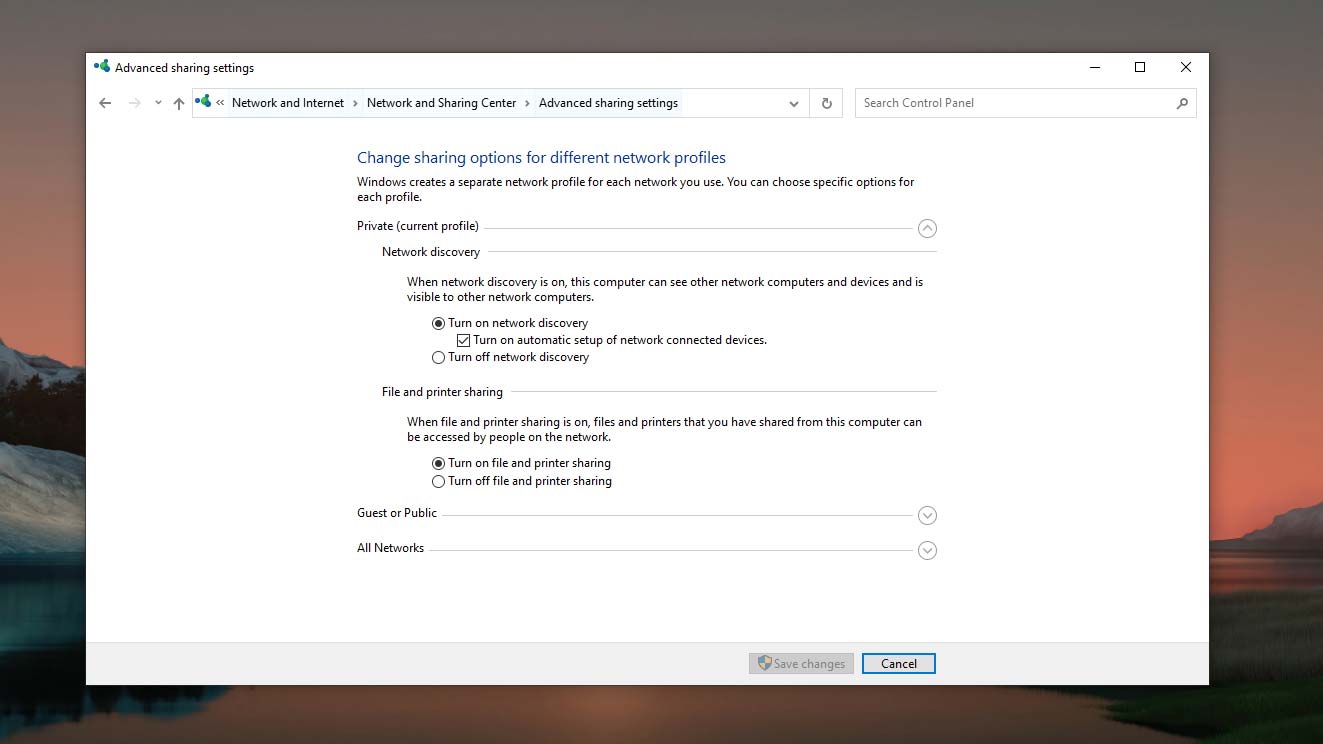
To begin, open the Control Panel on Windows and navigate to Network & Internet > Network & Sharing Center. Click “Change advanced sharing settings” from the menu on the left and toggle on the “Turn on file and printer sharing” option under the “Private (current profile)” section.
Next, launch the Command Prompt program on your PC, punch in “ipconfig,” and hit the Enter key. Copy the numbers next to the “IPv4 Address” field. You will need to later type in these numbers on your phone. Send them to your device via email or any other method you prefer.
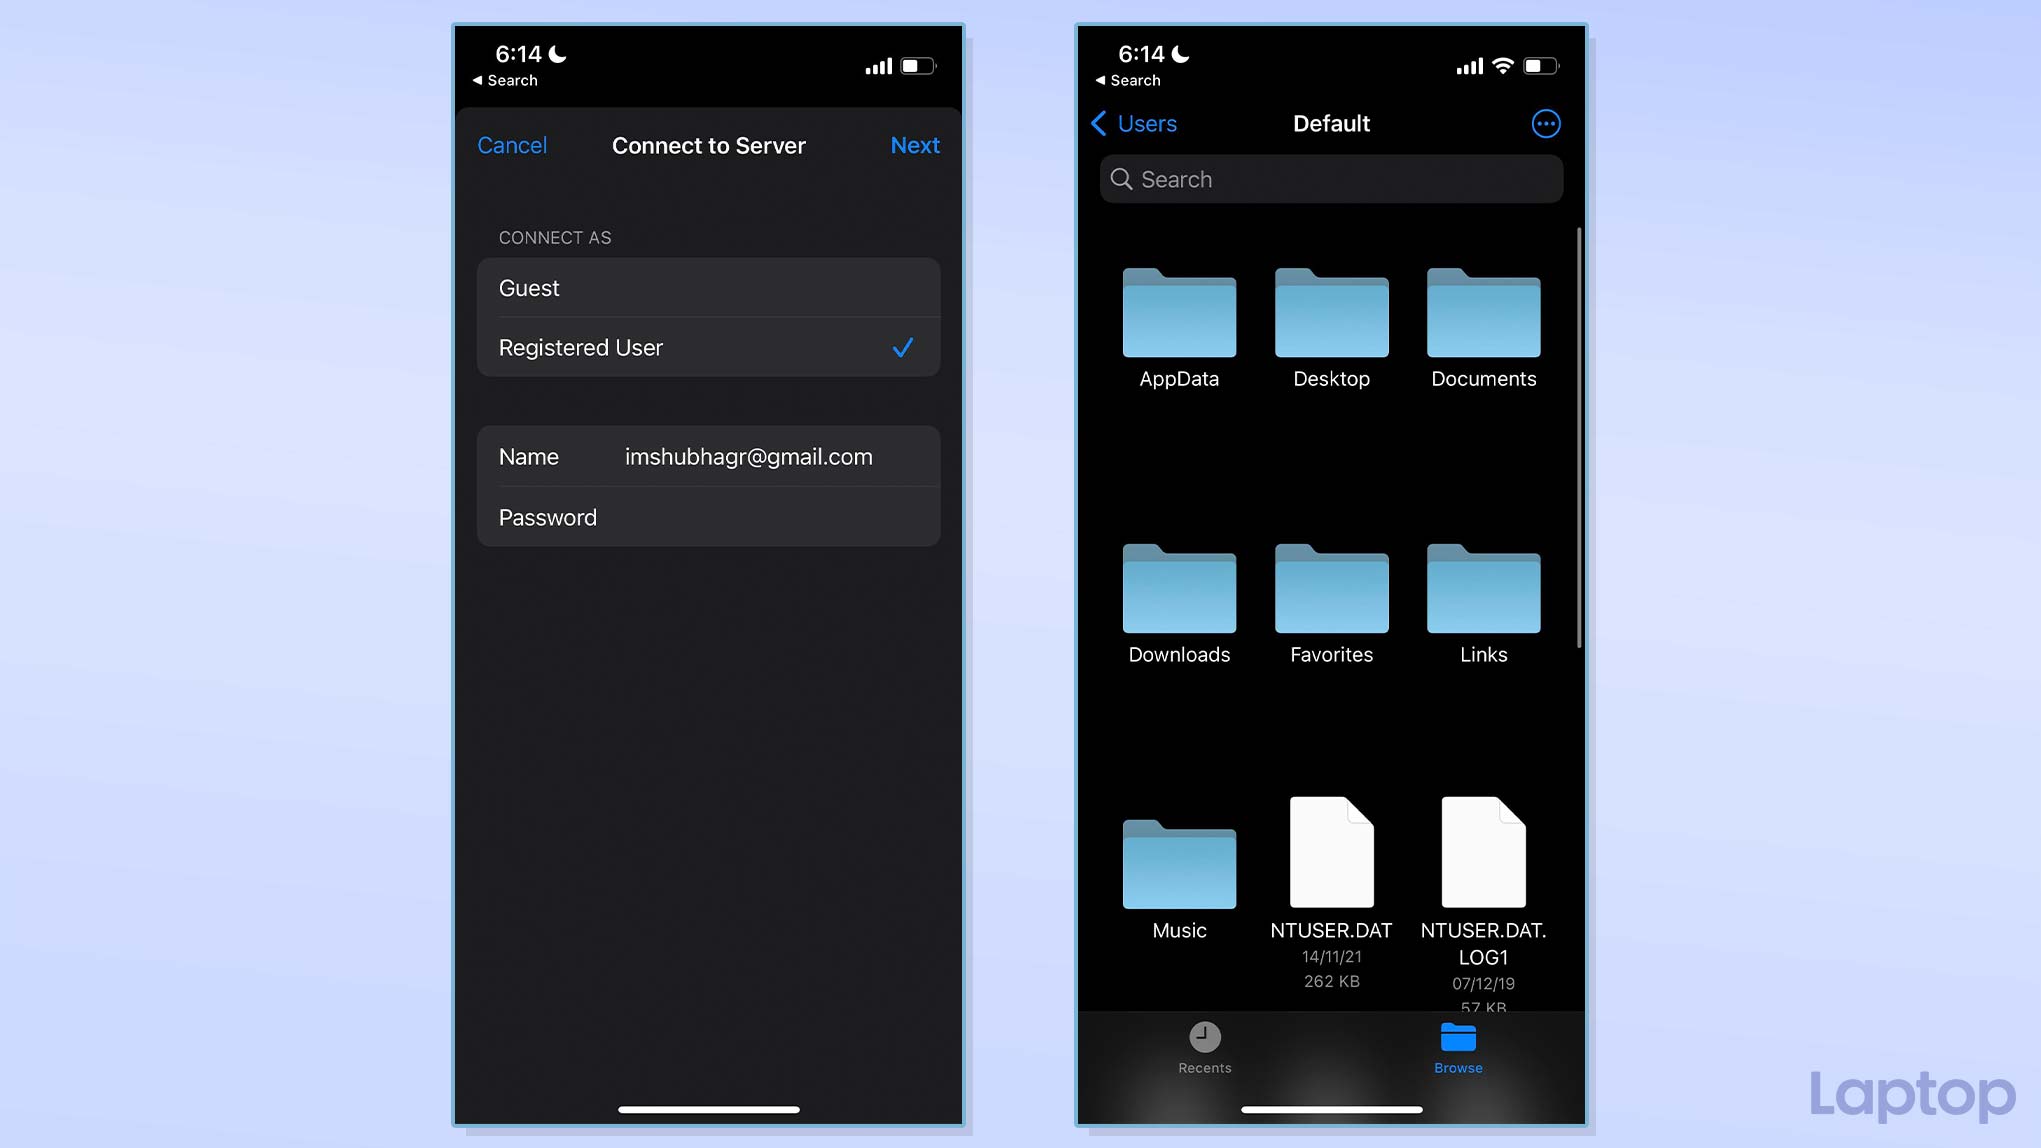
On your iPhone, fire up the Files app, touch the three-dot menu button at the top right corner, and select “Connect to server.” Enter your IPv4 address. On the following screen, tap “Registered User,” and enter your PC’s username and password. Touch the “Next” button to continue.
That should do it. Your computer’s directory will be added to your Files app. You can copy items from here and move them to your phone’s local storage or vice versa. Note that your computer and phone have to be on the same Wi-Fi network for this to work.
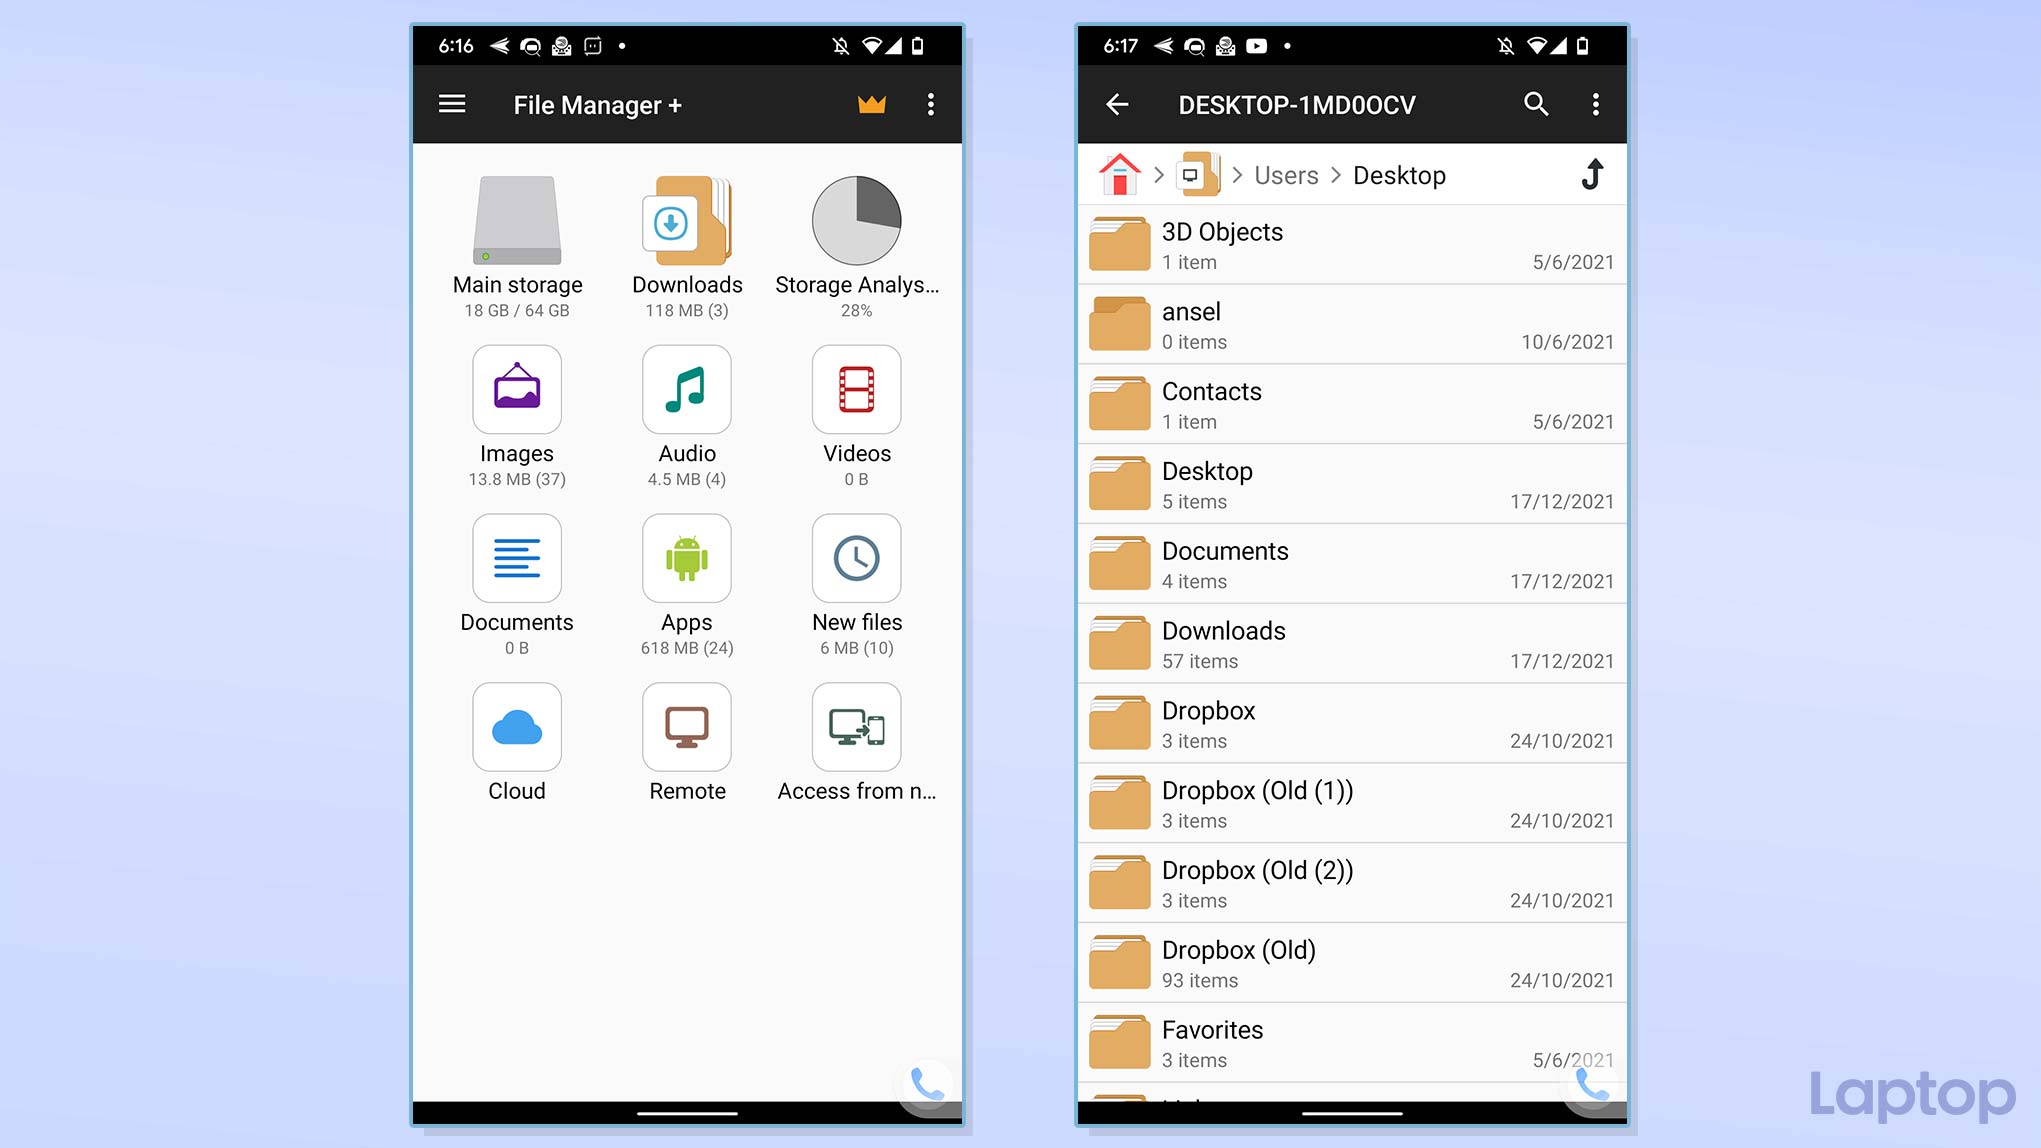
Similarly, on an Android phone, you must have a file manager app that lets you connect to a server. If you don’t have one already, we recommend downloading File Manager Plus.
Once you have File Manager Plus on your phone, open it. On its home page, you’ll find the “Remote” option. Tap it, and on the next screen, touch “Add a remote location.” In the pop-up, select “Local Network.” As long as your computer is connected to the same Wi-Fi network, File Manager Plus will automatically pull its details. All you need to do is enter the username and password, and you’re all set.
Shubham Agarwal is a freelance technology journalist from Ahmedabad, India. His work has previously appeared in Business Insider, Fast Company, HuffPost, and more. You can reach out to him on Twitter.
