How to display a page in landscape mode in Google Docs
View your document from a new perspective with Google Docs
Sign up to receive The Snapshot, a free special dispatch from Laptop Mag, in your inbox.
You are now subscribed
Your newsletter sign-up was successful
Google Docs is rapidly growing, becoming one of the most popular document processing software programs. Its online and cloud-stored features makes it attractive to users who dislike downloading and installing new programs for every task. One common feature that it includes is its landscape mode page setup.
Landscape mode is a document orientation where the width of the pages is greater than the height. While portrait orientation is more common (and therefore the default for Google Docs), , landscape orientation is preferable in some instances. This orientation is useful for brochures, newsletters, or documents with wide images. It can also be used to save paper when printing lengthy texts.
Google Docs offers two options when using landscape mode. You can either apply the setting to your whole document or to specific pages. The details below explain how to do both.
How to turn your whole document landscape in Google Docs
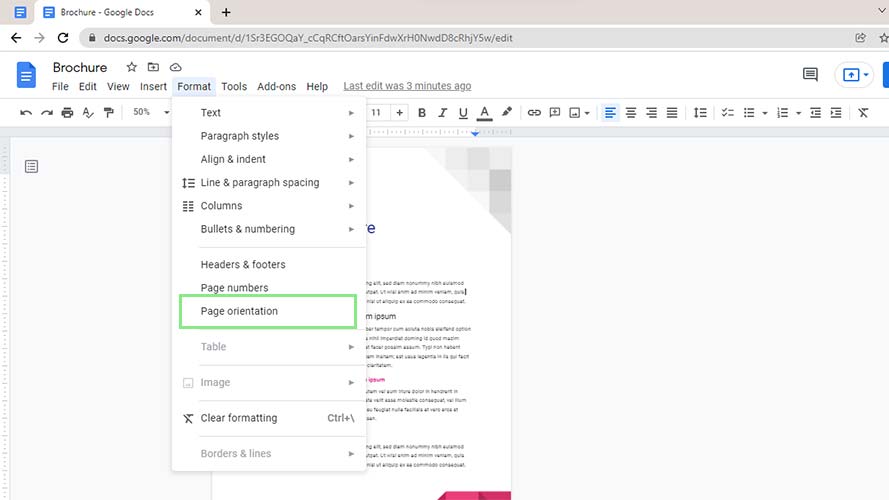
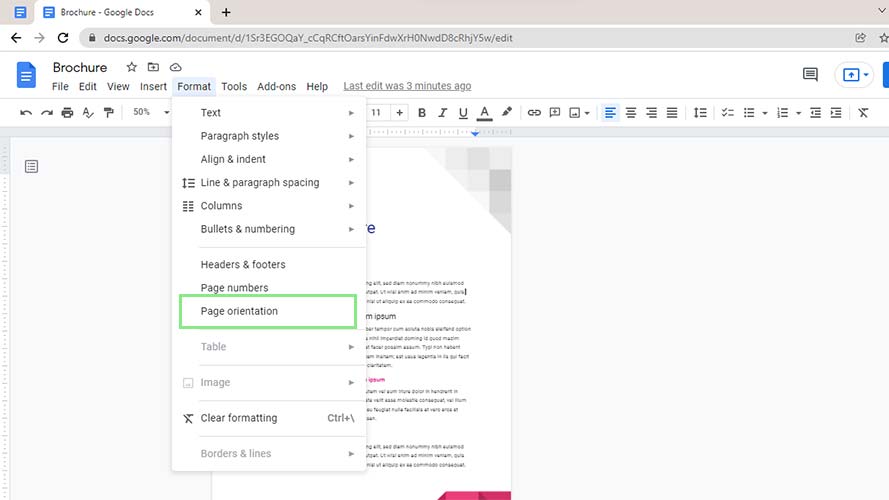
1. Turning a whole Google document landscape is pretty straightforward. First, go to Format > Page Orientation on your Toolbar. This action will open a window that lets you set your document’s orientation.
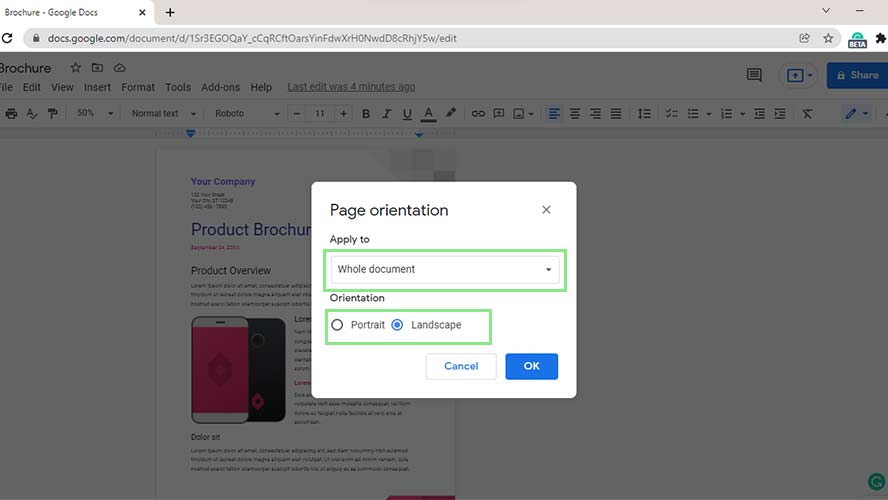
2. Under “Apply to,” select “Whole document.” While in the Orientation section, select Landscape.
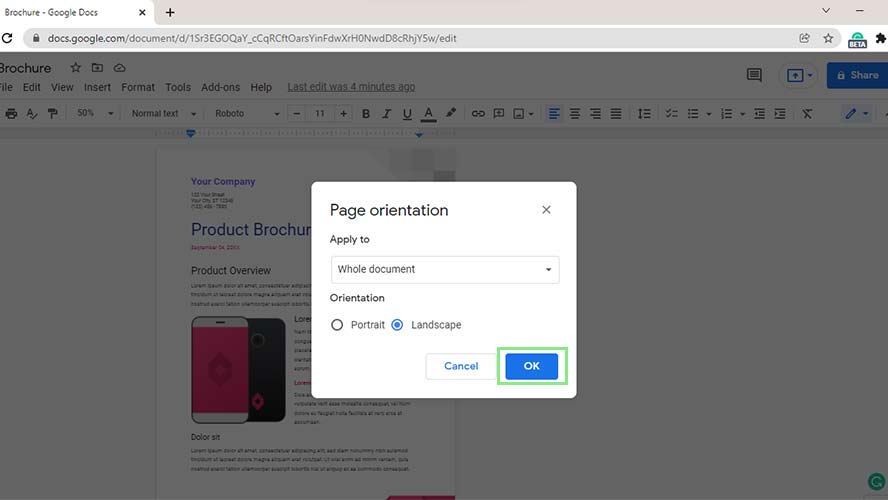
3. Lastly, click the “Ok” button at the bottom of the window. All existing pages and newly added pages should now have a landscape orientation.
How to turn specific pages to landscape in Google Docs
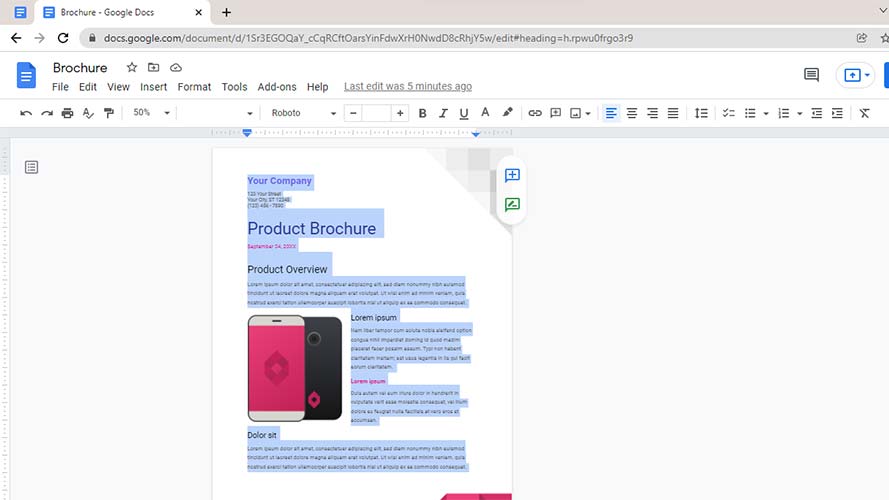
1. To turn only specific pages to landscape orientation, first select all texts on the page you want to turn to sideways.
Sign up to receive The Snapshot, a free special dispatch from Laptop Mag, in your inbox.
2. Next, go to Format > Page Orientation on the Toolbar once again.
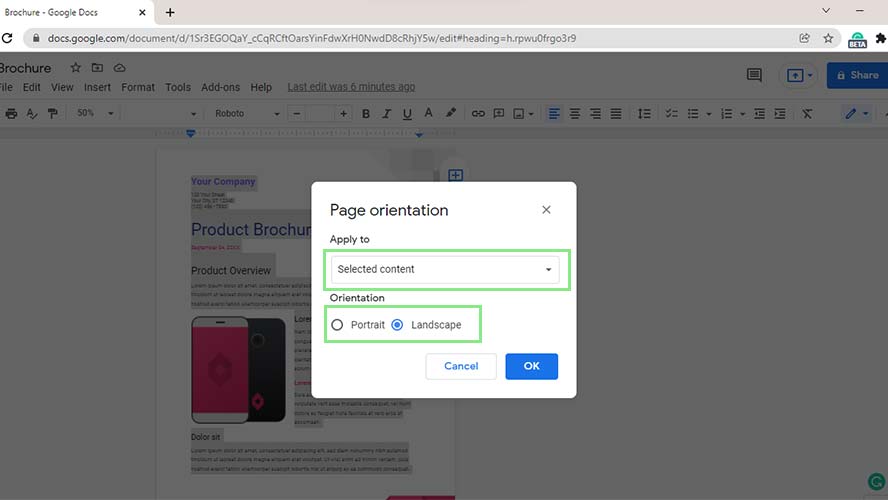
3. This time, select “Selected content” under the “Apply to” field, and select “Landscape” under the Orientation field.
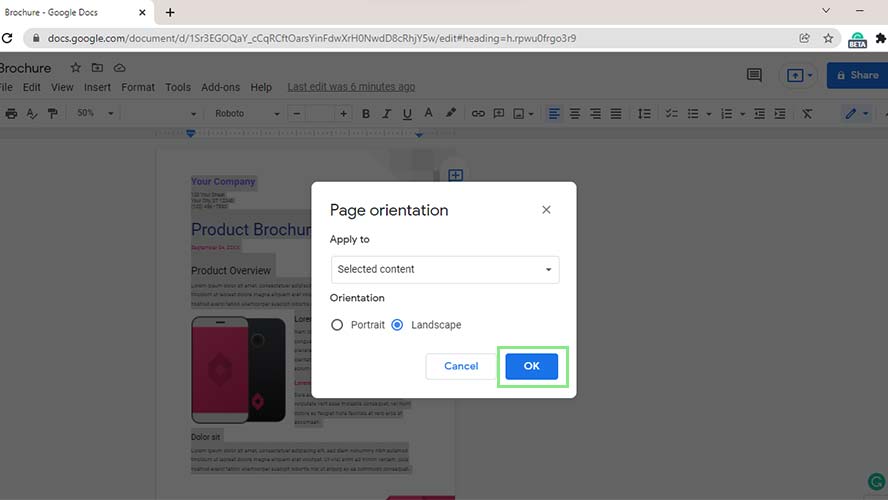
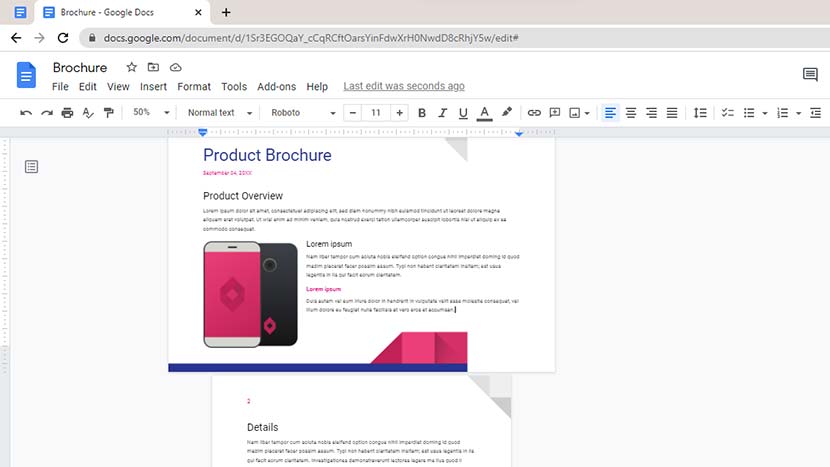
4. Click the “Ok” button at the bottom of the window.
