How to adjust cell spacing for a table in Google Docs
Perfect your documents with symmetrical table cell spacing

Tables are one of the best ways to present your data. In Google Docs, you can tweak and customize your tables to make them look their best. The simplest yet most obvious of these style customizations is the cell spacing of your table. In this tutorial, you’ll learn to set cell spacings with expert precision.
Cell spacing or cell padding is the amount of free space between the borders of each cell, and the content inside it. Before we jump into the steps needed to do this task, let us look at why you may want to do away with Google Doc’s default cell spacing and use a custom one.
First, the default cell padding of Google Docs can be too small. The lack of padding makes your document look cramped and hard to read. Another reason to add more cell padding is to leave some space for people to annotate your table if you plan to print it. Here are the steps to add more spacing to your table cells in Google Docs.
Increasing or decreasing cell spacing in Google Docs
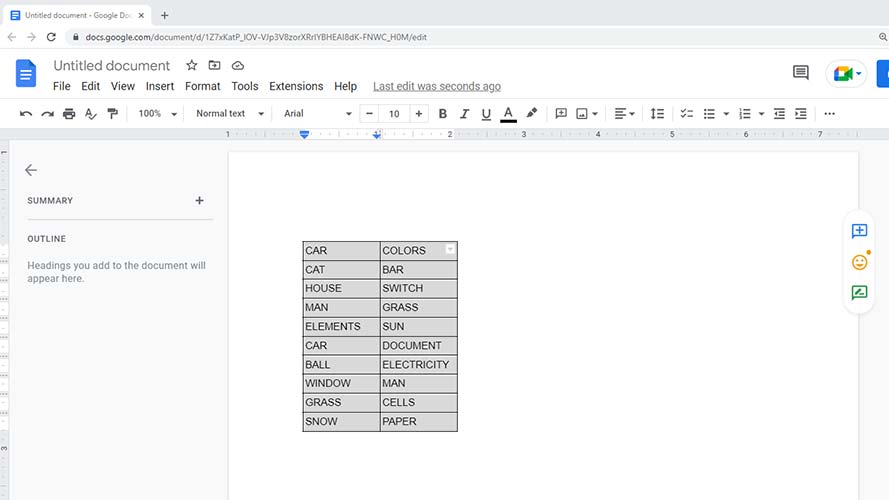
1. To change the default cell spacing of your table, first, highlight the whole table. You can also click any cell on the table. However, the new cell padding will only apply to the cells that belong to the same row as the cell you clicked.
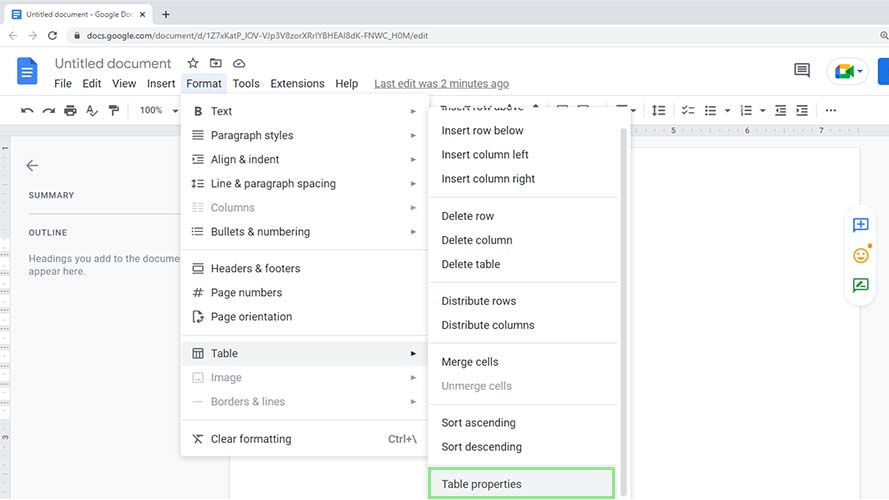
2. Next, on the main header navigation bar, go to Format > Table > Table Properties. This should open a panel on the right side of your google Docs titled Table Properties.
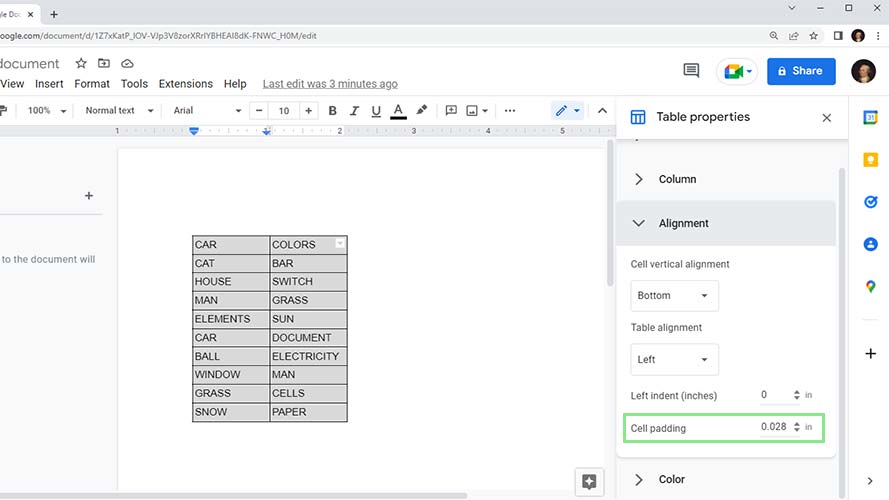
3. Lastly, scroll down until you find the Alignment section and adjust the Cell padding value as much as you want.
Sign up to receive The Snapshot, a free special dispatch from Laptop Mag, in your inbox.


