How to Change The Connection Priority in Windows 8.1, Windows 8 or Windows 7
Sign up to receive The Snapshot, a free special dispatch from Laptop Mag, in your inbox.
You are now subscribed
Your newsletter sign-up was successful
It happens all the time. You're using your relatively slow Wi-Fi network as you sit on the couch, but even after you get up and plug your notebook into the speedy Ethernet port at your desk, Windows still insists on using on the hotspot as your Internet connection. Unfortunately, on some systems, Microsoft's operating system places slower connections higher in the priority order than wired ones.
Fortunately, by tweaking a couple of settings, you can decide which connection takes precedence when more than one is available. Just follow these simple steps to change the connection priority in Windows 8.1, Windows 8 or Windows 7.
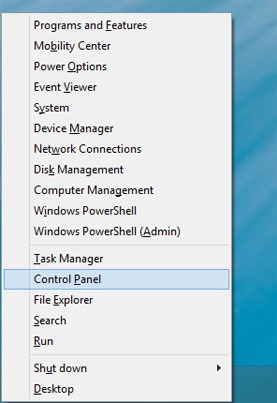
1. Navigate to Control Panel. In Windows 8 or 8.1, you can get to control panel by hitting Windows + X and selecting Control Panel from the menu that appears.
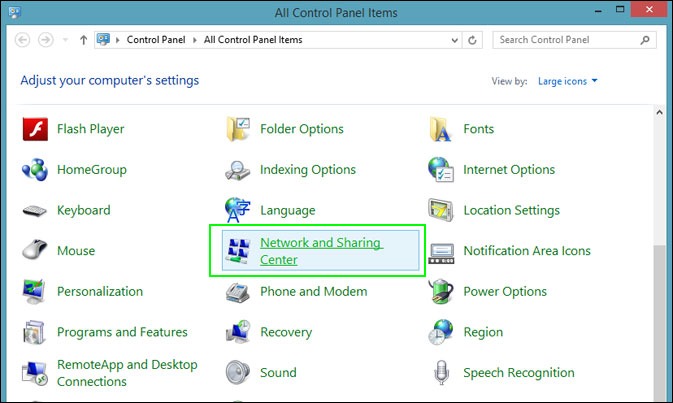
2. Select Network and Sharing Center. If not visible, pull down Large or Small icons from the View by menu.
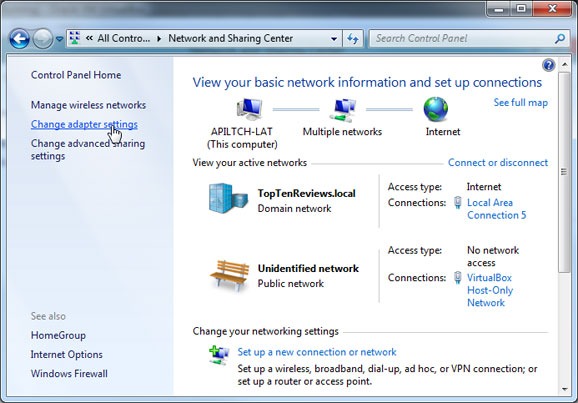
3. Click Change Adapter Settings.
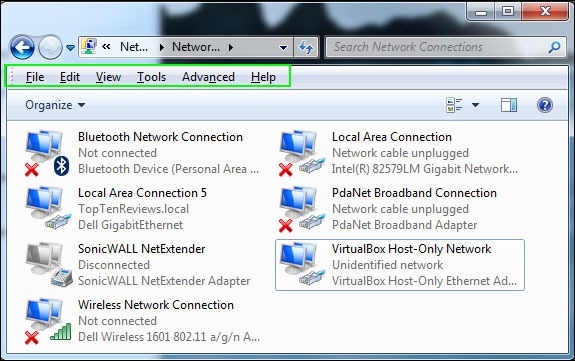
4. Hit the Alt Key to make the menus appear above the list of Network connections. If you don't see the File, Edit, View and Tools menus, hit Alt again.
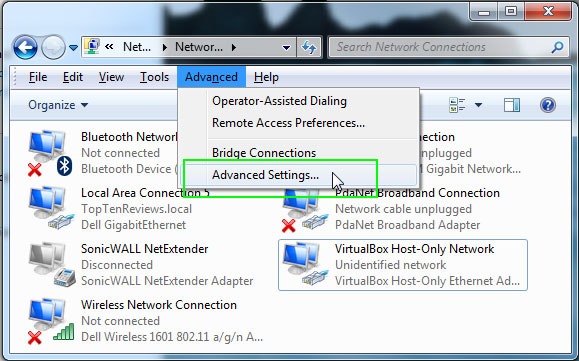
5. Select Advanced Settings from the Advanced menu.
Sign up to receive The Snapshot, a free special dispatch from Laptop Mag, in your inbox.
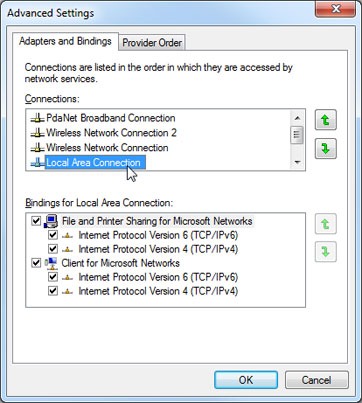
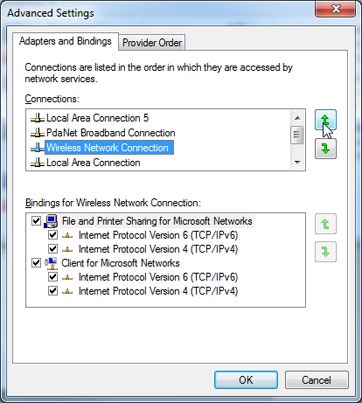
6. Rank your connections by priority using the up and down arrows.

