12 Tips for Taking Control of Privacy on Facebook
Have you ever gotten in trouble for something your friend posted on your Facebook? Or maybe you shared way too much information about your own life that your family would care about. Your whole life does not need to be on the Internet, and even if you disagree, the people around you might not. Get a better grasp on your privacy with the help of these 12 tips.
Manage Your Activity Log
Facebook’s Activity Log is a one-stop shop for making quick changes to your Timeline. Want to unlike something from weeks ago? Delete a link you shared in 2005? Click on Activity Log in your Timeline and you’ll have a full view of everything you’ve posted and what your friends have posted and liked on your Wall since you joined Facebook. To remove an item, click the circle icon to the right of the post to launch an options menu. From here, you can delete, allow or highlight any item on your Timeline. You can also change the date an event took place or mark a post as spam.
Edit/Remove Timeline Events
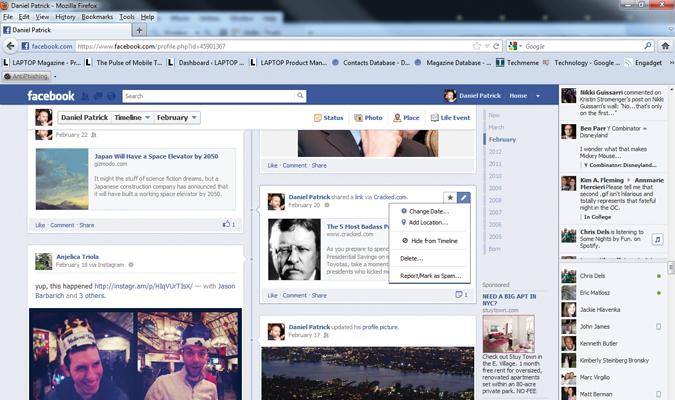
If you’re having second thoughts about something you recently posted on your Timeline, you can edit or remove it by moving your cursor over the post and clicking the pencil icon that appears in the popup box. From there, you can pin a post to the top of your Timeline, change the date of a post, hide it from your page or delete it.
Manage Who Can See Posts on Your Timeline
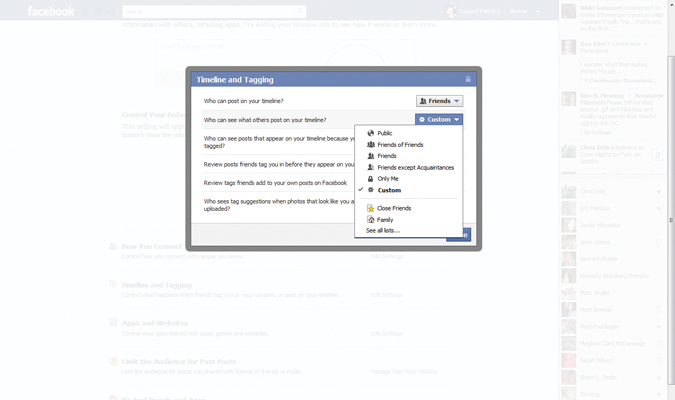
Just because you’re Facebook friends with someone doesn’t mean you want them to see all of your posts. To hide posts from a person or group:
Sign up to receive The Snapshot, a free special dispatch from Laptop Mag, in your inbox.
- Open the Privacy Settings menu in the top right corner.
- Click the Custom tab.
- Add the names of friends you want to permanently hide posts from to the Hide This From list.
- Click Save Changes.
Manage Timeline Apps
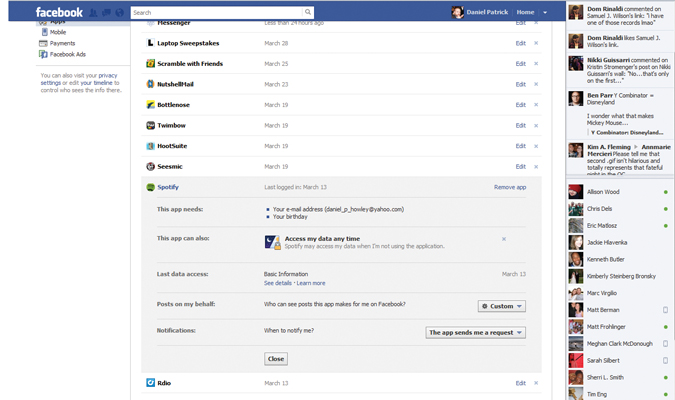
Certain Facebook apps, such as Spotify, offer Timeline integration that allows you to display your recent activity on your Timeline. But if you don’t want everyone to know you’ve been listening to Selena Gomez, you can change the app’s privacy settings by opening your Facebook Account Settings and selecting Apps from the toolbar on the left. Click the app you want to edit and change the App Activity Privacy to your desired level.
Keep Friends From Checking You into Places
There are two ways to stop people and friends from checking you into places.
#1
- Open Privacy Settings.
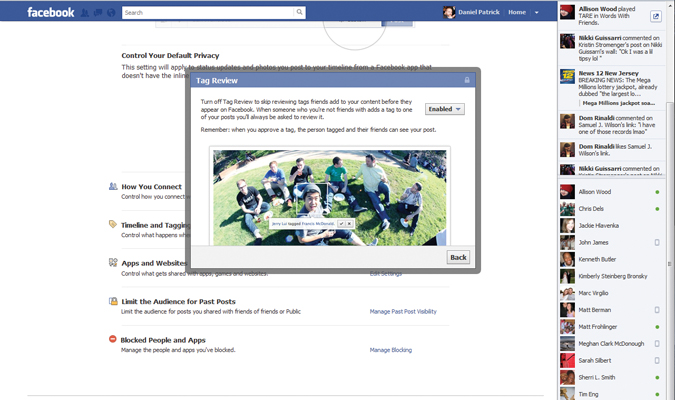
- Click on Edit Settings next to How Tags Work toward the bottom of the screen.
- Click the Tag Review tab.
- Select Enable from the drop-down box. Now each time someone tries to tag you, you will receive a notification asking for approval.
#2
- Open Privacy Settings.
- Click Timeline and Tagging.
- Toggle off “Allow friends to check you into places.” The next time a friend tries to check you into a location, you’ll get a request for approval.
View Your Page from a New Perspective
See how others view your page: Go to your Timeline and click the gear icon on the right side of the screen, then select View As from the dropdown box. You should see a message at the top that says, “This is how your Timeline looks to the public.” Below that is a dialogue box in which you can enter any of your friends’ names to see how they view your profile.
Add Friends to a Group
To share posts and photos with just your closest friends, Facebook allows you to arrange your friends into distinct Groups, including Close Friends, Acquaintances and Restricted, which limits the posts the person can see to posts that are made public. To add a friend to a Group, click the Friends box on their Timeline page and choose the specific Group from the drop-down menu. You’ll know a friend has been added to a Group when a check mark appears next to the Group name.
Enable Secure Browsing
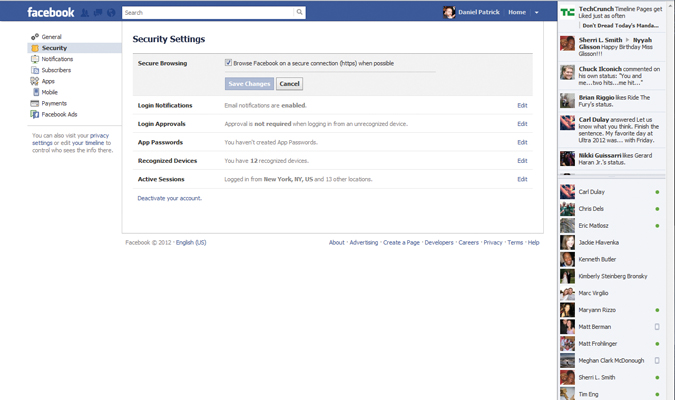
Facebook’s secure browsing feature (HTTPS) ensures that the data you send back and forth between Facebook and your laptop is encrypted. To enable HTTPS:
- Open Account Settings.
- Select Security on the left.
- Click Edit next to Secure Browsing.
- Check the box next to “Browse
- Facebook on a secure connection (https) when possible.”
- Click Save Changes.
Turn on Login Approvals
Login Approvals force you to enter a random security code sent from Facebook to your mobile phone in order to log into your account. Enable Login Approvals by selecting Security from the Facebook Account Settings menu and clicking Login Approvals. When you check off the dialog box, you’ll be asked to enter the country code and phone number to which Facebook should send your secret code. Facebook will then send you your secret code and ask you to enter it on the next page. After entering your code, click Next and then Save Changes.
Remove Recognized Devices
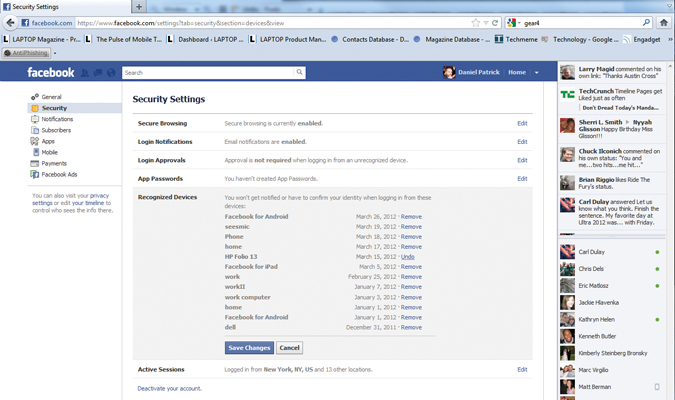
If you’ve approved your laptop or phone as a recognized device, Facebook will no longer ask you to prove your identity when logging into your account. That’s problematic if you lose or sell your phone. To remove recognized devices from your Facebook account, open the Account Settings menu and click Security. Open the Recognized Devices tab and choose the device you want to remove. The next time anyone attempts to log into your account from the device, they’ll be asked to verify their identity.
End Active Facebook Sessions
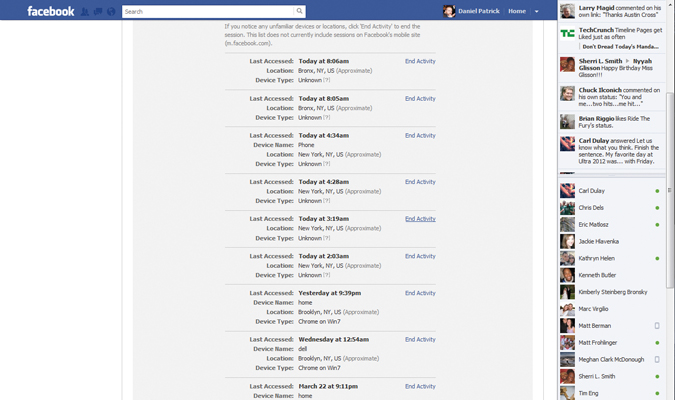
Leaving an active Facebook session open on your computer or mobile device means the next person that jumps on can navigate to Facebook and easily take control of your account. To end an active session on a device remotely, choose Active Sessions from the Security tab in the Account Settings menu. Scan your active sessions and click End Activity on each session you want to close.
Reset Your Password
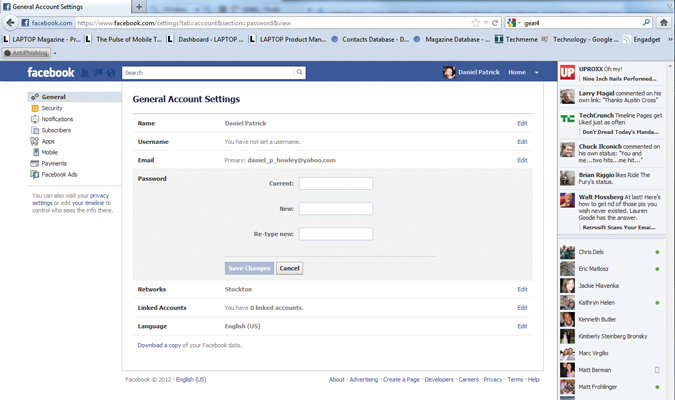
From the Account Settings menu, select the General tab and choose Password. Type your current password into the dialogue box and your new password into the next two boxes. Click Save Changes and your new password will be set.

