How to update audio drivers on Windows 11
Keep your audio driver up-to-date

If you're experiencing audio issues on your Windows 11 computer, updating your Windows 11 audio drivers may be the solution. Outdated or incorrect drivers cause a range of problems, from distorted sound to no sound at all. In this guide, we'll show you how to update audio drivers on Windows 11.
Updating your audio drivers is a simple process that can be done in just a few steps. First, you'll need to identify the make and model of your audio device. This information is usually found in the Device Manager or by checking the manufacturer's website. Next, you'll need to download the latest drivers from the manufacturer's website or through Windows Update. Finally, you'll need to install the updated drivers on your computer.
By following these steps, you can quickly and easily update your audio drivers and get your audio working properly again. Whether you're trying to listen to music, watch a movie, or participate in a video call, updated audio drivers will help ensure that you have a smooth and enjoyable experience.
Updating audio drivers on a Windows 11 computer
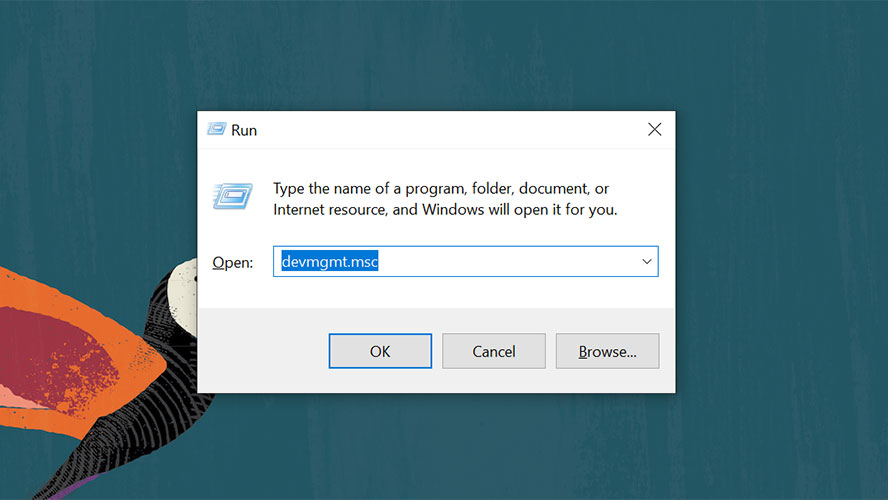
1. Type "devmgmt.msc" into the Run command window and press Enter. This will open the Device Manager.
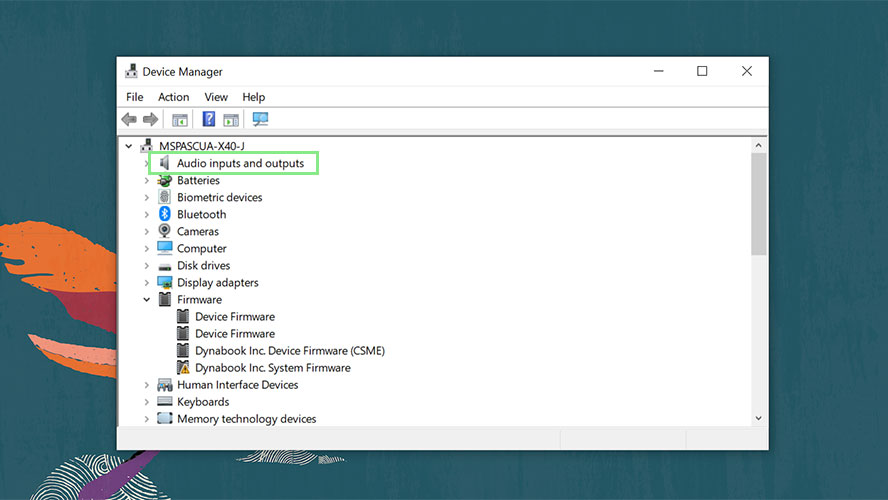
2. In the Device Manager, expand the "Audio inputs and outputs" category.
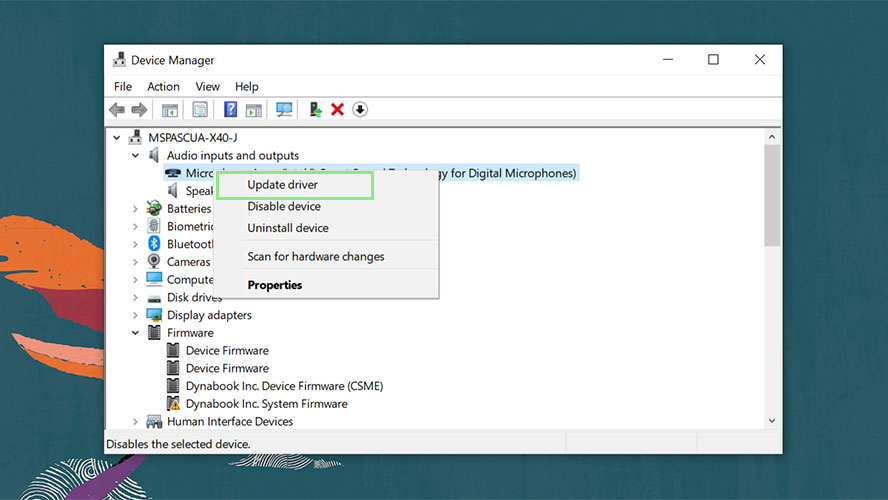
3. Right-click on your audio device and select "Update driver."
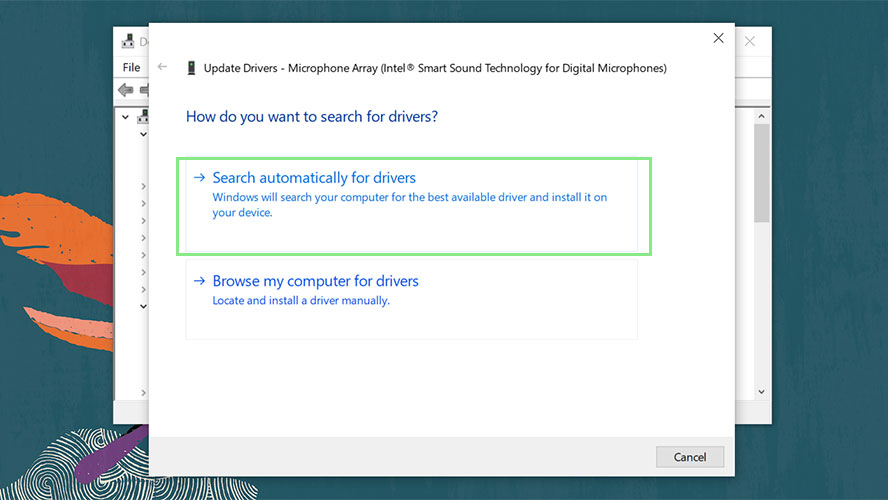
4. In the Update Driver window, select "Search automatically for drivers." Windows will search for and download any available updates for your audio driver.
Sign up to receive The Snapshot, a free special dispatch from Laptop Mag, in your inbox.
5. Follow the prompts to install the updated driver on your computer.
6. Once the installation is complete, restart your computer.


