How to rename a Bluetooth device on Windows 11
Changing the name of your Bluetooth device with Windows 11 is as easy as 1-2-3
Sign up to receive The Snapshot, a free special dispatch from Laptop Mag, in your inbox.
You are now subscribed
Your newsletter sign-up was successful
Curious about how to rename a Bluetooth device on Windows 11? You’ve come to the right place. Bluetooth has been the standard protocol for wirelessly connecting two or more devices since the early 2000s. Prior to that, all of our peripherals were connected to our PC with wires. Fortunately, Bluetooth changed all that.
Because of its widespread use, companies are always finding ways to improve Bluetooth connectivity by working within the constraints of the standard itself to improve performance on first-party hardware and software.
How to change the name of a bluetooth device with Windows 11
Most devices come pre-labeled; you should be able to see your Bluetooth device’s name in Settings. Generally, this works fine, but there are times where you might want to be a bit more specific. In Windows 11, you can change the name of your Bluetooth devices to make it easier to remember what’s what. Here’s how it’s done.
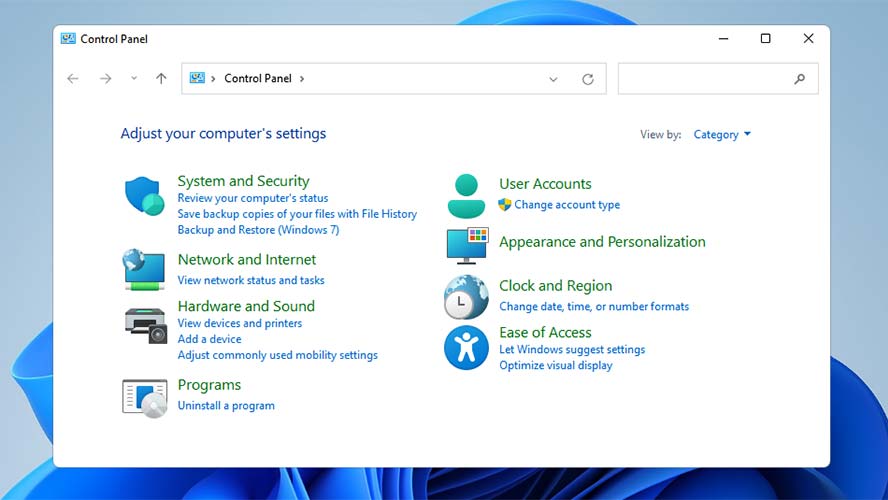
1. Open Control Panel with the Run command menu by pressing Windows + R on your keyboard and typing in “control.”
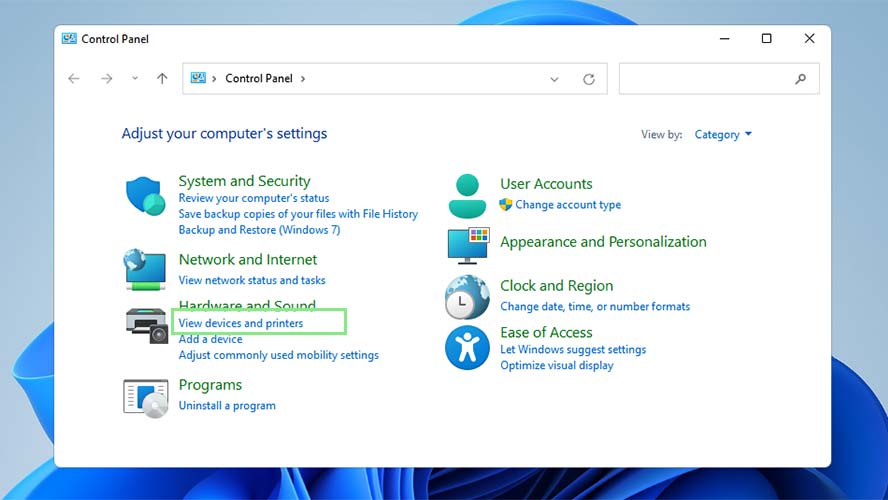
2. Under the Hardware and Sound section of your Control Panel, click View devices and printer.
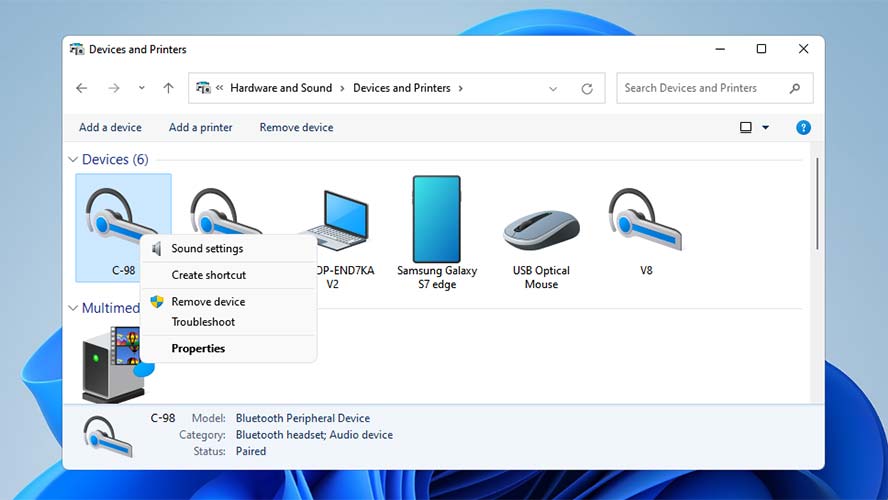
3. Look for the device you want to rename under the Devices section. Right-click the device to open a new menu.
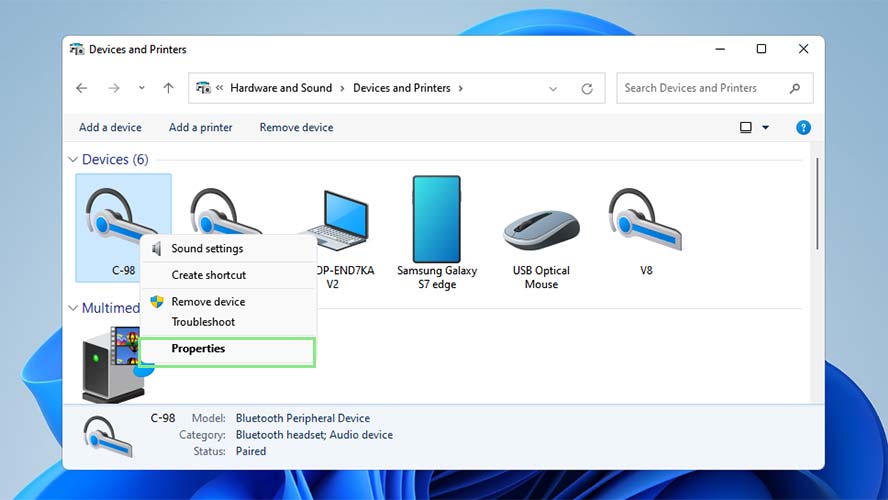
4. Choose Properties from the menu above.
Sign up to receive The Snapshot, a free special dispatch from Laptop Mag, in your inbox.
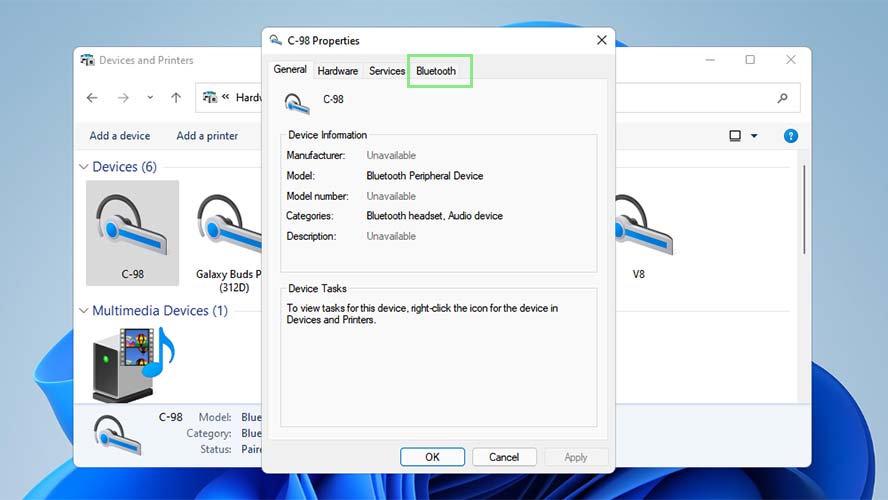
5. Navigate to the Bluetooth tab at the top of the window.
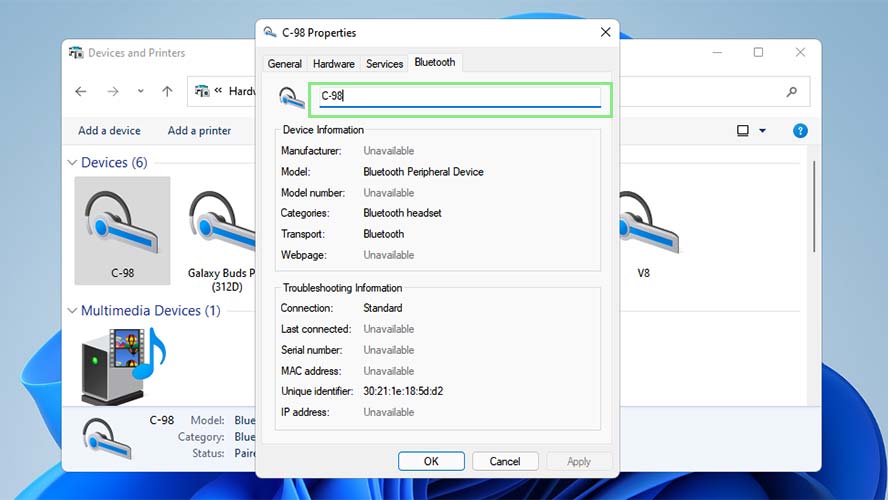
6. Click on the name of your Bluetooth device. You should notice a writing cursor appear on the field.
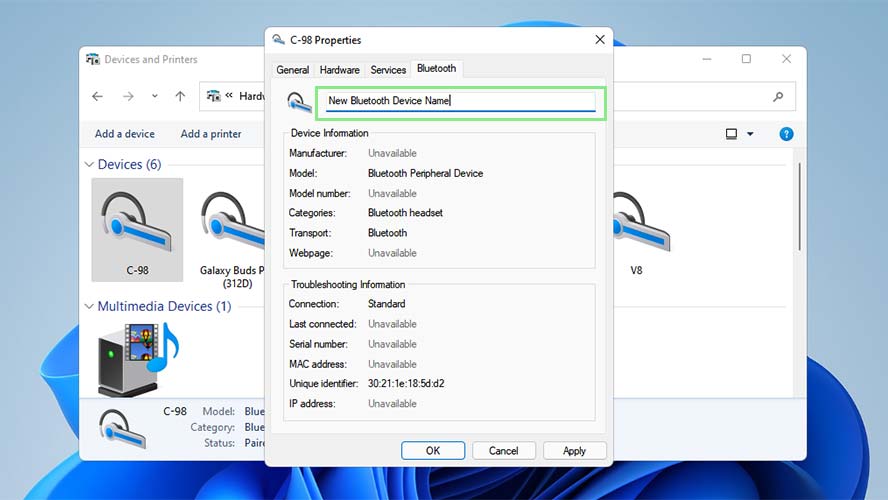
7. Type the new name for your Bluetooth device.
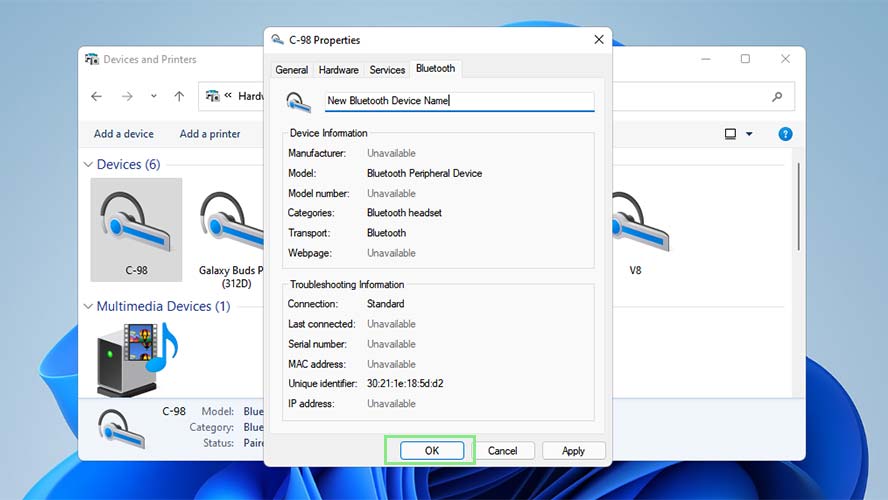
8. Finally, click Ok. Your Bluetooth device now has the new name that you gave it.
