How to Run Windows 8 and 8.1 on the Same PC
Microsoft has finally released the ISO files for the Preview edition of its first major update to Windows 8, known simply as Windows 8.1. While you could download and install the Preview directly over your current version of Windows 8, maybe you want to compare the two. Fortunately, if you download the Windows 8.1 Preview ISO file, you can install and use the new operating system while keeping your current OS intact.
Follow these steps to install Windows 8.1 Preview to dual-boot with your existing version of Windows 8.
Download the Windows 8.1 Preview ISO File
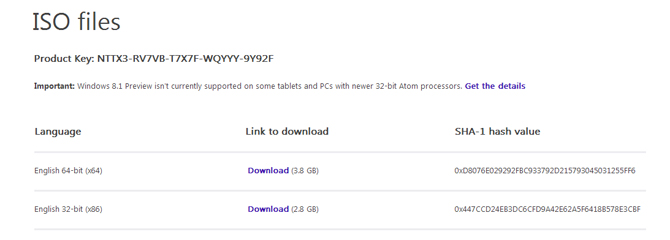
You could just download the Preview and use it as if it were the official release, but this is a beta, so you can expect bugs and other nasty performance issues to crop up over time. So, we recommend heading to the Windows 8.1 Preview website and downloading the full 2.8 to 3.9GB (dependent upon your version) ISO file to your desktop.
Before downloading, check whether you have a 64-bit or 32-bit version of Windows 8 installed from the System menu in the Control Panel, and choose the matching ISO version. Also, make sure to write down the Windows 8.1 Preview product key on the same web page, as you will need it during the install.
Create and/or Install the DVD or USB Drive
You have two choices through which to boot Windows 8.1 Preview from: a DVD or a USB drive. Since optical drives on laptops are quickly becoming a rarity, we find it easiest to use a USB drive that's larger than 4GB in size.
Sign up to receive The Snapshot, a free special dispatch from Laptop Mag, in your inbox.
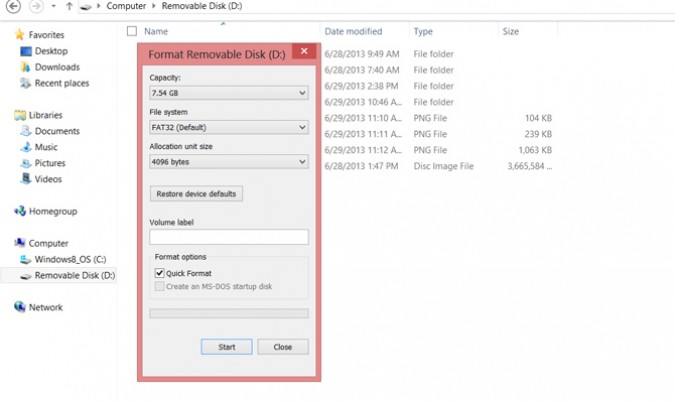
Before you continue with creating your bootable USB drive, we recommend formatting the drive, which erases all content (So, safely place your content elsewhere before formatting.) Follow these steps:
1. Right-click the USB drive in the Libraries menu, choose the "Format" option.
2. Click the "Start" button to finish formatting process.
MORE: Windows 8.1 Tips and Tutorials
Download and Run the Rufus Bootable USB Drive Creation Tool
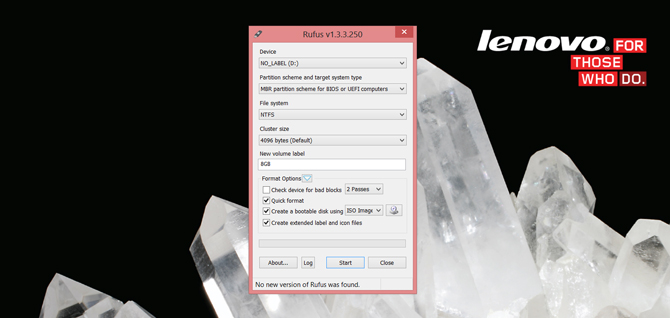
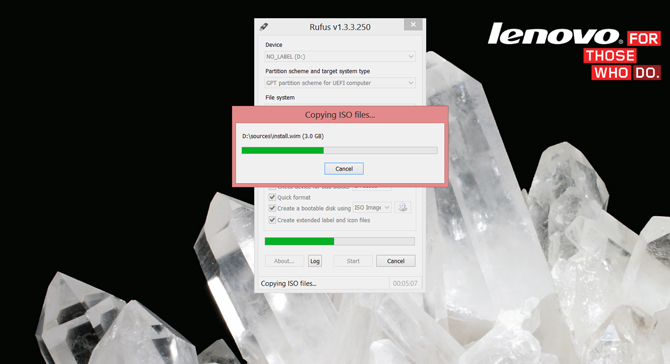
To make sure that you can boot Windows 8.1 Preview from your USB drive, we recommend you download the Rufus bootable USB drive creation tool. Then, follow these steps to install the software onto your USB drive:
1.Open Rufus, click the device that you want to make bootable and choose the partition scheme and target system type.
**It will take some hunting to discover what your Windows 8 system type is (either MBR or GPT), but this is an important step in creating your bootable USB drive. If you your dual-booting 8.1 onto a UEFI computer, as was the case for us, you must choose the partition scheme and target system type as "GPT partition scheme for UEFI computer." Most computers sold in the last year or two sport UEFI BIOSes.
2. Choose your file system. This will also depend on your Windows 8 system type. **If you are prepping to set up Windows 8.1 Preview for a UEFI computer, you will need set the file system as "FAT32".
3. Check the box next the text that reads, "Create a bootable disk using," and select the "ISO Image" option.
4. Click the button next to the words "ISO Image," and choose the ISO file that you downloaded to your desktop.
5. Click "Start" and allow the software to format your USB drive. Once it's through, you will receive a message telling you the process was a success.
Create a Windows 8.1 Preview Hard Drive Partition
If you want to be able to boot to either Windows 8 proper or Windows 8.1 Preview at will, each version of the operating system must be installed on separate hard drive partitions, or sections of one hard drive that act independently of one another. Luckily, it's not too difficult to create new disk partitions. To create a new partition on Windows 8, switch to Desktop Mode and follow these steps:
1. Right click on the desktop and choose "Personalize". From there, enter the words "hard disk partitions" into the search box.
2. Click on "Create and format hard disk partitions." The Disk Management tool will then launch.
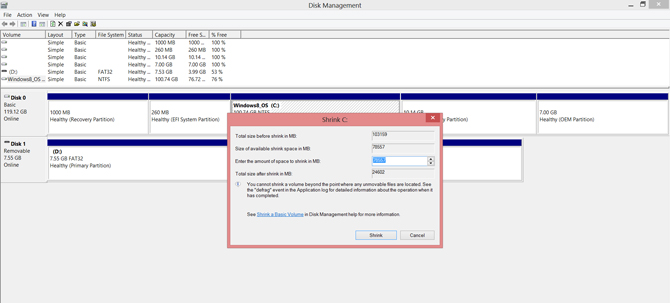
3. Right-click on the C: drive and choose the "Shrink Volume" option. This is where you will decide the size of your new partition in megabytes (1 GB = 1,024MB). So, to create a partition that is 20GB, which should be ample room to test Windows 8.1 Preview with, enter "20,480" into the first available field.
4. Right-click on the partition you just created, which should read "20.00GB Unallocated," and choose the "New Simple Volume option.
5. Follow the steps in the New Simple Volume Wizard, and give the new partition a drive letter of your choice that isn't already taken. On the next page, leave the settings on the "Format Partition" page as is and click "Next".
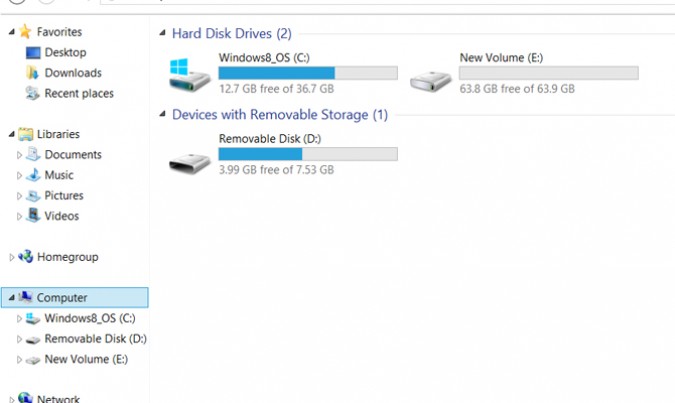
6. Verify that the new volume has been created from the Libraries menu. You should see what appears to be a brand new hard drive with the space that you allocated to it appear next to your C: drive.
Prepare the Installer
To finally install Windows 8.1 Preview on your Windows 8 machine, you must enter the boot settings on your computer. Follow these steps to do just that:
1. Restart your computer.
2. Hit the appropriate key to enter the pre-boot settings as soon as you're prompted. This is usually one of the function keys, but on some systems is the Enter key. You have only a second at most to do this, so pay attention and act quickly.
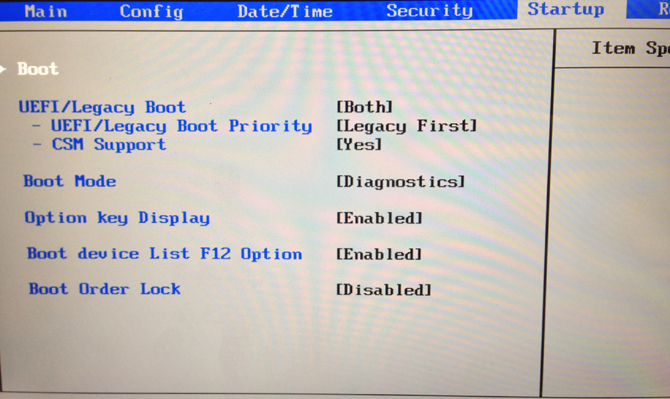
3. Set your device to UEFI or UEFI/Legacy mode. Once inside the BIOS Utility, it there is a UEFI/Legacy Boot setting, make sure this is set to "Both" using the + or - keys. Also, if your laptop has a Secure Boot function, make sure it is disabled.
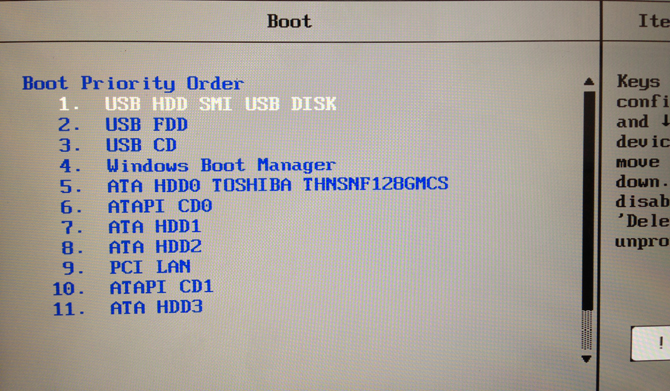
4. Staying in the Startup tab, enter the Boot settings menu. From here, identify your bootable USB drive. The name of your USB drive in the BIOS may not match how it appears on your desktop, but will usually be noted as a "USB HDD." Using the + or - keys, move this to the top of the Boot Priority Order.
5. Finally, press the key to Save and Exit, which is usually reserved for the F10 key. This will restart your computer, and the Windows 8.1 Preview installer should appear.
Run the Installer
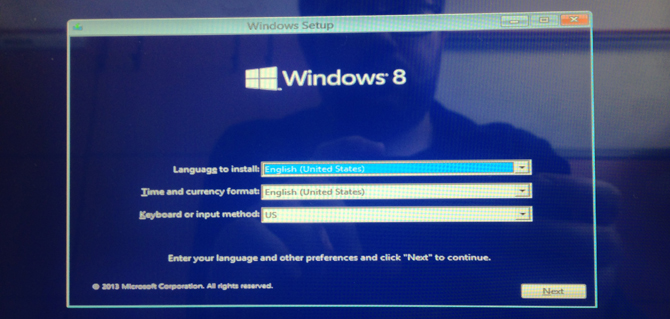
At this point, you should be greeted with a beta fish that signifies Windows 8.1 Preview. After that, the installer will appear and you can begin the process. Follow these steps to ensure a proper installation to your partition:
1. Press the "Next" button on the first screen, unless you're installing Windows 8.1 Preview in a different language or using different keyboard settings.
2. Press the "Install Now" button, and enter the product key.
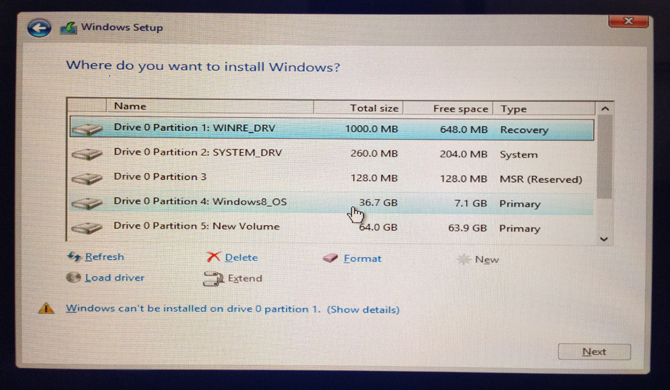
3. Press the "Custom: Install Windows Only" option after agreeing to the Terms and Services page. This will allow you to choose where this new operating system goes.
4. Choose the drive partition that you created earlier, which should show its size as 20GB (or whatever size you gave the partition) and its title as New Volume.
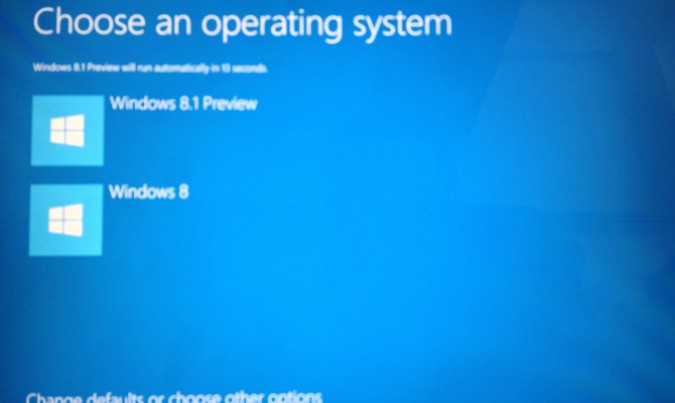
Windows 8.1 Preview will take some time to install, and will restart the computer at least once. Once you see a screen that allows to choose to an operating system, that is when you know the installation was successful.
Success!
You can now remove the USB drive after choosing Windows 8.1 Preview as your OS. While it's not made obvious, what you're doing is booting to your hard drive partition. You can now restart the computer and change your boot order settings back to normal, with Windows Boot Manager up top. However, every time you boot, you will be presented with the option to choose between Windows 8.1 Preview and standard Windows 8. Enjoy the return of the Start button!
