Though the Mail app is undoubtedly a workhorse, there’s no such thing as perfect. For the tinkerers out there, you can get a little closer with some really excellent third-party plugins. There are a number of them out there, whether you’re looking for something to manage multiple accounts, add notes and tags, or organize your inbox, chances are there’s a plugin out there to do it.
To install these, you first need to understand that it’s not nearly as straightforward as it should be. Though Apple supports these plugins, it doesn’t exactly advertise it. And some are available with installable packages, while others are installed as bundles, meaning installation isn’t the same for every plugin.
That said, this should work for a majority of Mail plugins, though if it doesn’t you may have to consult the instructions offered by the developer. And don’t forget to enable the plugin once you’re finished.

1) Download the plugin you want to use with Apple Mail.
2) Open the downloaded file from the Downloads folder and follow the installation process.

3) Open the Mail app from the Launchpad.

4) In the drop-down menu, select Preferences.

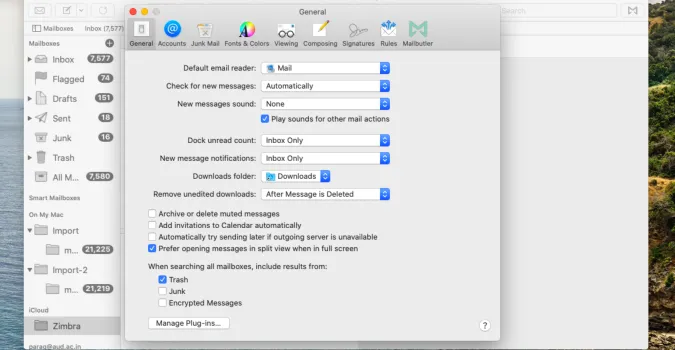
5) In the Preferences window, on the General tab, click Manage Plug-ins.

6) Select the app from the plug-ins list.

7) Click Apply and Restart Mail, to complete the process.

