While burning ISO files to a USB drive or DVD isn’t as crucial a skill as it once was, there are still some instances in which doing so can be beneficial. This article will explain when to burn an ISO to a USB drive or DVD and how to complete the process on Windows 11.
Burning an ISO image is usually done in order to back up operating systems. By having the OS stored in a physical drive or disc, it is less likely to get lost or corrupted. This means that the ISO image can be run to easily reinstall the computer’s operating system in the unfortunate event that your computer crashes.
In the past, it was necessary to use CD burner programs such as Nero or CDBurnerXP to burn ISO images. Luckily, with Windows 11, these third-party applications are no longer needed. In addition, the infamously long wait times for burning ISO have decreased dramatically thanks to the improvements introduced by Windows.
- The best Windows laptops you can buy right now
- Windows 11 vs Windows 10: Here's what's new
- 11 essential Windows 11 shortcuts you need to know
Burning an ISO Image on Windows 11
1. Burning an ISO image is fairly straightforward. First, right-click the ISO image that you wish to burn. ISO images have a file extension of .iso.

2. From the context menu that appeared, select “Show more options.” This will open a more extensive context menu that gives you all the actions you can do with your .iso image.

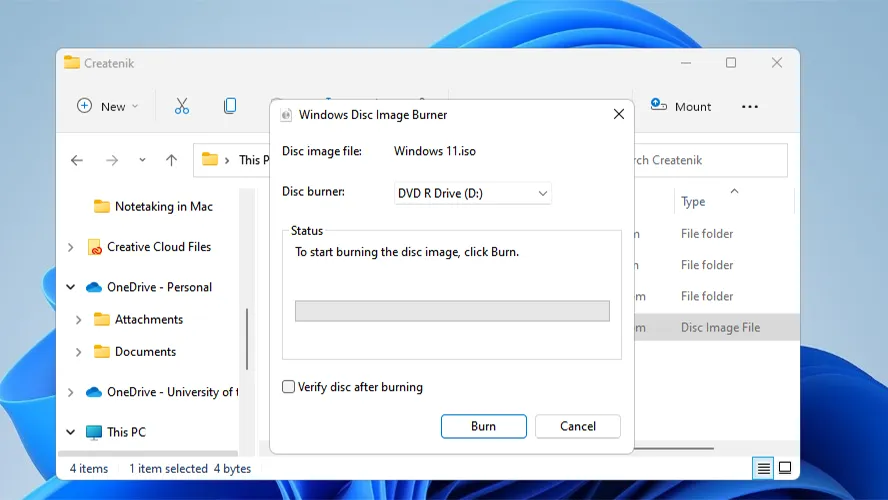
3. Select “Burn disc image” from the options. The Windows Disc Image Burner window should appear.

4. Under the Disc burner field, select the drive or disc where you want to burn your ISO image.

5. Lastly, click the “Burn” button at the bottom of the window. Once the loading bar is full, the process is complete and the ISO image has been burned successfully.

