Changing an icon on a Mac is fairly straightforward. It doesn’t require a third-party application so long as you’re changing the image to another .icns file. This isn’t difficult if you’re simply copying the icon from another app on your laptop or desktop PC.
But if you want to customize your own images, you’ll need some help. Apple requires these icons to be a .icns file, and as you may have guessed, most images aren’t saved in an .icns format; you’ll need to convert them. We can do this with a free tool called Cloud Convert.
All you need to get it working is a square image, and a tool like Cloud Convert to do the conversion. Once converted, you can follow the first part of this tutorial to change any icon to the new, customized one.
Article continues belowChange app icon

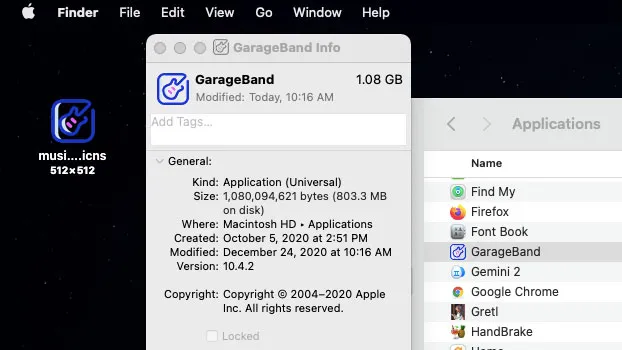
1) Open the Finder to get to the app.

2) Open Applications to see the list of all the apps on your computer.

3) Right-click on the app to open the context menu.

4) In the menu that opens, click Get Info.

5) Drag the icon and drop it on the icon in the app Info window.
Convert images to .icns format
1) Go to https://cloudconvert.com/

2) Click Select File to start the process.

3) From the list that opens, select the location of the file.

4) Select the image that you need to convert.

5) Click Open to upload the file to CloudConvert.

6) Open the Convert to drop-down menu to select the format.

7) Select ICNS from the menu that opens.

8) Click Convert to download the icon with .icns format.
