A proxy server can be useful to bypass a firewall, avoid geoblocking, or mask your location. The proxy server you set will be used by browsers like Safari, as well as certain applications and scripts. Apps that have their own proxy settings will still use their default settings.
There are many ways to set up a proxy server depending on your needs and your level of permissions. Auto Proxy Discovery detects if the proxy is necessary and configures it automatically.
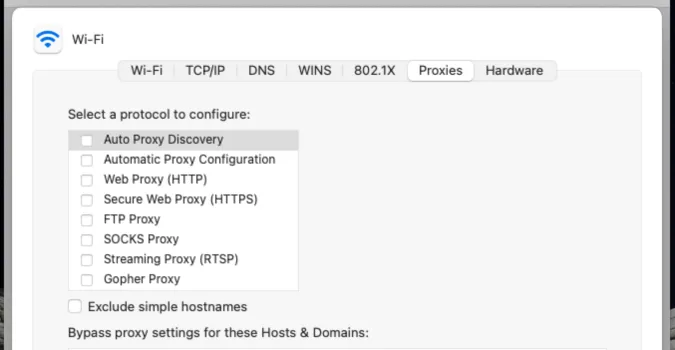
To manually configure a proxy there are other options. HTTP and FTP proxies are set up to make file transfer easier. HTTP is good for smaller files, though you’ll need FTP if you expect large files. You can set up HTTP, HTTPS, and FTP proxy servers with the same settings all at once. The steps below describe this process.
Article continues below
1) Click the Apple icon in the upper left corner.
2) In the menu that opens, select System Preferences.

3) In System Preferences, select Network.

4) At the bottom-right corner of the window that opens, click Advanced.

5) In the Advanced window, go to the Proxies tab.

6) In the left pane, select Web Proxy (HTTP) or all three if you want to use the same settings for all three proxy servers.

7) Add the proxy server in the text box in the right-hand pane.

8) In the text box next to the server, add the Port.

9) If you have a username-password for this setting, select “Proxy server requires a password.”

10) Add the Username and password you were provided.

11) Click OK to confirm the settings.

