There are a number of ways you can easily access an oft-used file or folder. Unfortunately, you can’t pin it to the menu bar like you can in Windows, where you might pin an app to the Start menu or the Quick Launch bar. You can pin it to the Dock, but the menu bar, sorry, is out of bounds.
Luckily there’s a free and lightweight app that lets us customize that menu bar to our heart’s content — or, pin icons from our favorite apps, files, and folders to it, anyway. It’s not the easiest thing to do and you should plan to devote a little bit of time to it, but if pinning files and folders to the menu bar is important to you then it’s worth putting in a little bit of time.
Using XMenu we can add things, like Application folders or the Documents folder, all within easy reach right at the top of the screen. Or, we can add a custom folder that holds multiple files and folders we’d want to access quickly.
Article continues belowDownload and Install the app
1) Download the XMenu app from the Internet or the App store.

2) In the warning window, click Open to allow the download.

3) Double-click to open the installer from the download folder.

4) Click Install to continue.

Note: The app will now be moved to the Application folder and open on the menu bar.
5) Right-click the new icon added on the Menu Bar.

6) In the menu that opens, click Preferences.

7) In the dialogue box, select user-defined. You can deselect the other options.

Note: The icon on the menu bar will change to a star.
Create an alias
1) Right-click the folder that you want to pin to the menu bar.

2) In the menu that opens, click Make Alias.

3) Right-click the alias folder, to open the menu.

4) Click Copy to make a copy of the folder.

Add alias to custom folder
1) On the menu bar of the Finder window, click Go.

2) In the menu that opens, select Library.

3) In the Library, open the Application Support folder.

4) In the Application Support folder, open XMenu.

5) Open the Custom folder and paste the copied file in it.

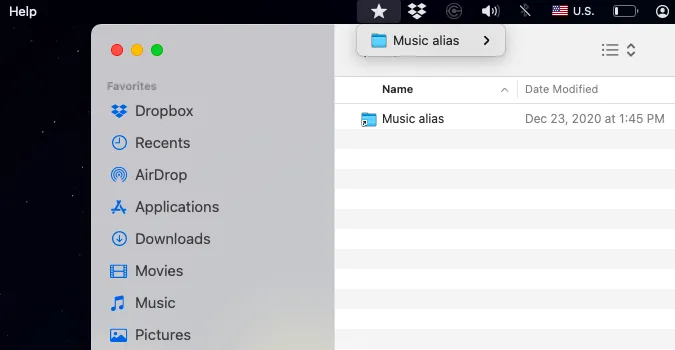
6) Click the star icon on the menu bar to see the contents of the Custom folder.

Note: You can add as many folders and files as you would like in the Custom folder. They will appear as a list when you click the star.
