Though you can access just about anything in the Go menu (located in the Mac menu bar), there are some options that don’t appear until you first hold down the Command key. And though it’s not difficult to do, if you’d rather just leave all the options visible without the keyboard modifier, it’s an option.
The Library folder, for example, is one of these options hidden by default. On a non-modified macOS build, you’ll need to hold down Command when scrolling through the available options to make Library visible. But, a quick switch in another menu leaves it visible by default at all times.
These steps are relative to the user, so if there are multiple users you’d need to switch it on for each, if desired. It’s also worth noting that the reason the Library folder is hidden is that it contains some of the operating system’s most important files. Proceed with caution.
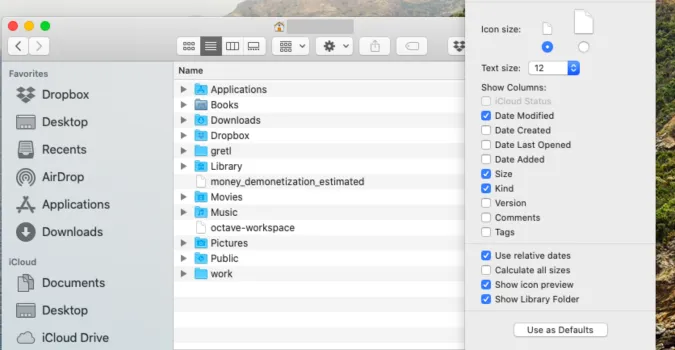
The Library folder is hidden by default. Just like other systems folders, it is to avoid tampering or accidentally deleting important files. If you need to see the Library folder, it is as simple as switching on the option in the Finder. The option is related to the user, so if there are multiple users, you have to switch it on for each user.
1) In the Finder, search <username> to go to your user folder.

2) With the User folder in focus, click View in the men bar.

3) In the View menu, select Show View Options.

4) In the window that opens, select Show Library Folder.

