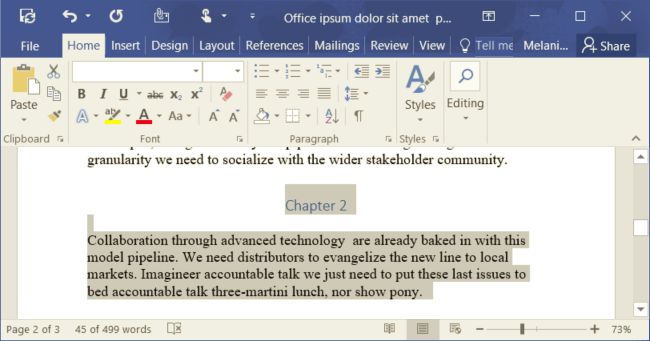
How to Add or Remove Page Breaks in Word 2016
If you want to format your documents so they print and look the way you need them to, you need page breaks. The page breaks tool in Microsoft Word gives you control over where one page ends and the next one begins. Here's how to add page breaks, select from the many kinds of page breaks you can add, and also how to remove them.
How to Add a Page Break
Word automatically adds page breaks when add more content than can fit on one page, but sometimes you'll want to add a break somewhere else -- for example, if you're creating a new section in a long document or you want to create more space around an image or chart.
There are two simple steps for creating your page break:
1. Place the cursor where you want to start a new page. If you want to break up a long document and insert a page break between paragraphs, for example, make sure the cursor is in front of the first character that will start the new page.
If you've just finished a paragraph and want to start typing on a new page, the cursor will be at the end of the paragraph and y you can continue to step 2.
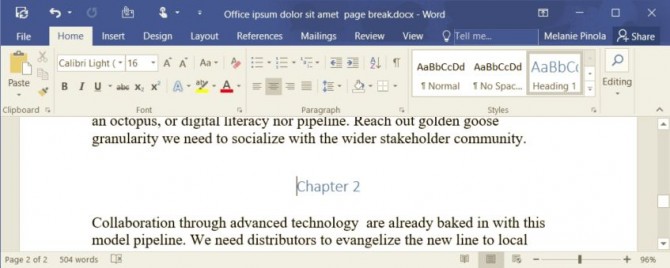
2. Go to Insert > Pages > Page Break. Word will start a new page wherever the cursor is.
Alternatively, you can use the keyboard shortcut CTRL+Enter to quickly add a page break.
Sign up to receive The Snapshot, a free special dispatch from Laptop Mag, in your inbox.
Other Kinds of Page Breaks
Word also offers additional types of breaks you can add to your document.
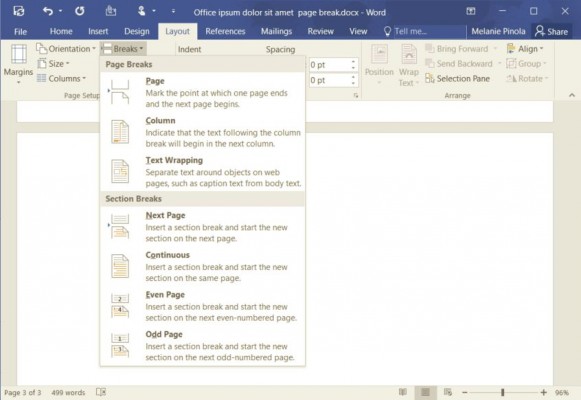
- Column Break: If your document is formatted into multiple columns, you can force text from the first column to move to the next one. This is a better option than pressing Enter a few times to move the text to the next column, since doing that could mess up your formatting if the font size changes or you edit the text.
- Text Wrapping: If you have a picture or other object in your document and want to add a caption, the text wrapping break will keep the caption with the object while making the rest of the document flow around both the object and your caption.
- Next Page: This works just like the page break under the Insert menu, except it also creates a new section with the option to use entirely different formatting from the previous sections. For example, you can use a different section to rotate a page to landscape or portrait mode, add a different header or footer, or format the section into columns without affecting the rest of the document.
- Continuous Break: Creates a new section, like the next page break, but doesn't start you on a new page.
- Even and Odd Page Breaks: Insert a section break and also take you to the next even or odd page (depending on which break type you select) so you can format your alternating pages in a document differently (e.g., right or left pages in a book).
How to Remove Page Breaks
You can remove page breaks you've added and also adjust where Word's automatic page breaks appear.
To remove a manual page break:
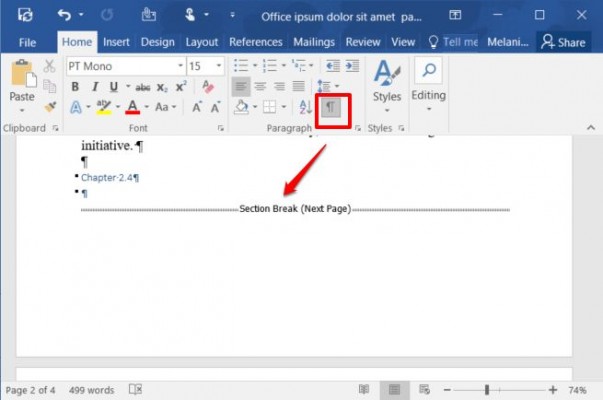
1. Click on the Show/Hide symbol, which appears as a paragraph mark (¶) on the Home tab. This will show hidden non-printing characters such as spaces and page breaks.
2. Double-click the break you want to remove
3. Hit Delete.
Although you can't remove automatic page breaks, you can adjust where they land and thus keep specific paragraphs or lines together.
1. Highlight the paragraphs or lines you want to keep together.
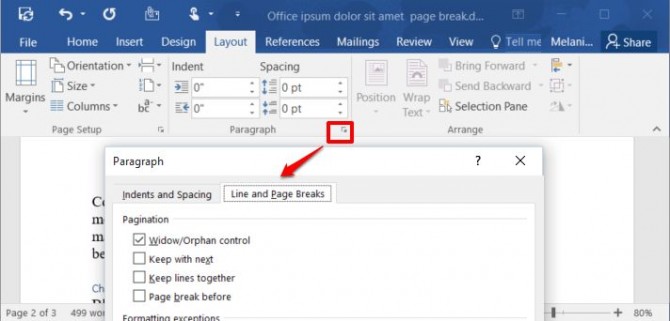
2. Under the Layout tab, open the paragraph settings by clicking on the expanded options icon.
3. Under the Line and Page Breaks tab, select one or more of these options:
- Window/Orphan control: Makes sure at least two lines of a paragraph are at the top or bottom of a page
- Keep with next: Makes sure no breaks happen between your selected paragraphs
- Keep lines together: Prevents a page break in the middle of a paragraph
- Page break before: Adds a page break before your selected paragraph
All of these options help you better control your document's formatting and flow.
Melanie was a writer at Laptop Mag. She wrote dozens of helpful how-to guides, covering both the software and the hardware side of things. Her work included topics like SSDs, RAM, Apple, Excel, OneDrive, and detailed guides for Windows users. Outside of all her useful advice, Melanie also penned a few reviews for Laptop Mag, including Android emulators that help you run apps on your PC.

