6 Ways to Totally Avoid Metro and Use Only Desktop Mode in Windows 8
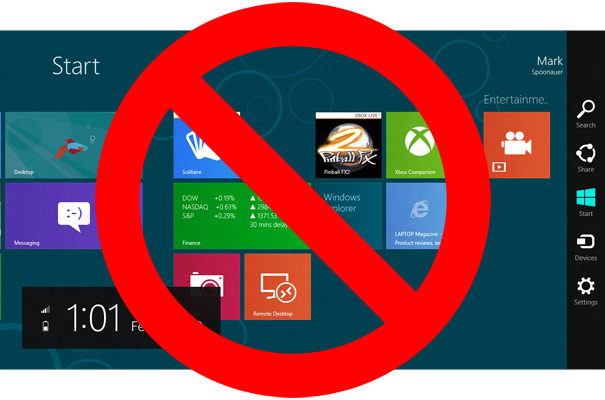
As installed, the Windows 8 Consumer Preview forces users to navigate through two attractive, but disparate UIs: the tile-based Metro Start Screen and the traditional desktop, which now comes without a start menu. Even though 99.9% of Windows programs run in desktop mode, the new OS effectively forces you to return to Metro when you want to browse through your applications and launch one. Fortunately, with a few tweaks, you can live 100% of your Windows 8 life in desktop mode, without even setting foot in Metro.
Editor's Note: It almost goes without saying, but if you want to run a dedicated Metro app like Bing Weather, you'll have to launch and run it in Metro.
Boot to The Desktop in Windows 8
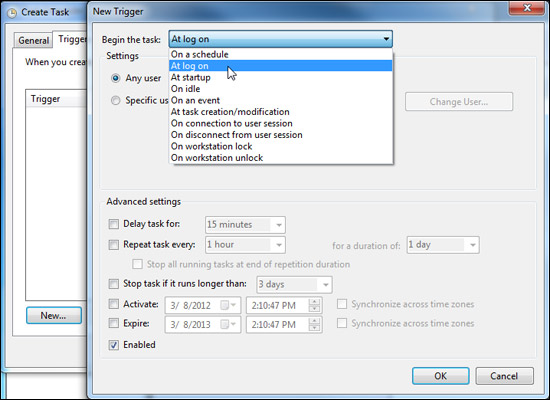
The first and most unavoidable time you'll see Metro in a given Windows 8 session is upon start-up. There's no way to disable Metro, but you can force the desktop mode application to load as soon as you log in, effectively covering over Metro, before it even has a chance to draw. Here's how.
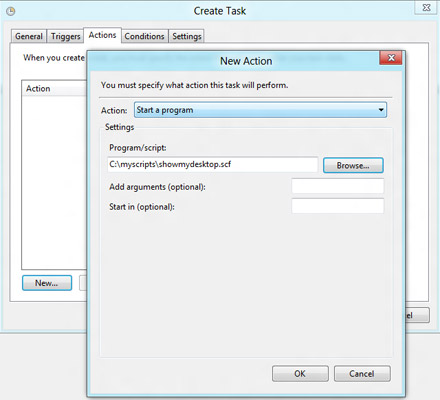
1. Create an Explorer script file that launches the desktop. Open Notepad and paste or type in the following text:
[Shell]
Command=2
IconFile=Explorer.exe,3
[Taskbar]
Command=ToggleDesktop
Save the file as showmydeskop.scf and put it in a location you'll easily remember.
Sign up to receive The Snapshot, a free special dispatch from Laptop Mag, in your inbox.
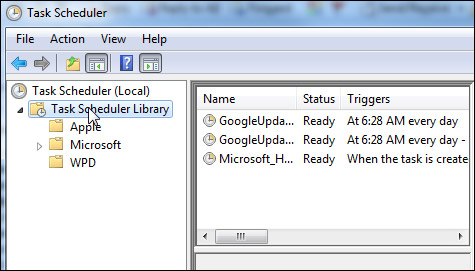
2. Launch Windows Task Scheduler. You can find Task Scheduler by using Windows 8's built-in search or by navigating to the Administrative Tools section of Control Panel.
3. Select Task Scheduler Library in the left window pane.
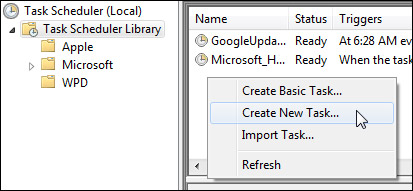
4. Right click in the task area and select Create New Task.
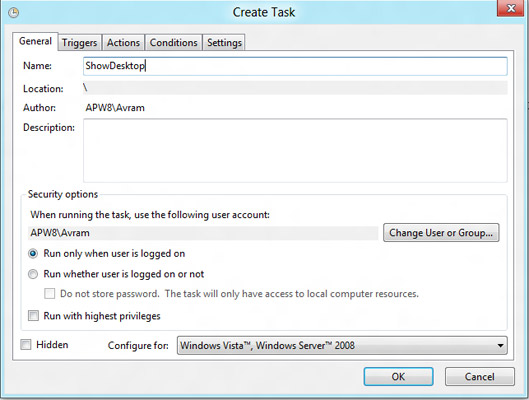
5. Enter a name (ex: ShowDesktop) on the General tab.
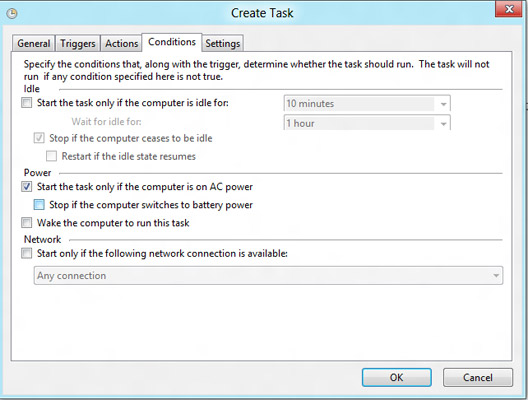
8. Toggle off "Stop if the computer switches to battery power" on the conditions tab. You want to log in to the desktop whether your notebook is plugged in or not.
9. Click Ok and close the Task Manager.
The next time you log in, whether at boot up or after signing out, the desktop will launch before you can even see Metro.
Prevent Your Media Files From Launching in Metro
By default, Windows 8 launches your images, music files and videos in its Metro photo viewer and media player. So, even if you are just minding your own business browsing your picture library in Windows Explorer, you'll be shoved head-first into the Metro UI as soon as you double click to view a file.
Fortunately, there's an easy way to prevent your media files from opening into Metro. All you have to do is associate the appropriate file types with Microsoft's desktop media player and photo viewer.
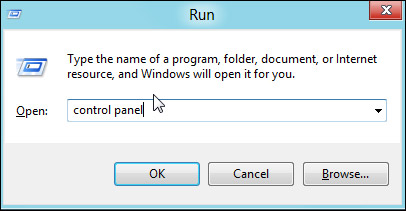
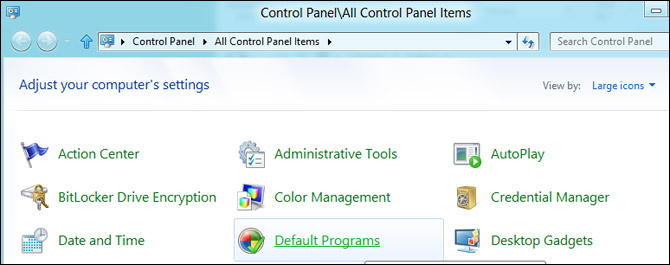
1. Open the Control Panel. You can get to it by hitting Win + R, typing control panel into the dialog box and hitting Enter.
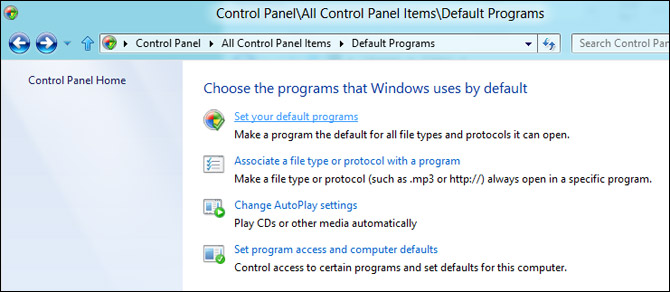
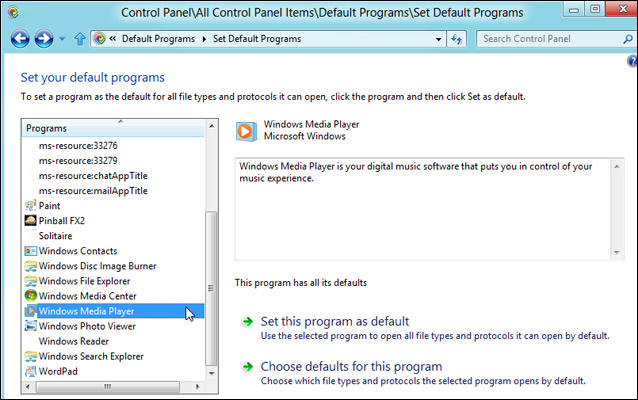
2. Select Default programs
3. Click "Set your default programs" A two-pane window appears.
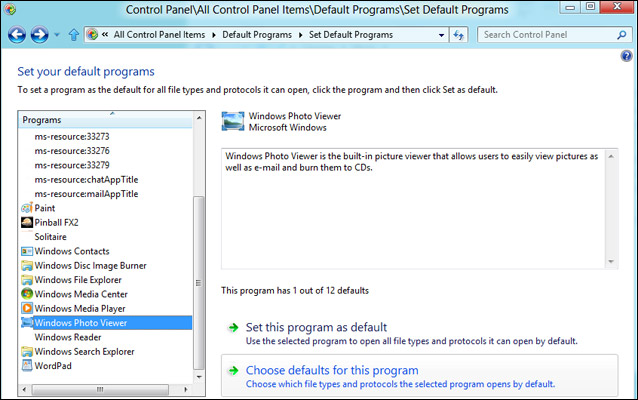
4. Select Windows Photo Viewer in the left menu and Click "Choose defaults for this program." A list of file extensions appears.
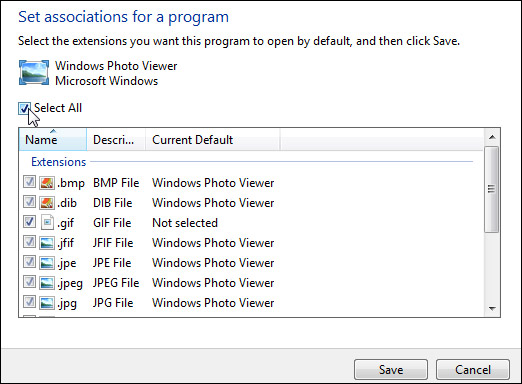
5. Toggle on the Select all button and click Save. Now all photos should be associated with the desktop photo viewer.
6. Repeat steps 4 and 5 for Windows Media Player to associate music and video files with the desktop player.
Install Third-Party Start Menu Utilities in Windows 8
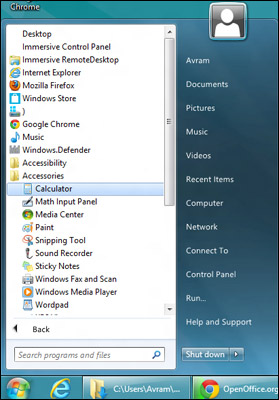
Though there's no way to enable Microsoft's own old-school Start Menu in Windows 8, a number of third-party utilities provide alternatives that are almost as good. Here are three of our favorites:
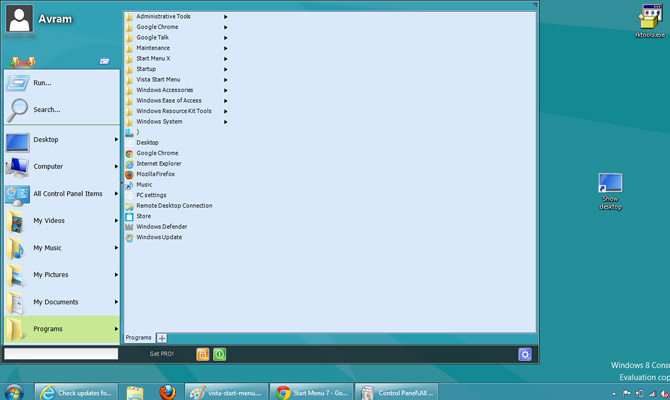
- ViStart: Visually the most similar to Windows 7's Start Menu, ViStart places the familiar Windows logo orb in the lower left corner of your taskbar and shows an Aero styled menu with subfolders. Unfortunately, it's not a perfect replica as you can't drag and drop shortcuts onto it or right click to change their properties. ViStart takes over control of the Windows key on your keyboard so that, when you press it, you open the menu. Keep in mind that breaks some built-in keyboard shortcuts.
Some users have also reported that the orb overlaps other taskbar icons, but we didn't have that problem. However, we did find it was far too easy to accidentally click on the Metro start button on the lower left corner of the screen when we were targeting the orb.
You can download ViStart for free from LeeSoft software. Make sure you hit decline when the installer attempts to load RegClean Pro.
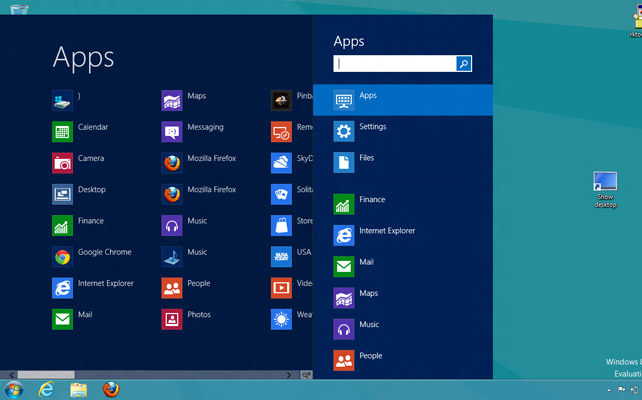
- Start8: Made by Stardock, a company famous for its UI-enhancement utilities, Start8 makes Windows 8's Metro "all apps" menu serve as the start menu, forcing it to appear in the lower left corner of the screen when you click its start button. Though a departure from Windows 7's UI, we like Start8's approach because it allows you to see all of your apps using Windows 8's built-in menus, without the hassle of leaving the desktop.
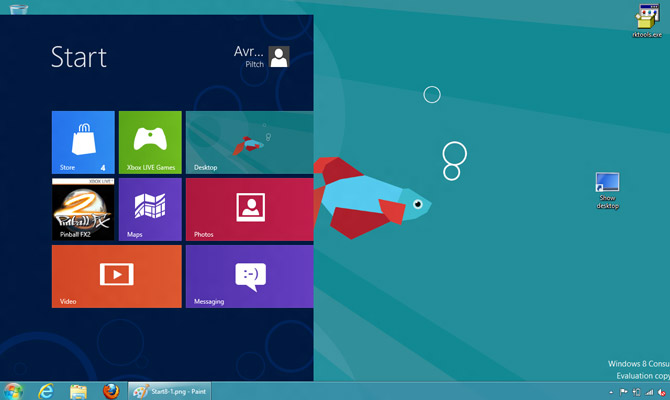
You can even configure Start8 to show the actual Metro home screen in a frame, allowing you to see all the live tiles, without leaving your desktop. Unlike ViStart, Start8 prevents you from accidentally launching Windows 8's built-in Start Screen. When we clicked in the lower left corner of the desktop, Start8 -- not Metro -- opened. You can download a beta of Start8 from Stardock's website.
- StartMenu7: Like ViStart, StartMenu7 emulates the look and feel of a traditional Windows start menu, with lots of options thrown in for customizing the background and font size. However, we found the program a bit clunky as it creates a huge menu that floats several pixels above the taskbar. Like ViStart, it does not allow drag and drop, though unlike ViStart, it does support right clicking on its shortcuts.
Thankfully, StartMenu7 does not take control of the Windows key, but it fails to prevent you from accidentally opening the Metro menu when you click in the lower left corner of the screen. A more robust, customizable version of StartMenu7 is available for $19.99, but you can download the basic version for free from StartMenu7.com.
Create a Custom Toolbar for Your Programs Folder
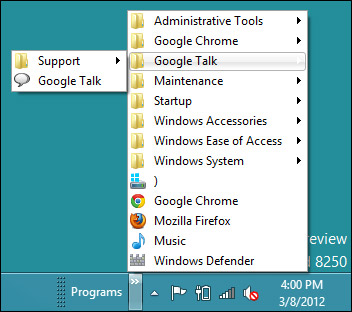
If you don't like using third-party utilities to create a Start Menu, Windows 8 has a built-in solution that doesn't give you the familiar Start orb, but does pop-up a menu with all your shortcuts when you click on the taskbar. Simply by creating a custom toolbar and assigning it to the right folder, you can attach this new menu to the right side of your taskbar.
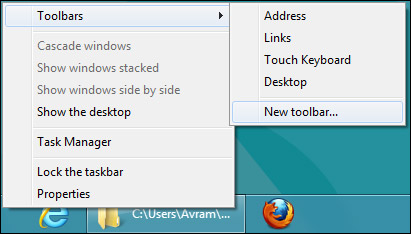
1. Right click on the taskbar and select New Toolbar from the Toolbar menu. A dialog box appears and asks you to choose a folder
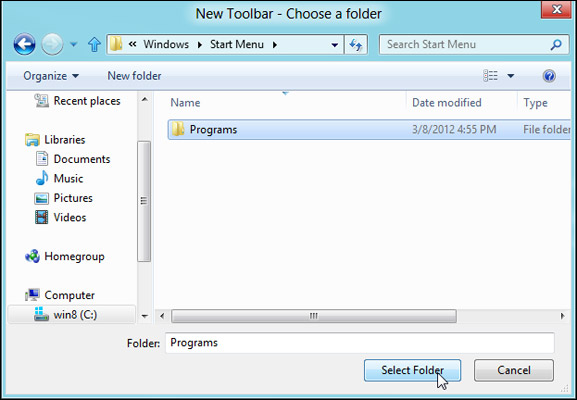
2. Navigate to C:\Users\MYUSERNAME\AppData\Roaming\Microsoft\Windows\Start Menu\Programs where MYUSERNAME is your actual username (ex: Avram) and C:\ is your system drive letter. Then click select folder. The Programs menu will appear on the right side of the taskbar, next to the tray.
3. Drag the border line to the left to make the toolbar bigger if you want to make it larger.
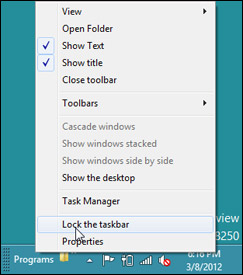
4. Select "lock the taskbar" after right clicking on the taskbar to prevent the toolbar from being inadvertantly dragged around.
Unfortunately, the toolbar will only show programs that get installed into the current user's Start Menu/Programs folder. A few applications install into the default user's Programs folder at C:\Users\Default\AppData\Roaming\Microsoft\Windows\Start Menu\Programs, but you'll need to create a second toolbar if you want easy access to those shortcuts.
Pin Shortcuts to the Taskbar
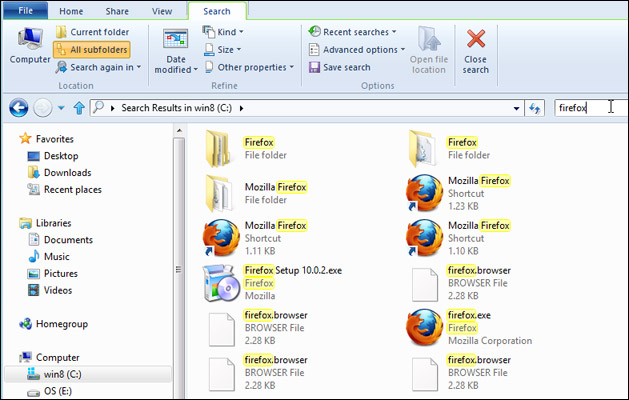
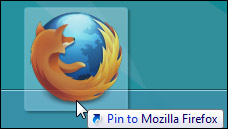
In reality, you don't even need a Start Menu to get to your applications; you can just pin your most important shortcuts directly to the taskbar as you would in Windows 7. If you have a shortcut to a favorite application sitting on the desktop, you can simply drag it onto the taskbar where it will stay pinned. However, if you don't have a shortcut icon for a particular program staring you in the face, you'll need to browse or search for one.
To search for shortcut icons:
1. Launch windows Explorer. You can do this easily by hitting Win + E.
2. Enter C:\ into Explorer's address bar. If your Windows drive is not C:, use the correct letter.
3. Enter the name of your program into the search box (ex: Firefox) and wait while a list of results appear.
4. Look for a shortcut in the result set and drag it to the taskbar.
To browse for shortcut icons, you can simply navigate over to the Start Menu/Programs folders for both the current the default user and try to find them there. Searching for shortcuts is clearly a much faster way to go.
Create Keyboard Shortcuts for Windows 8 Apps
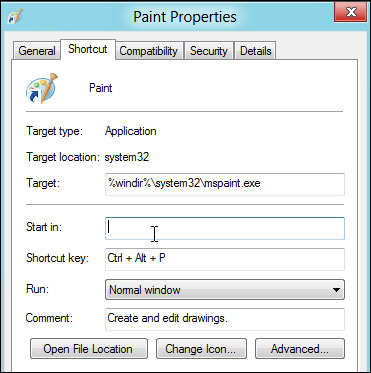
Though Microsoft has done away with the Start Menu in Windows 8, it didn't eliminate your ability to create keyboard shortcuts that launch your favorite applications with custom key combos you set. To create a keyboard shortcut for any app:
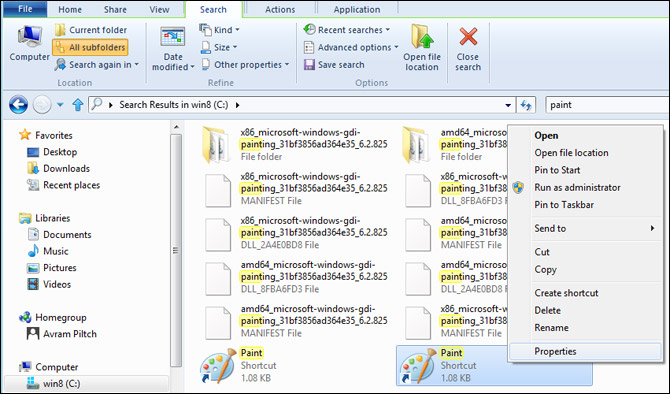
1. Locate the application's shortcut icon. If it isn't already on your desktop / taskbar, use Explorer's search feature (described above) to query for it.
2. Right click the shortcut and select properties.
3. Enter a key combo in the Shortcut key field. The combo must be CTRL + ALT + a third key such as a letter or number.
4. Click OK.
You can now launch your application by simply hitting the key combo you've set, no mouse movement required. That said, some applications you run may occasionally have their own CTRL + ALT + key combos that override yours, though this problem is extremely rare. We recommend assigning hot keys to your most frequently-used programs like your browser. Using the first letter of the application name as the third key (ex: CTRL + ALT + W for Microsoft Word) can be a good way to remember your shortcuts.

